Today we’ll show you what fields to complete in your Census spreadsheet, how to convert your spreadsheet into a .csv file, how to upload the Census into Benelinx, and where you can access your Census within the platform. You can watch the view or access step-by-step instructions below.
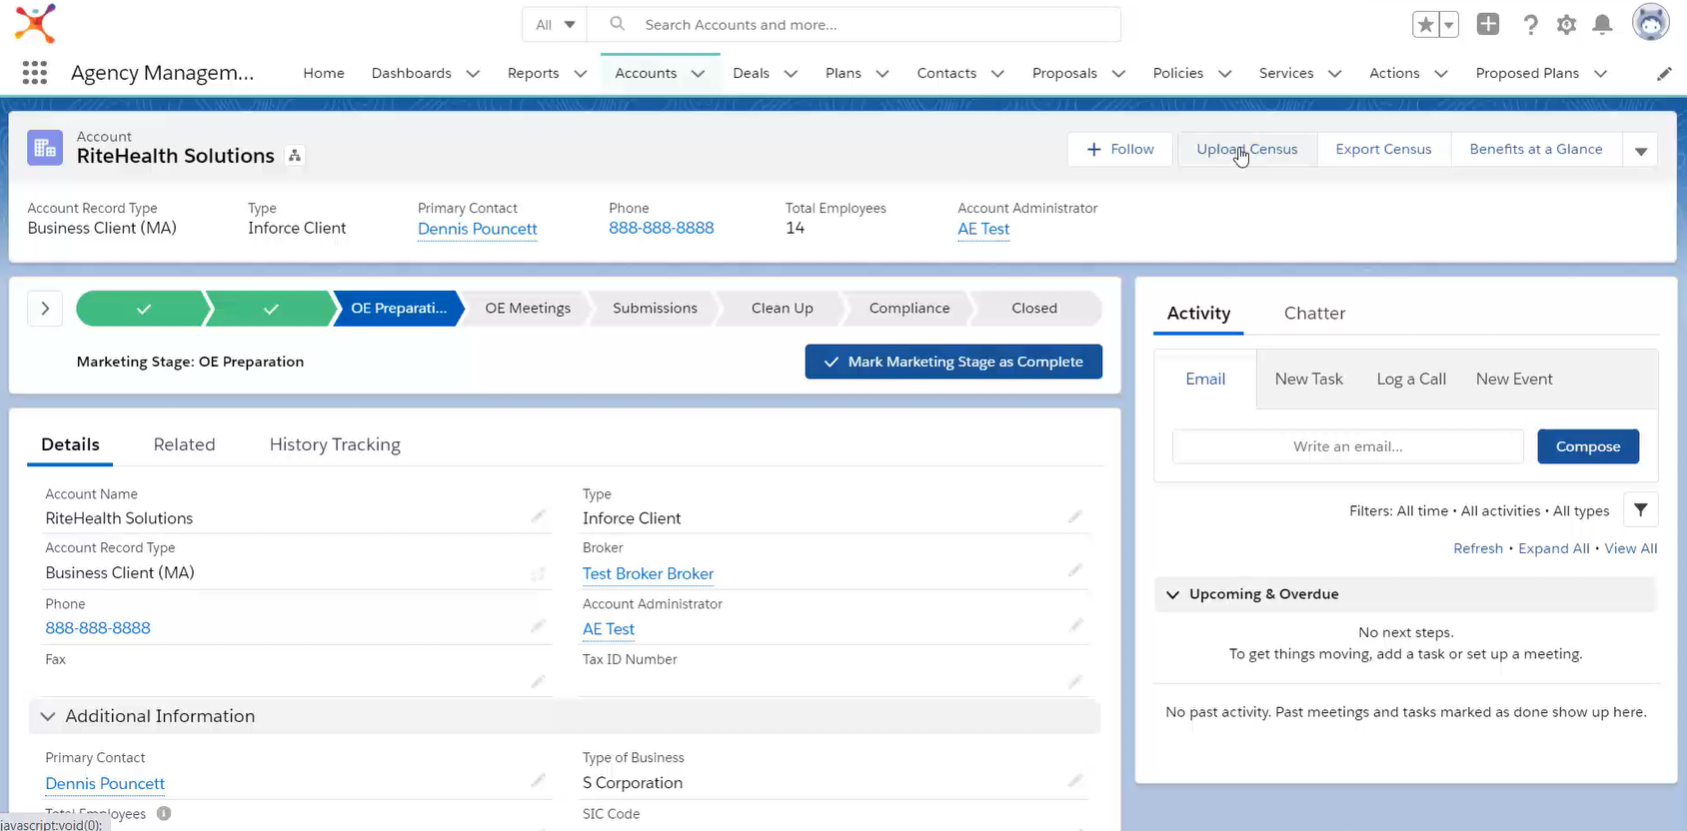
 Click on the desired Account, then click on the Upload Census button in the righthand corner.
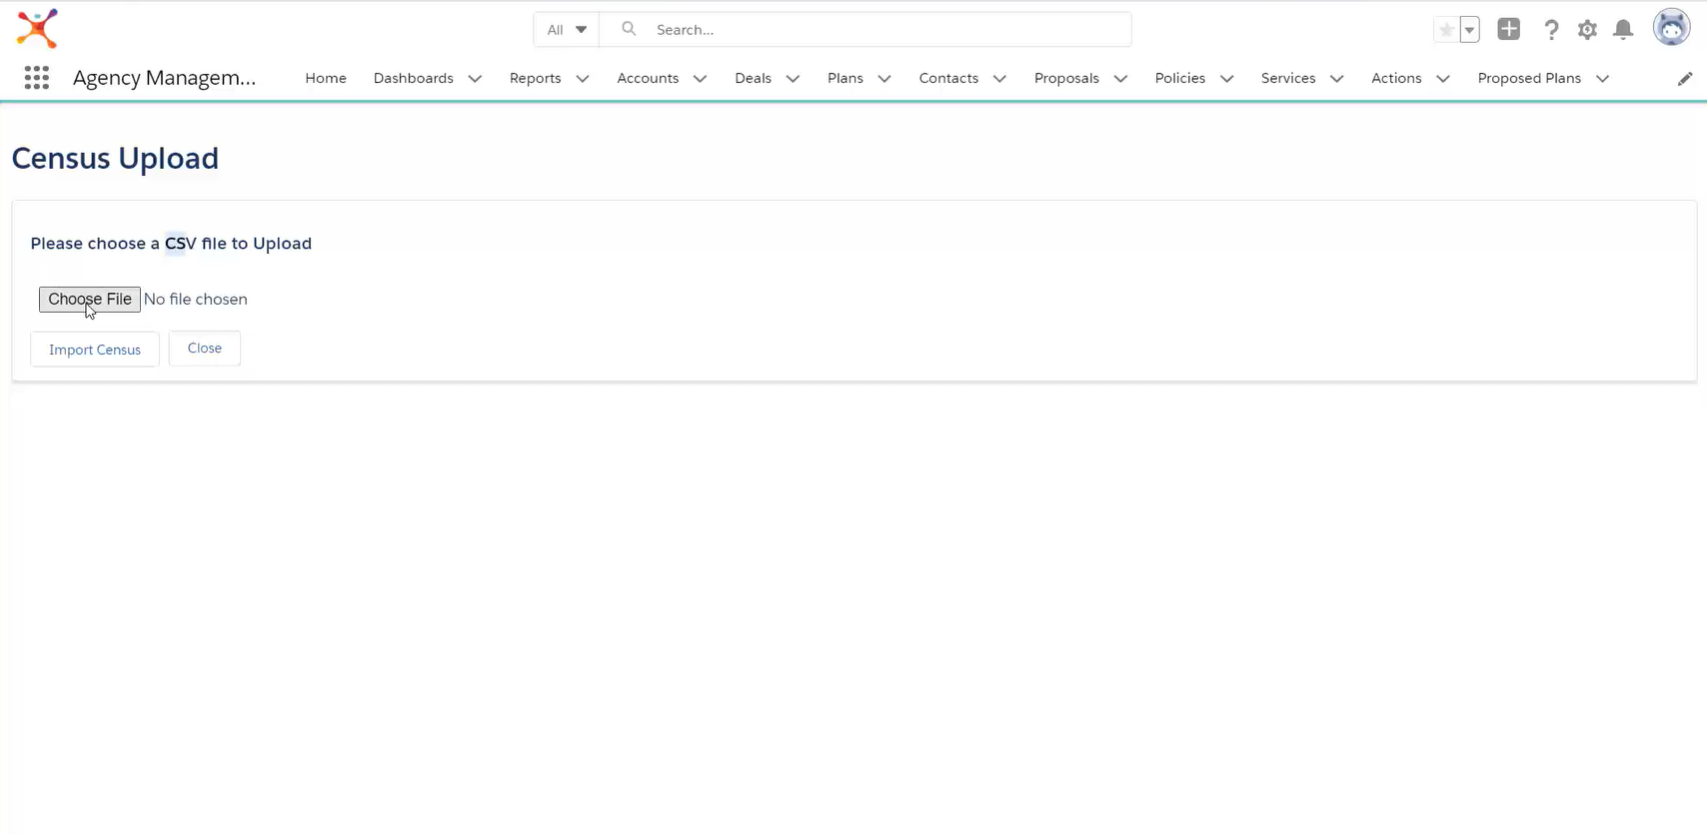
 Click on the Choose File button and select your Census from the popup menu.
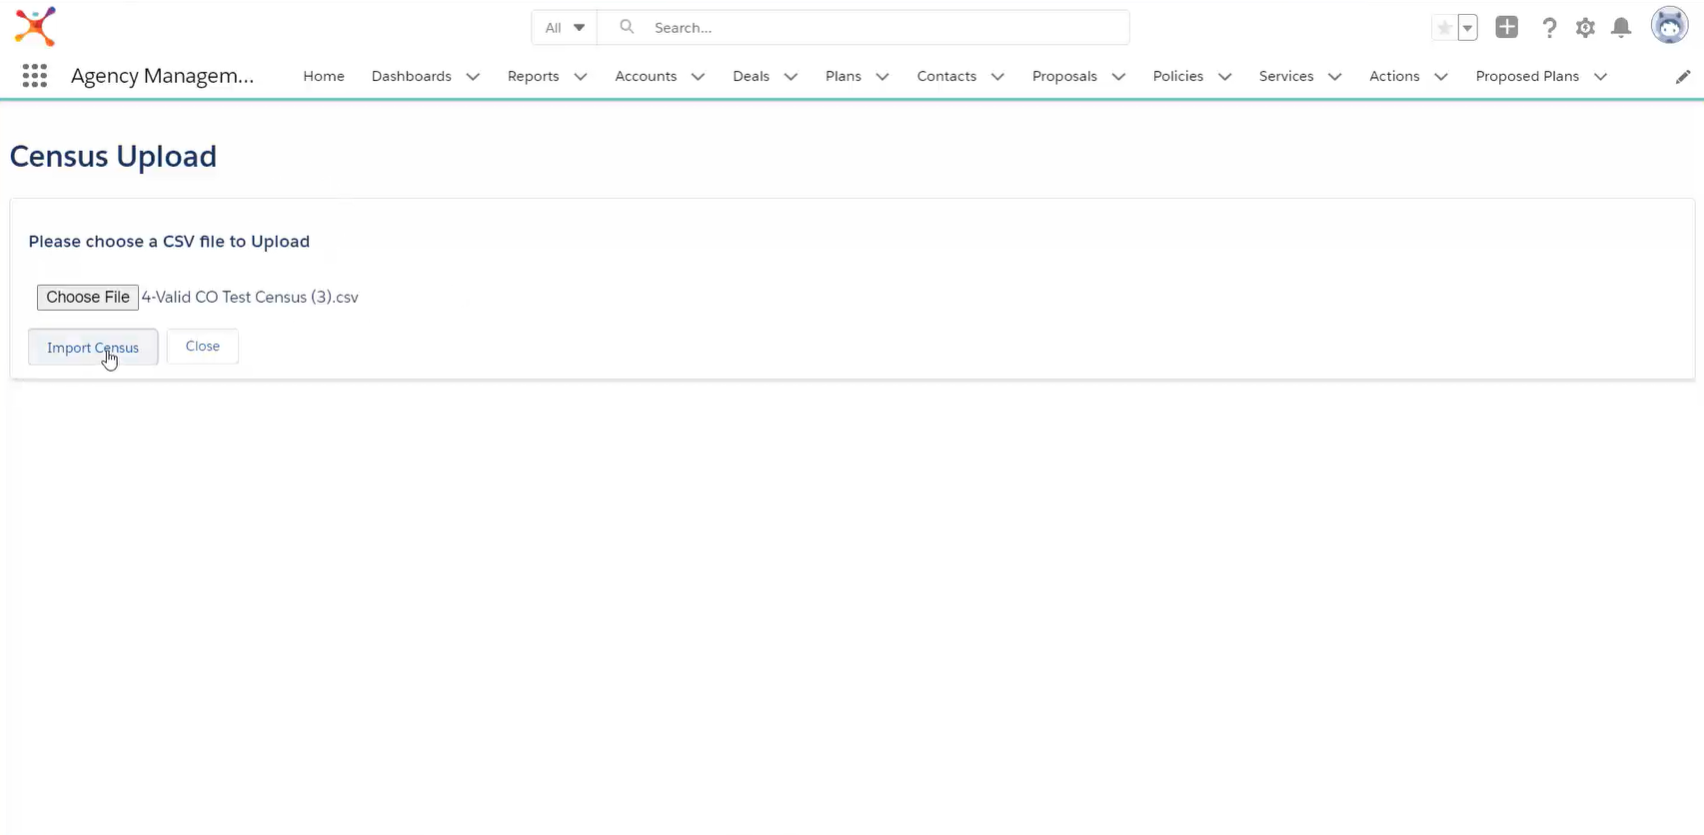
 Once you’ve selected your Census, click Import Census.
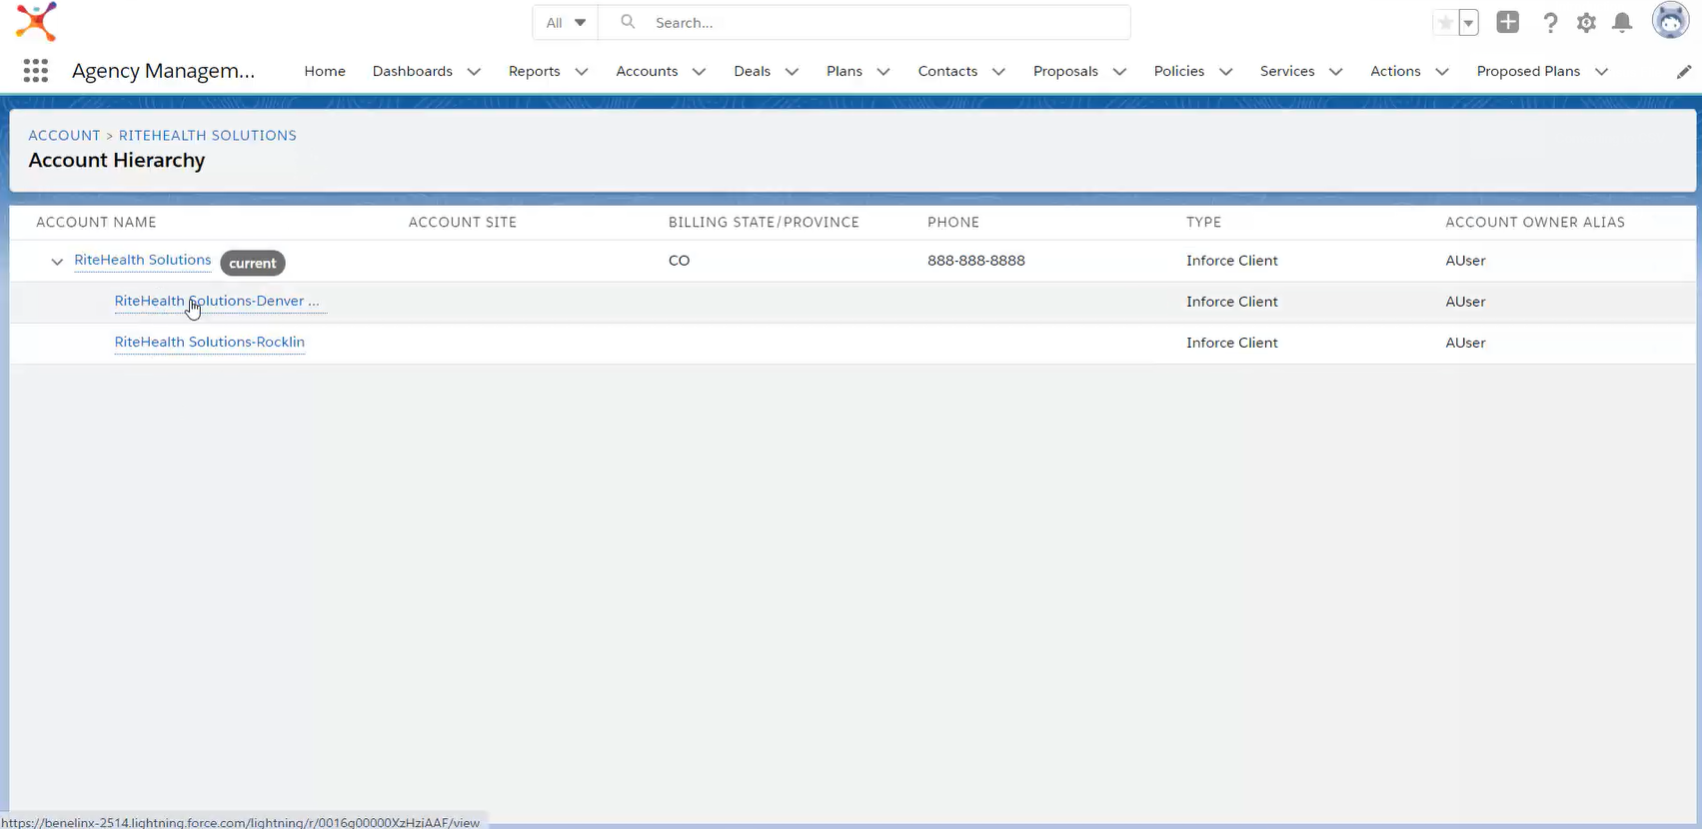
 Clicking this button will take you to the Account Hierarchy page. From there, you can select your Census Account Location from the List.
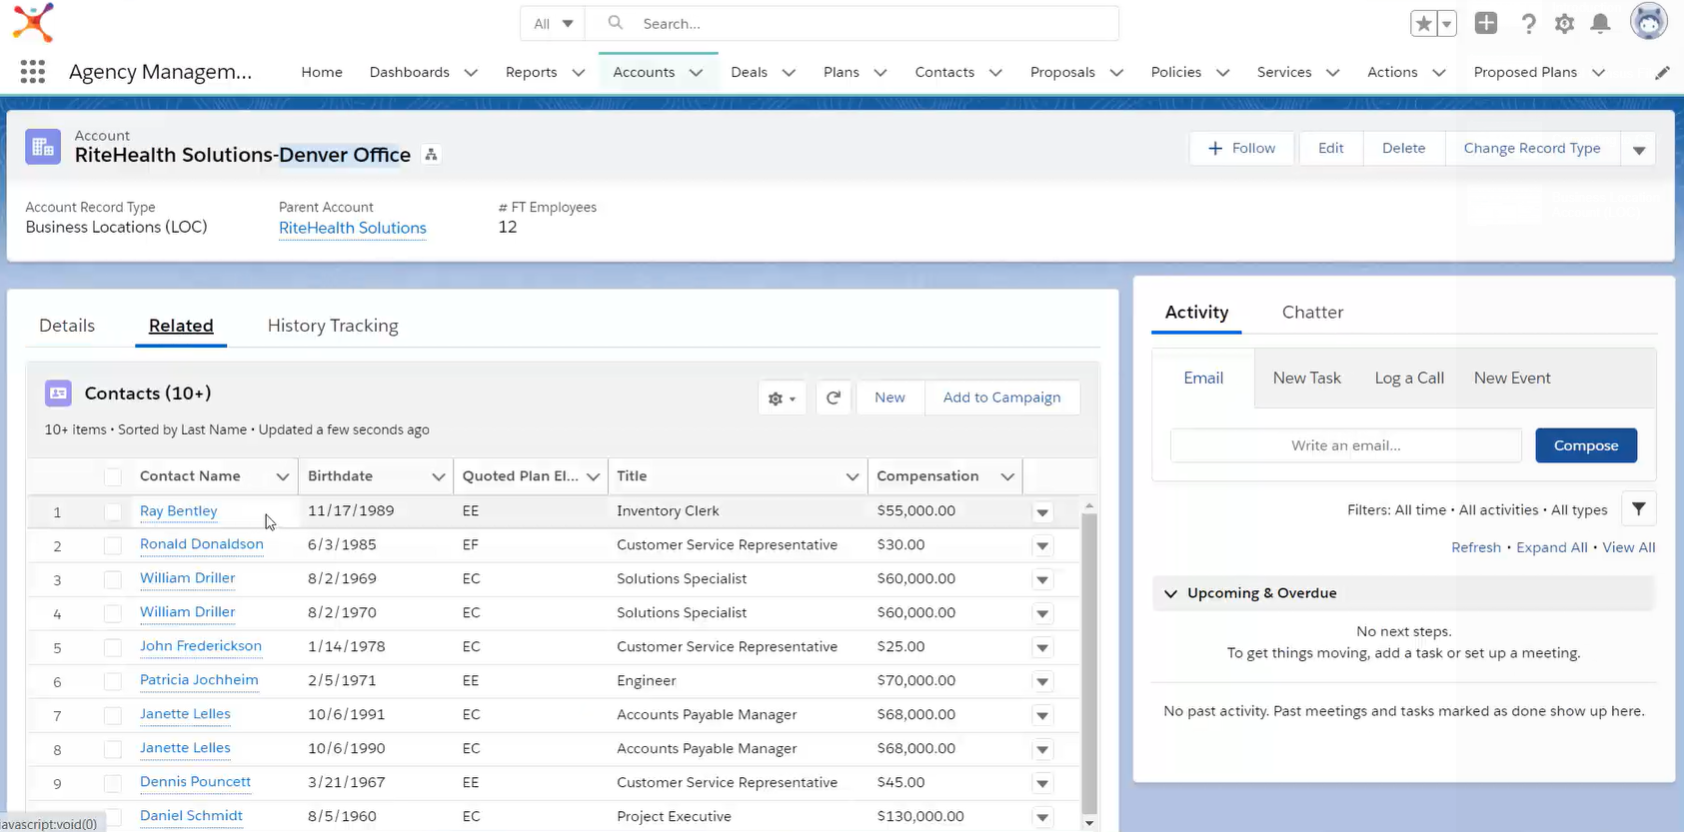
 Once within the Account Location, click on Related to access your Census information. The data uploaded in your Census will be populated under Contacts as individual Records.
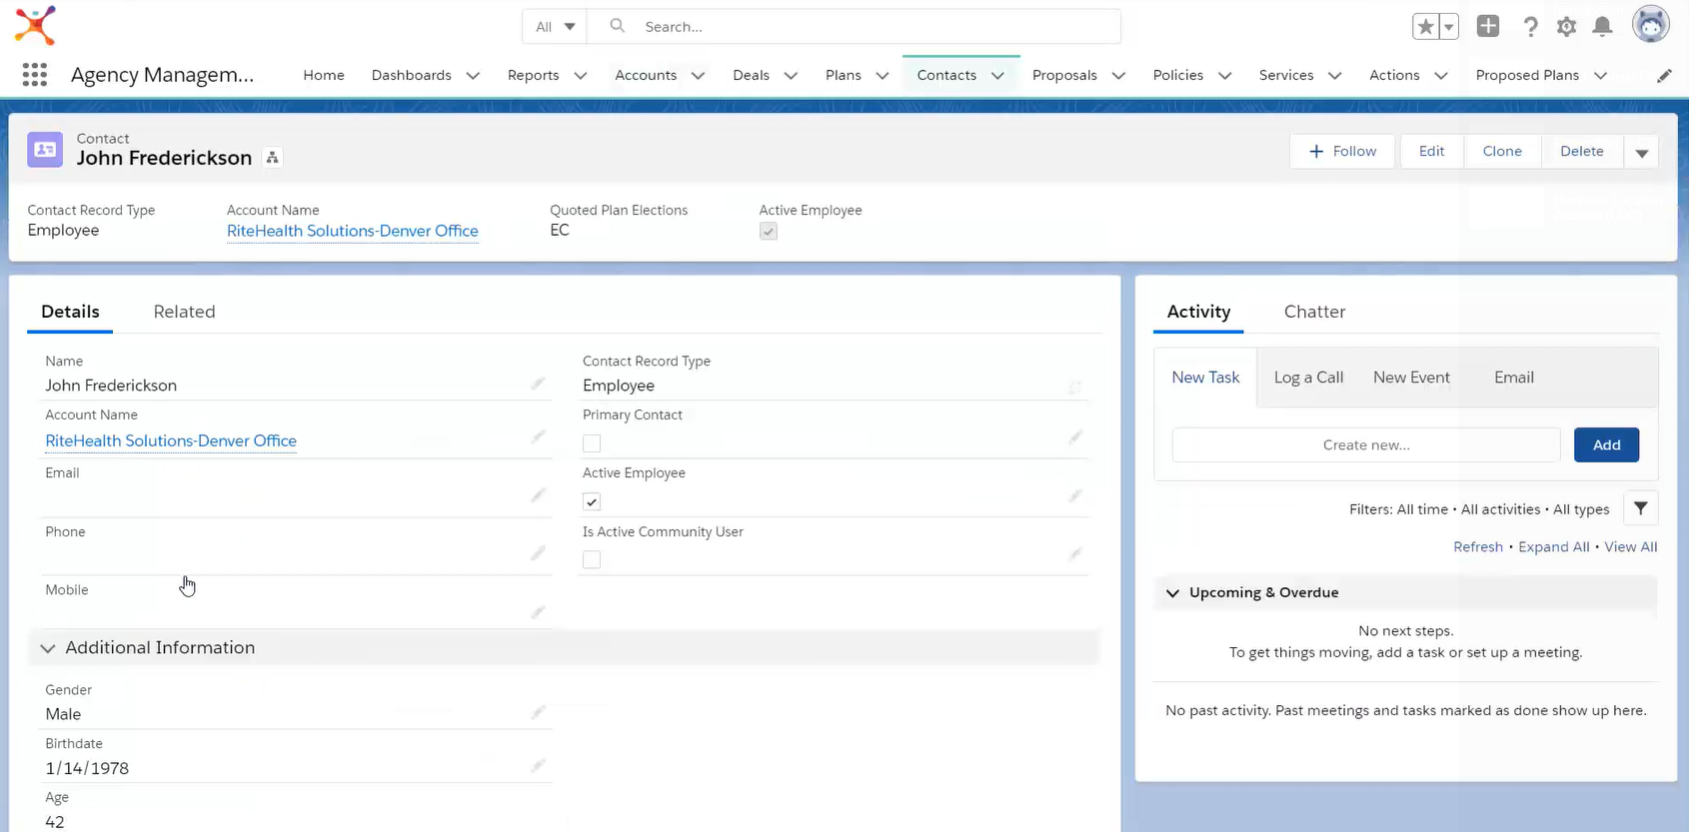
 Click on a Contact to access the Record for that particular individual.
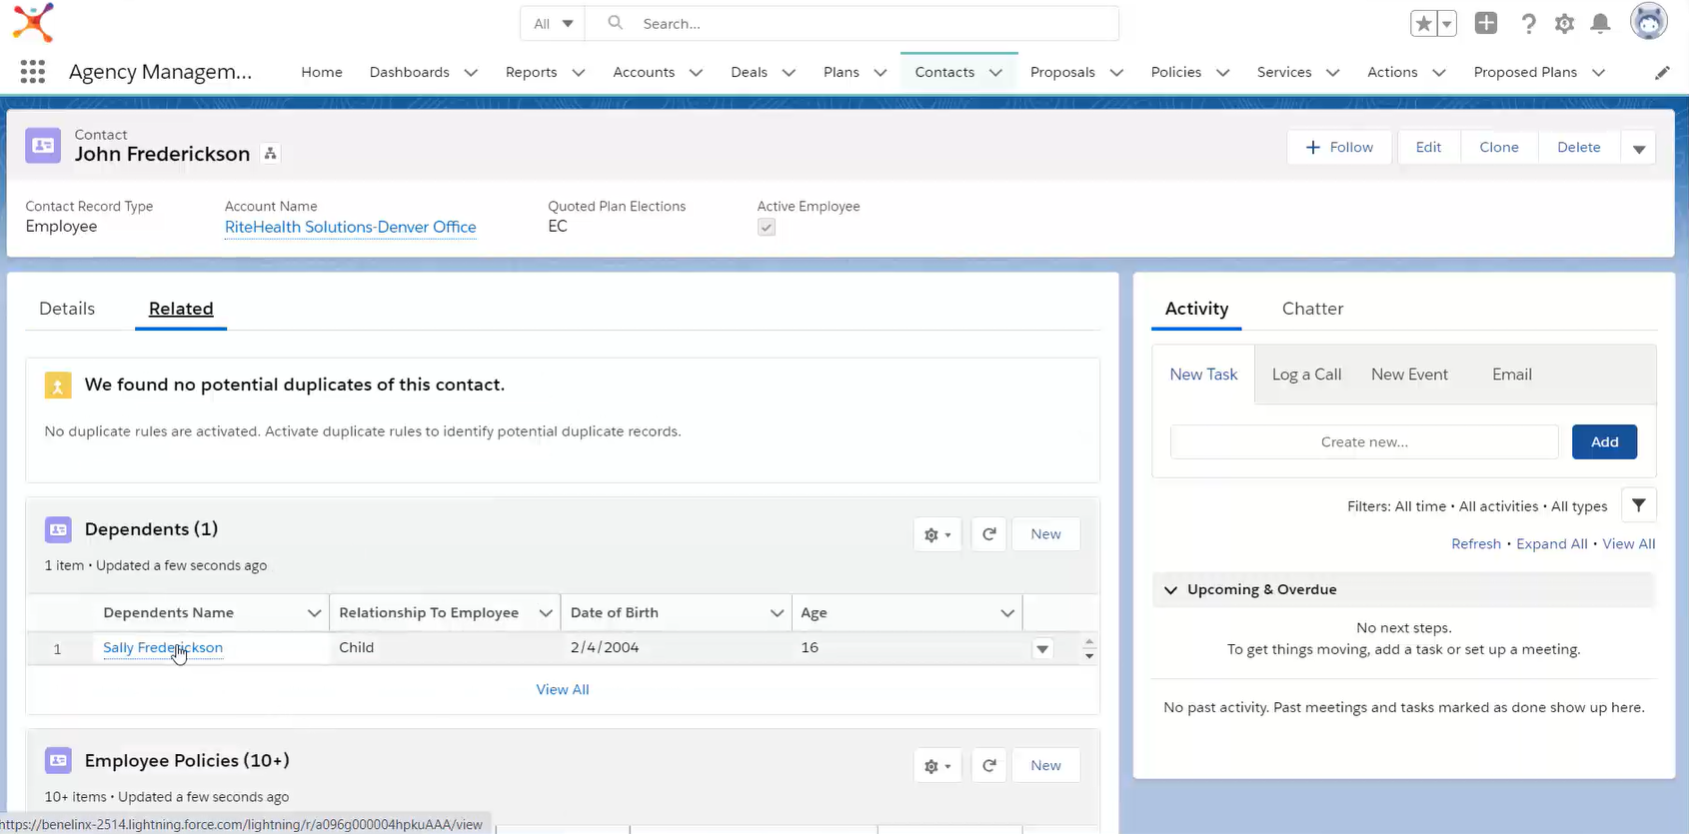
 You can click on Related within the Contact Record to access Dependent information for that Contact
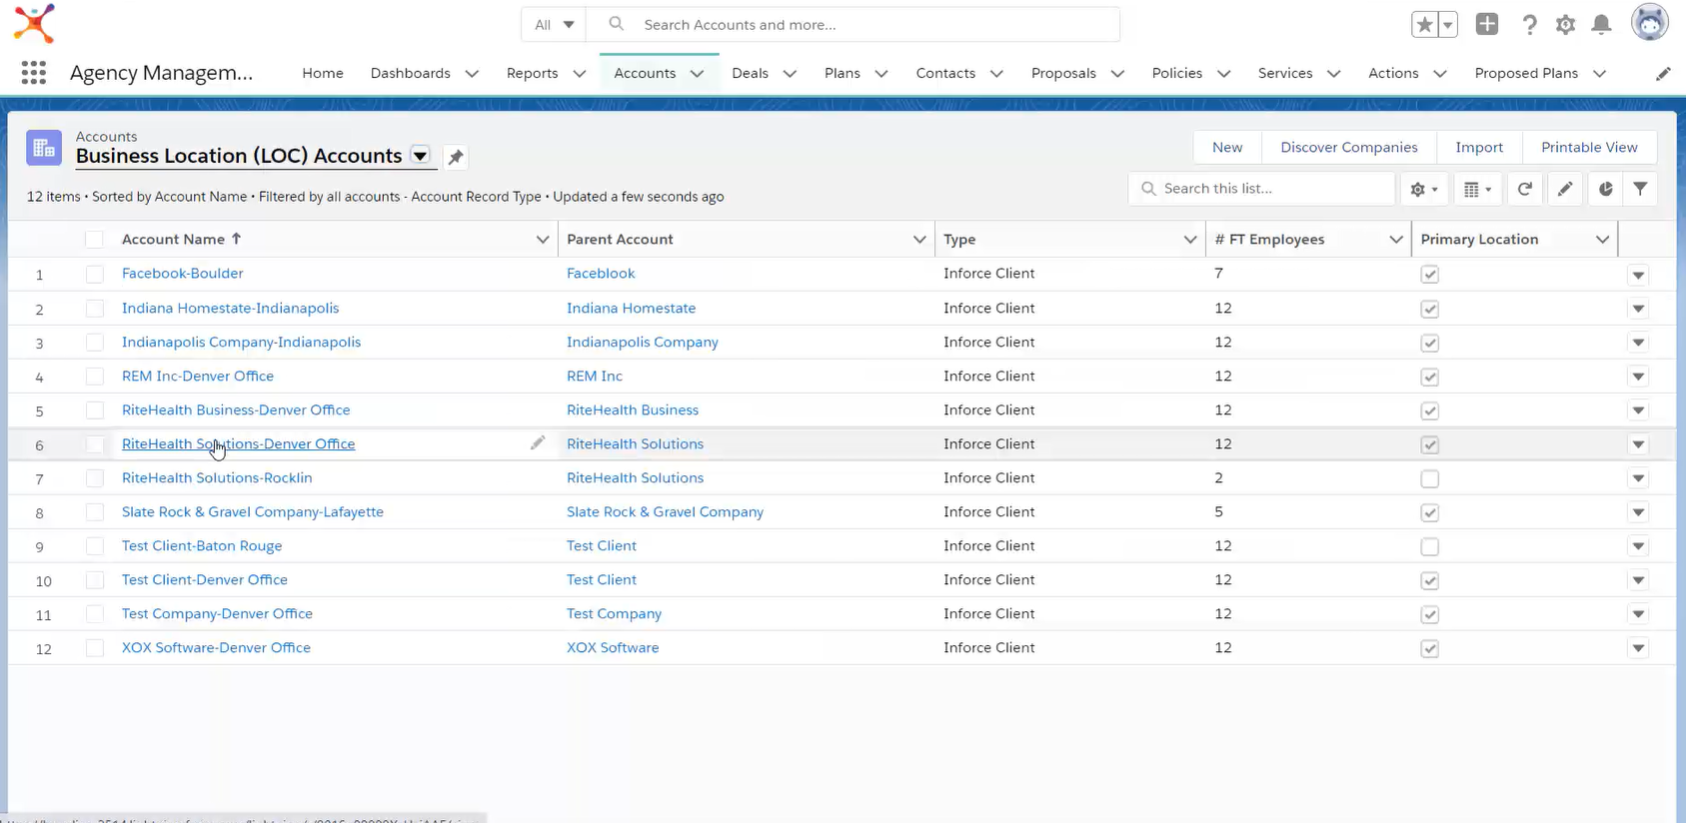
 Selecting the Business Location (LOC) Accounts List View will display all Location Accounts.
Step-by-Step Instructions
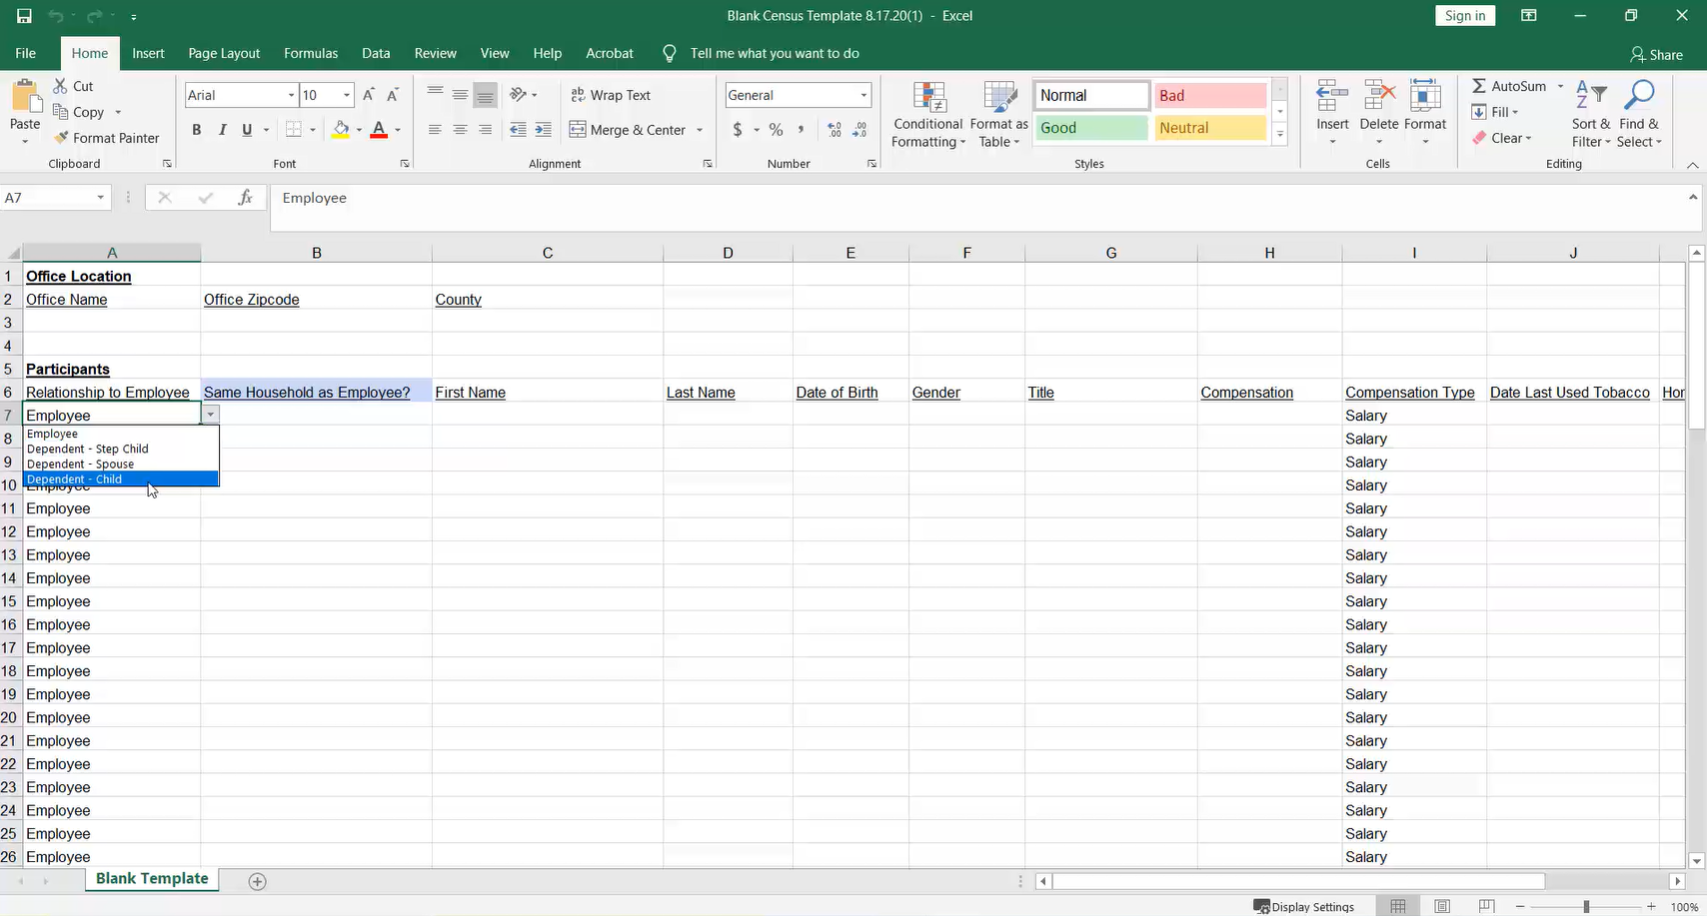
Step 1: Add your data
Add your Census data to the template below. Use the dropdown menus in each column to select preset responses for Relationship to Employee and Same Household As Employee. All columns are required except for Title, Compensation, and Compensation Type.
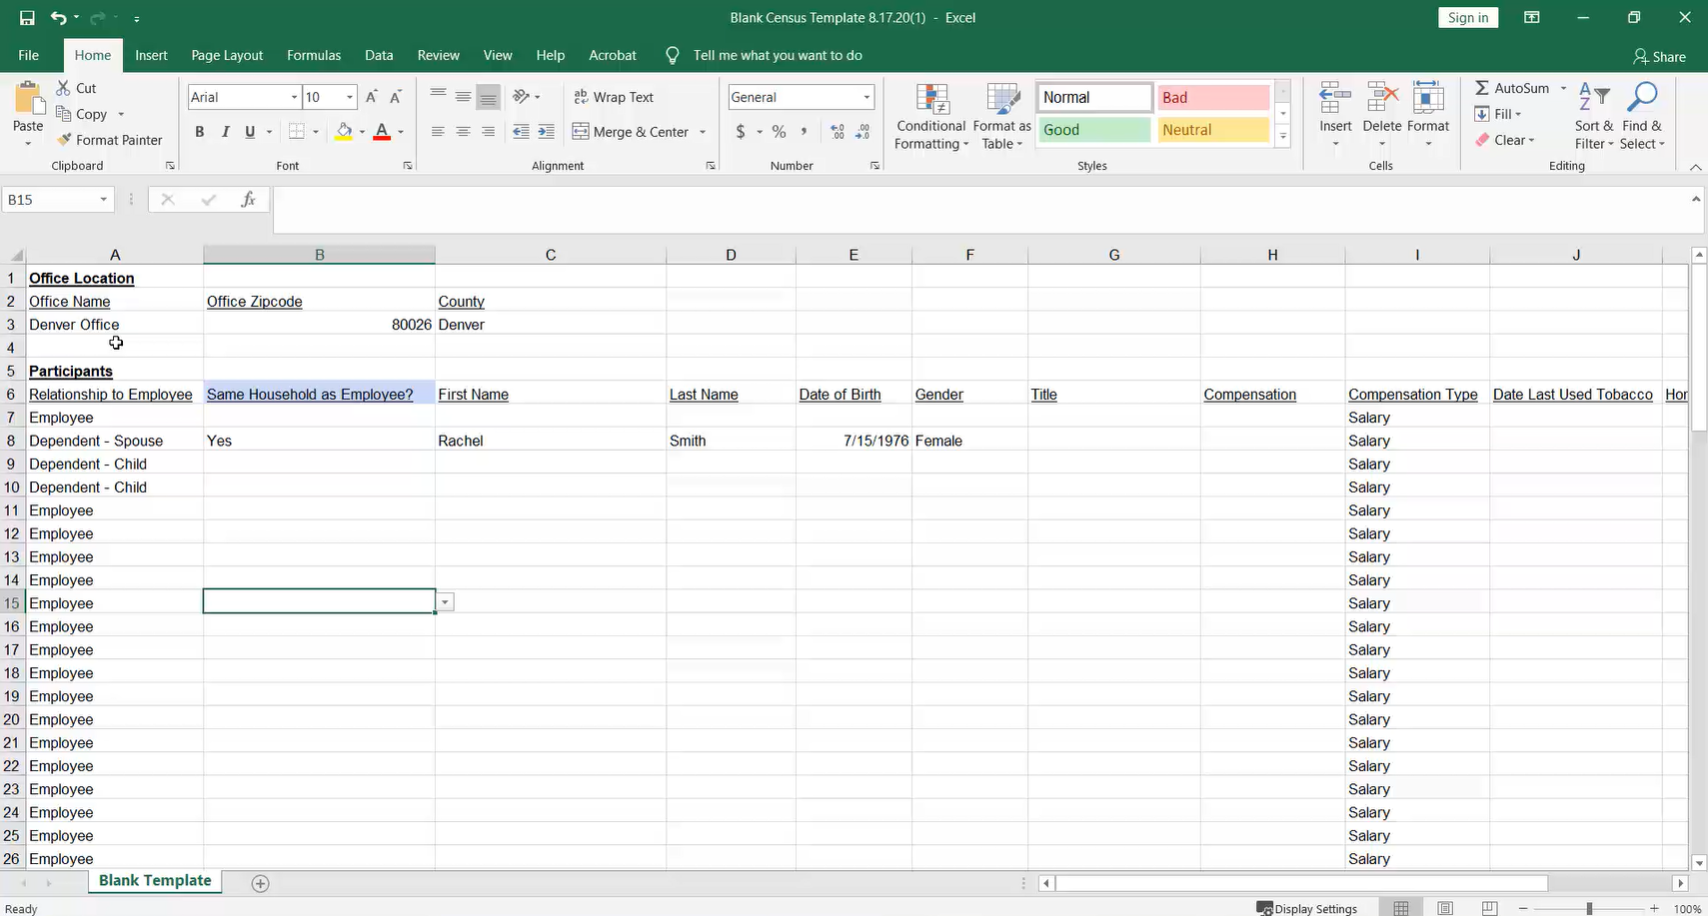
Step 2: Specify Details
After you finish adding Census data, you must specify the Office Location Name, Zipcode, and County in cells A3, B3, and C3. When uploaded, Benelinx will create a Location Account based on this name and data.
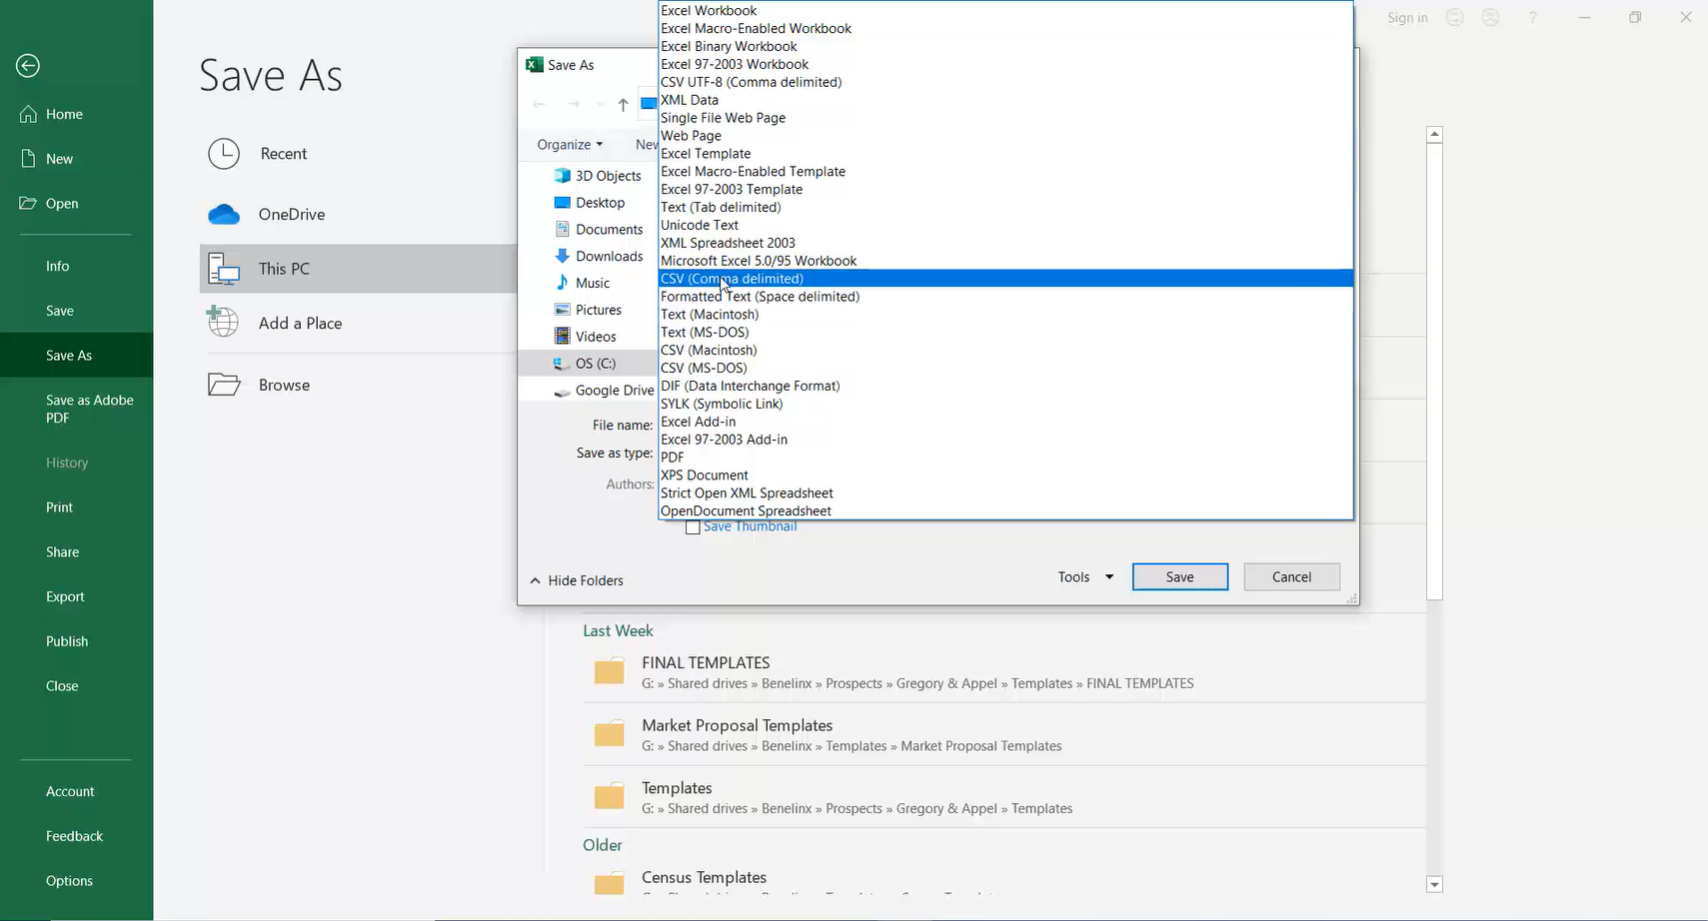
Step 3: Change file type
Once the Census template is complete, you must change the file type to .csv. To do so, click File>Save As to access a popup menu. Within that menu click Save As Type and select CSV (Comma delimited) from the dropdown menu. Then click Save.
Step 4: Upload file
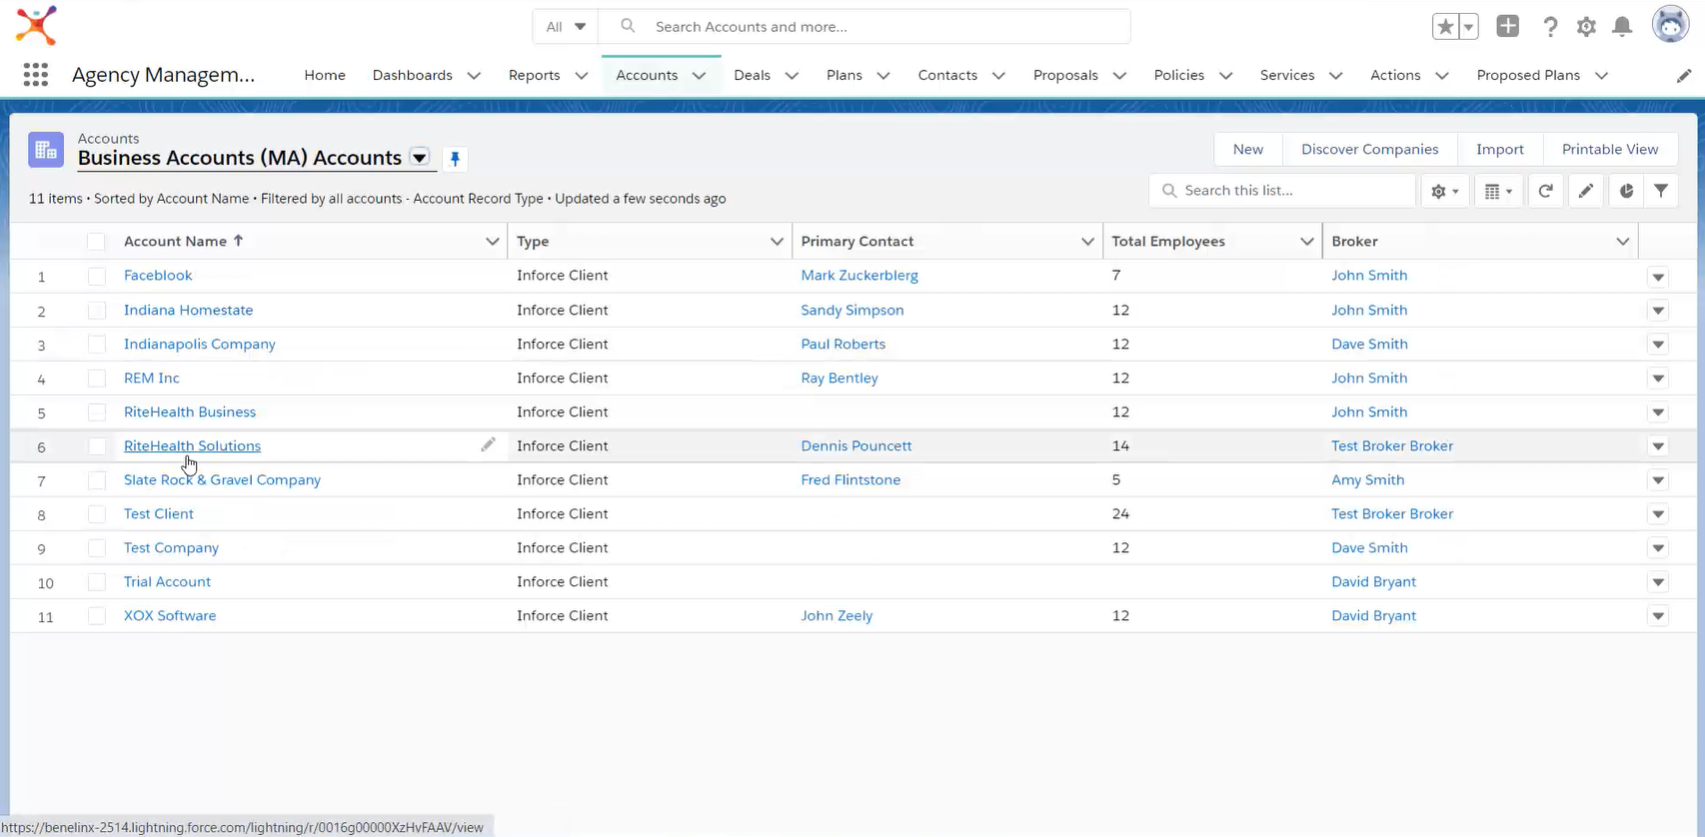
To upload a census within Benelinx, click Accounts in the Navigation Bar, then find the account you want to upload the census to from within the Accounts List.
Click on the desired Account, then click on the Upload Census button in the righthand corner.
Click on the Choose File button and select your Census from the popup menu.
Once you’ve selected your Census, click Import Census.
Access your census
Once the Census successfully imports, you’ll be taken back to the Account page. To access your Census, click on the Hierarchy button next to the Account Name.
Clicking this button will take you to the Account Hierarchy page. From there, you can select your Census Account Location from the List.
Once within the Account Location, click on Related to access your Census information. The data uploaded in your Census will be populated under Contacts as individual Records.
Click on a Contact to access the Record for that particular individual.
You can click on Related within the Contact Record to access Dependent information for that Contact
Making Changes
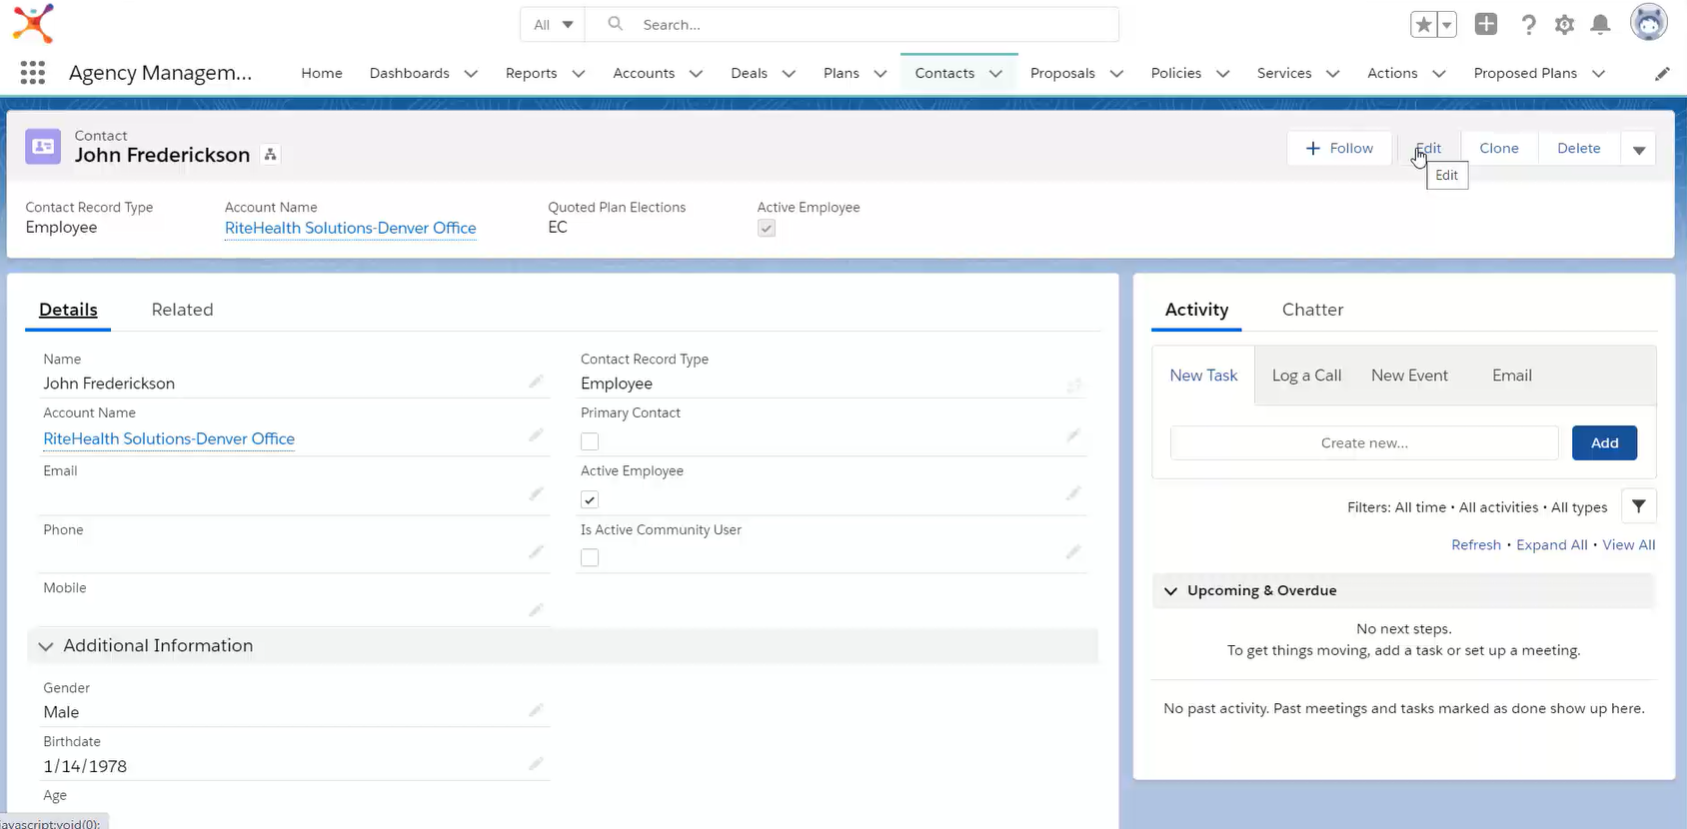
To change anything within the Record, use the Edit button in the upper left corner.
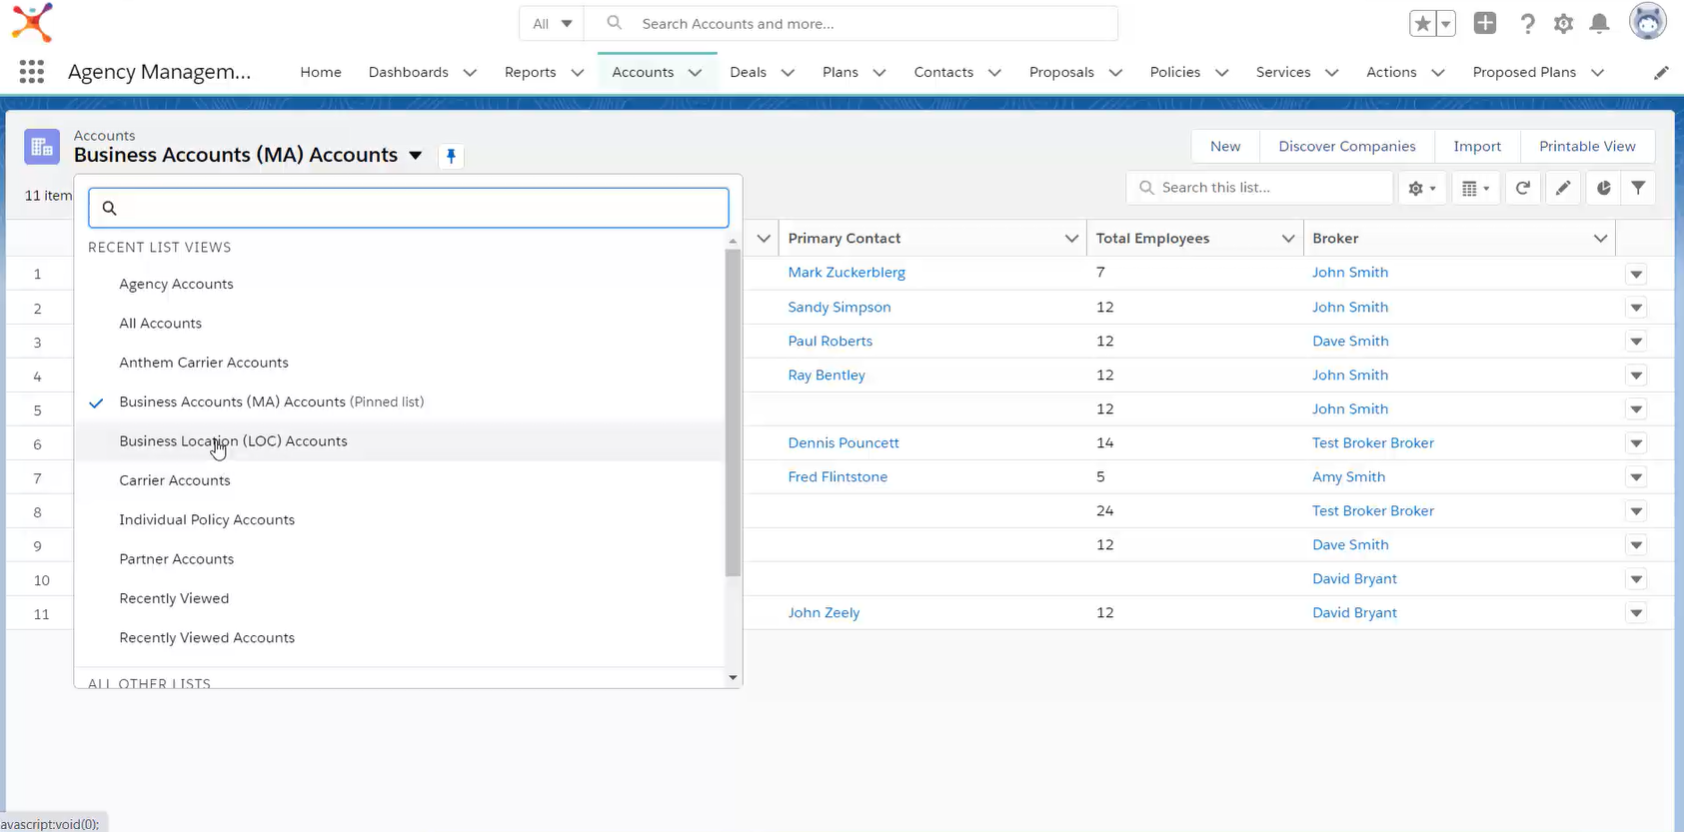
Alternate Method for Data Access
Another way to access Location Accounts is to use the Business Location (LOC) Accounts List View. Click on the down arrow to the right of your List View and select Business Location (LOC) Accounts.
Selecting the Business Location (LOC) Accounts List View will display all Location Accounts.


