In the Propose Phase, we’ll show you how to upload a Census, create a Deal, use the Quoting Engine, and create a Proposal.
Step-by-Step Instructions
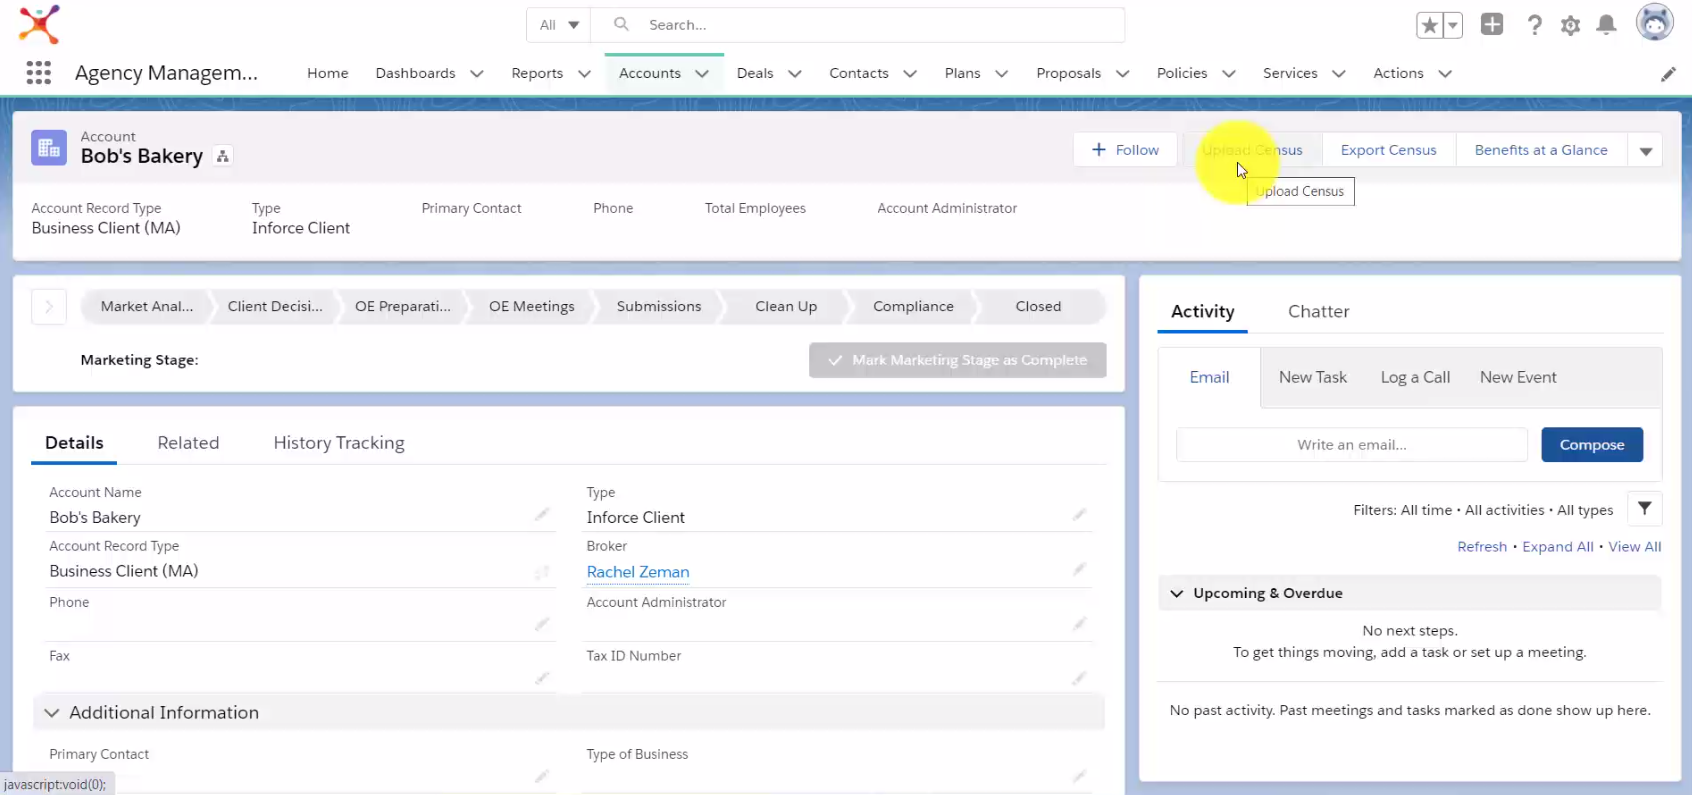
Upload A Census
Navigate to an Account then click the Upload Census button under the Navigation Bar.
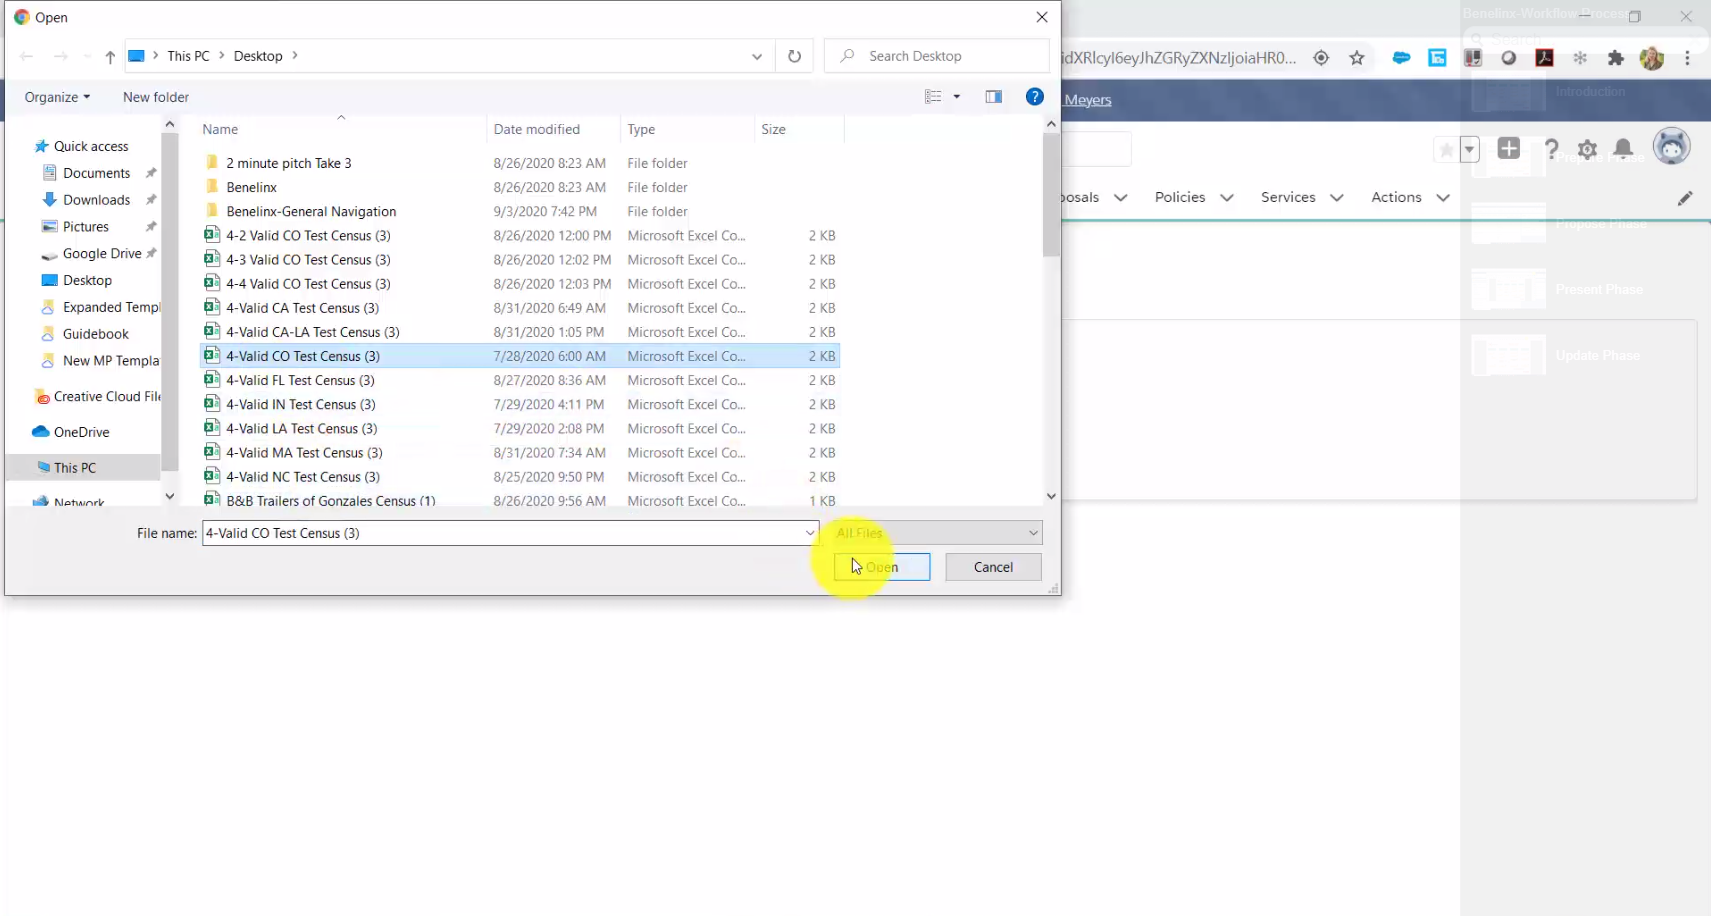
Click Choose File, then select your Census .CSV file and click Open.
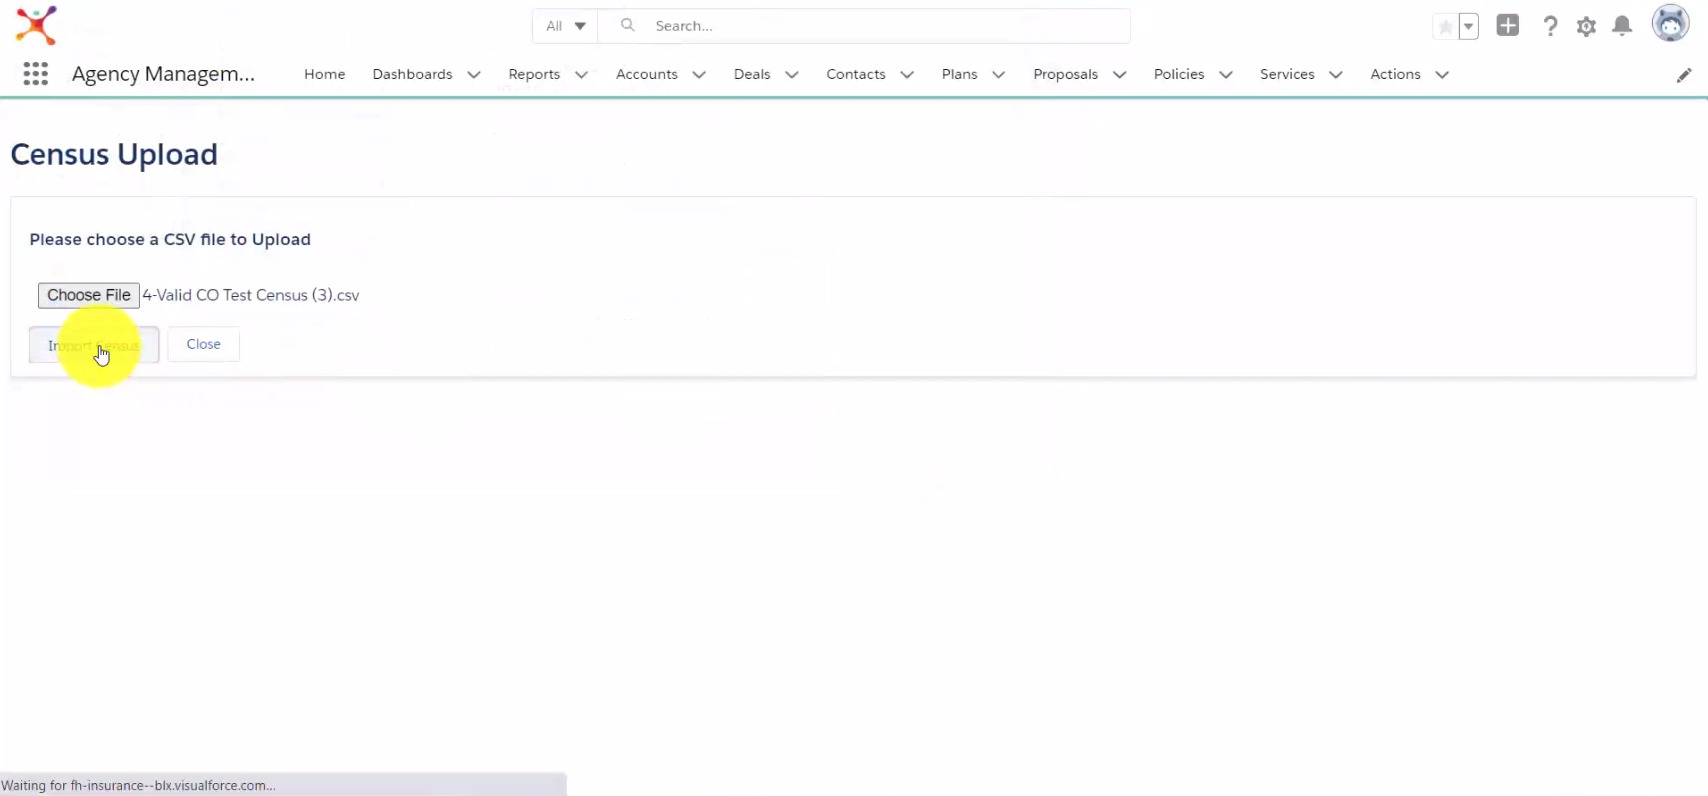
To upload your file, click Import Census.
Once your upload is complete, Benelinx will automatically create a new Business Location (LOC) Account for your Census under your main Account. For more details on how to upload a Census, view our guide.
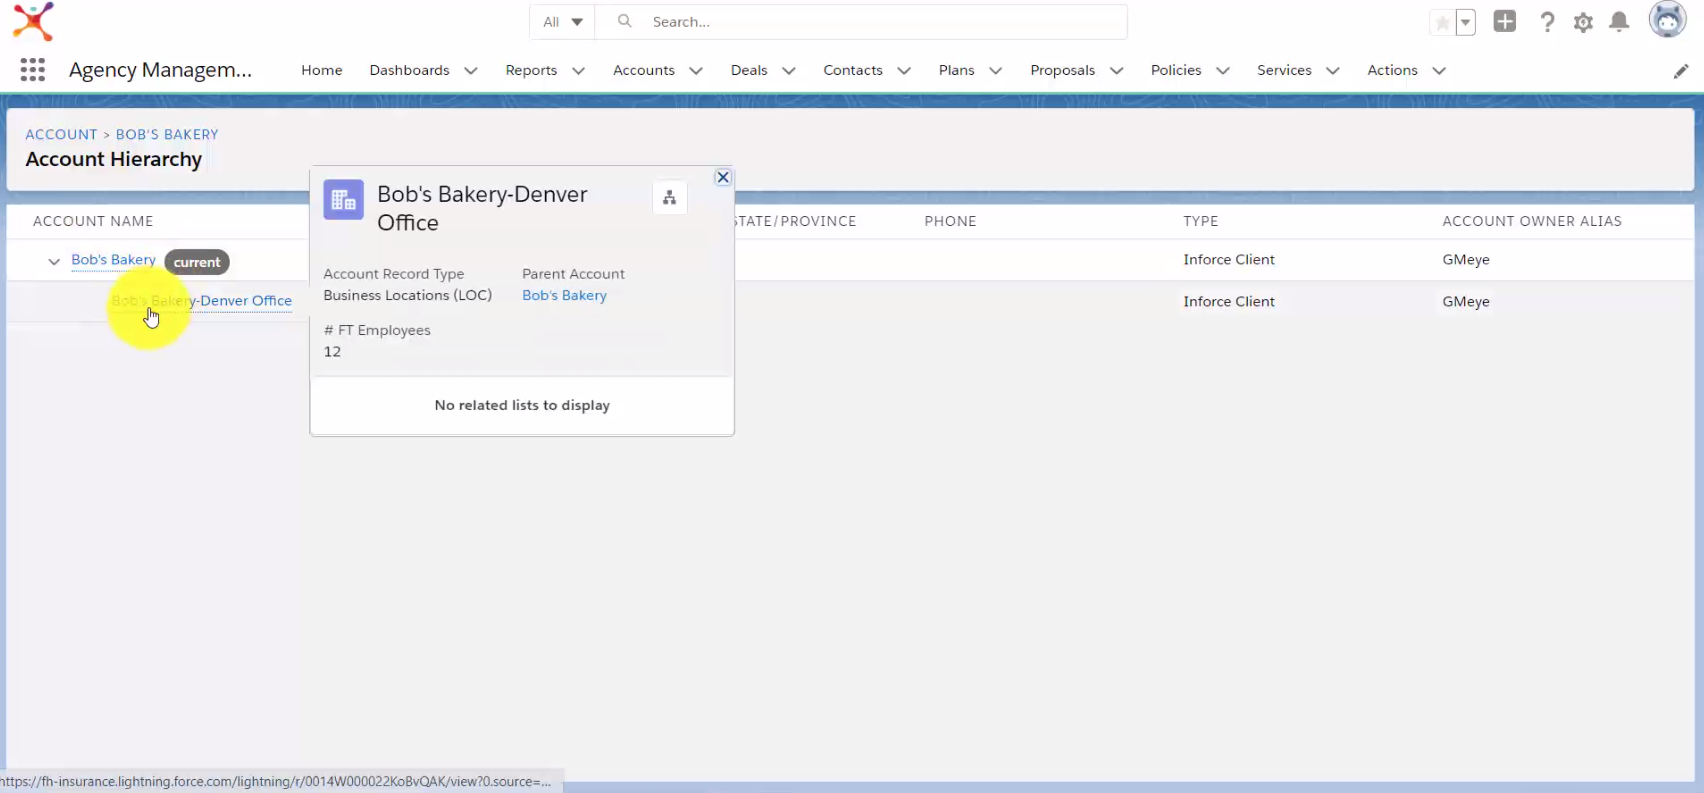
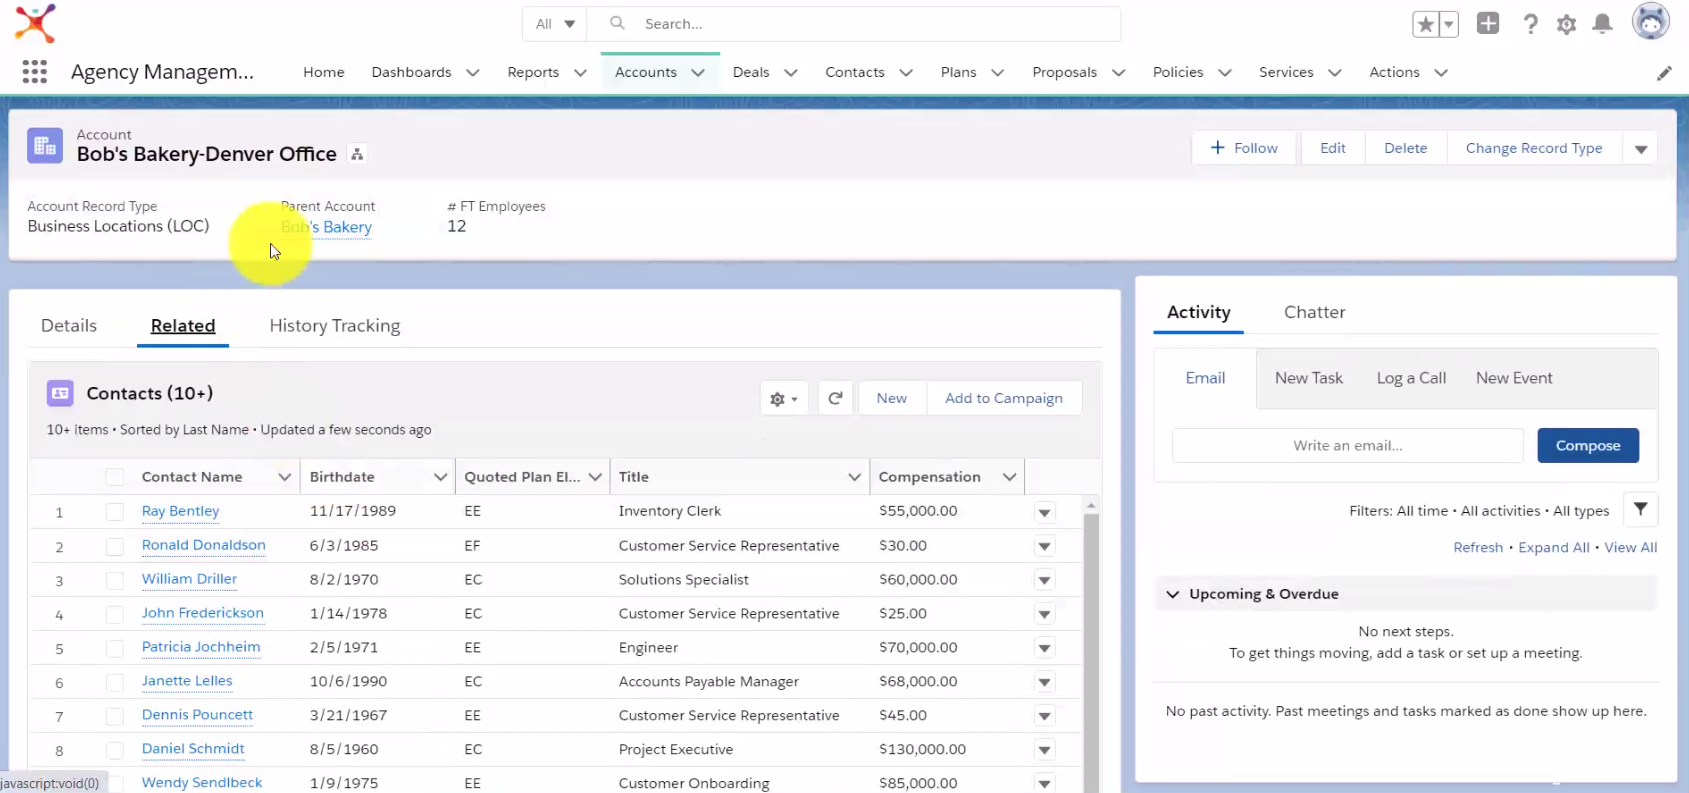
Within the Business Location Account, click the Related button to access your Census data.
Create A Deal
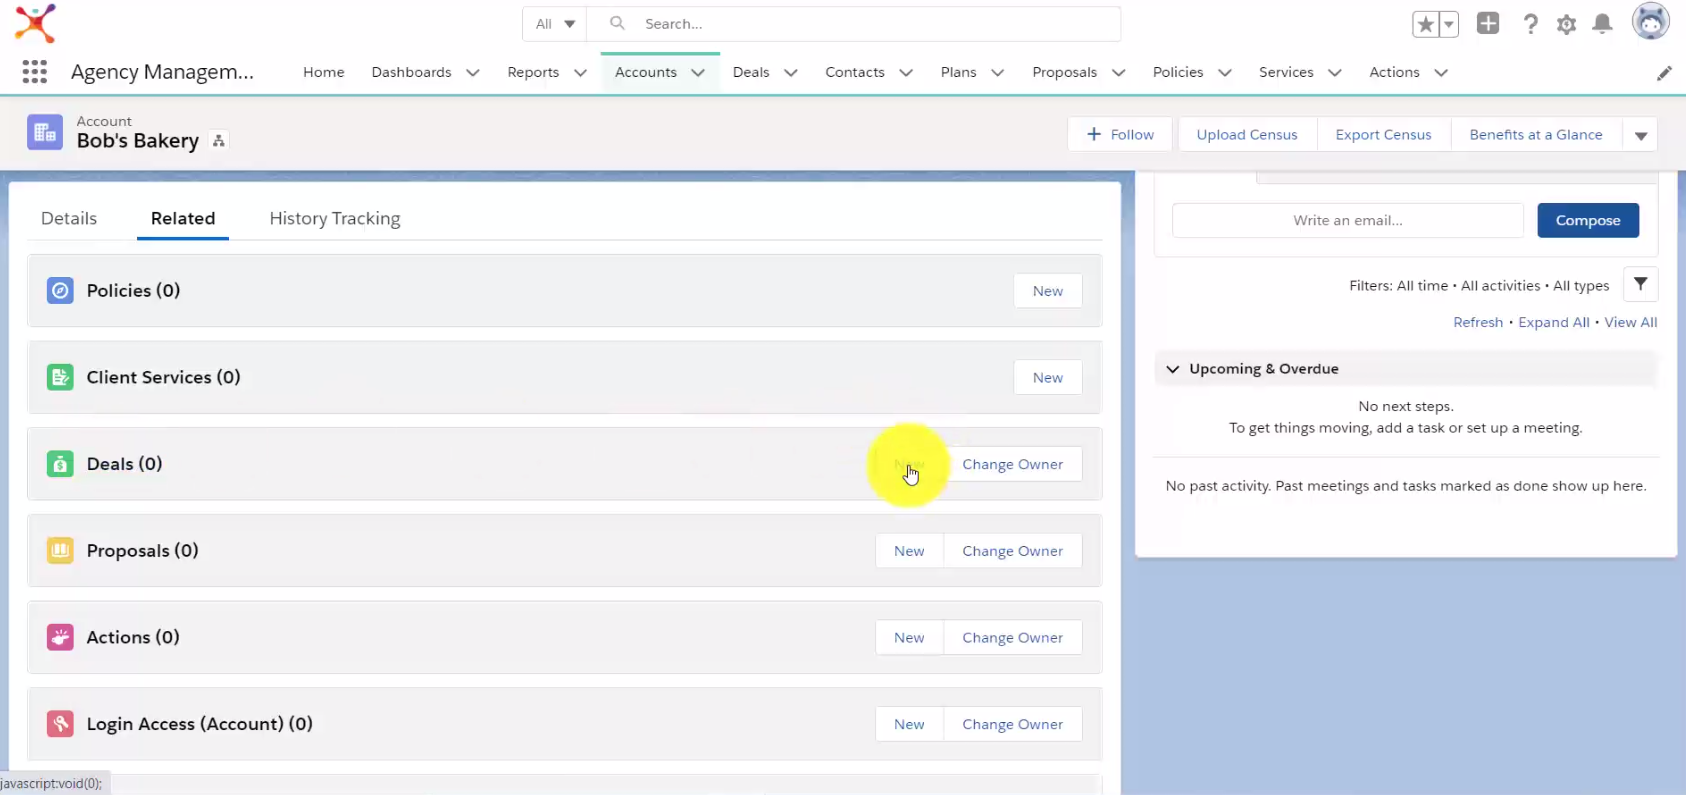
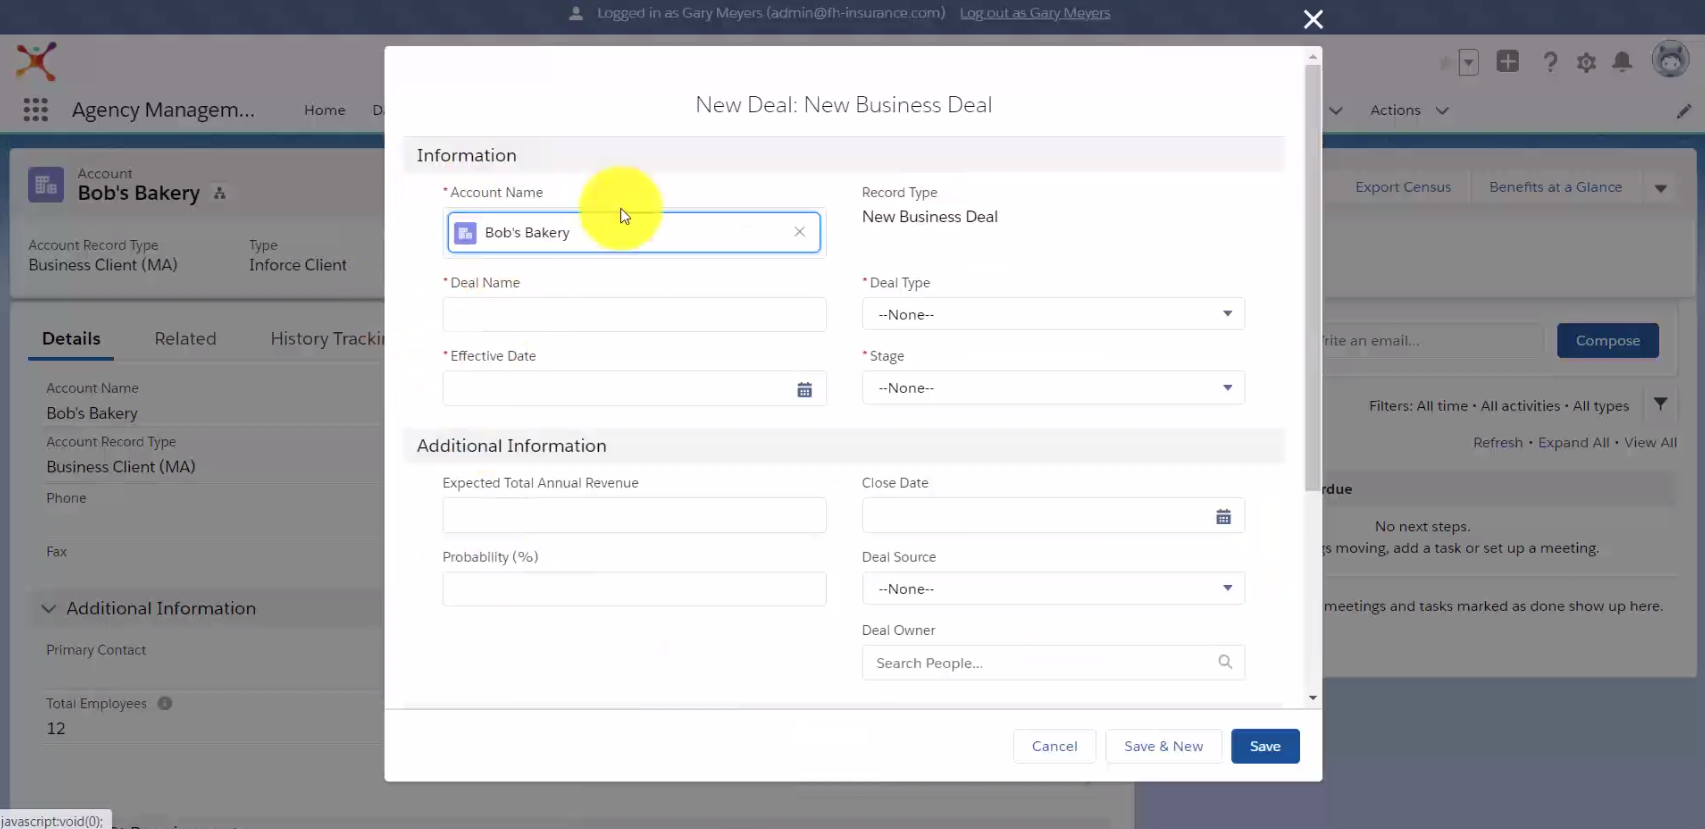
To create a new Deal, click on Related from within an Account, then click on the New button within the Deals section.
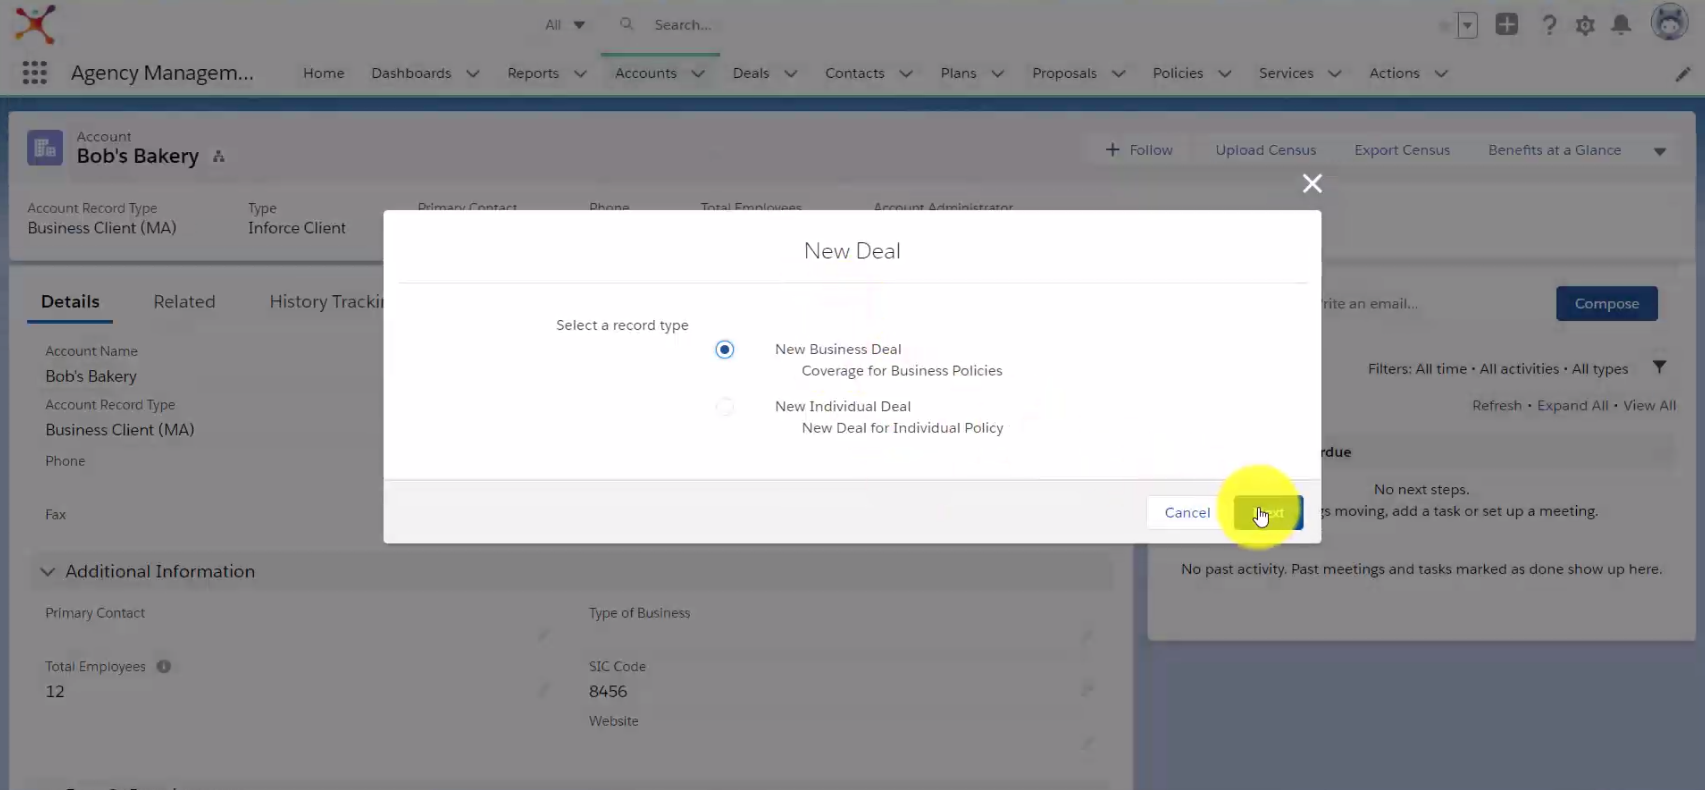
Select your desired Record type, then click Next.
By creating a new Deal from within an Account, you’ll automatically attach that Account to that Deal.
Another way to create a Deal is to click on the Deals Object in the Navigation Bar, then click New. This will create a new Deal but you’ll need to specify what Account to attach it to.
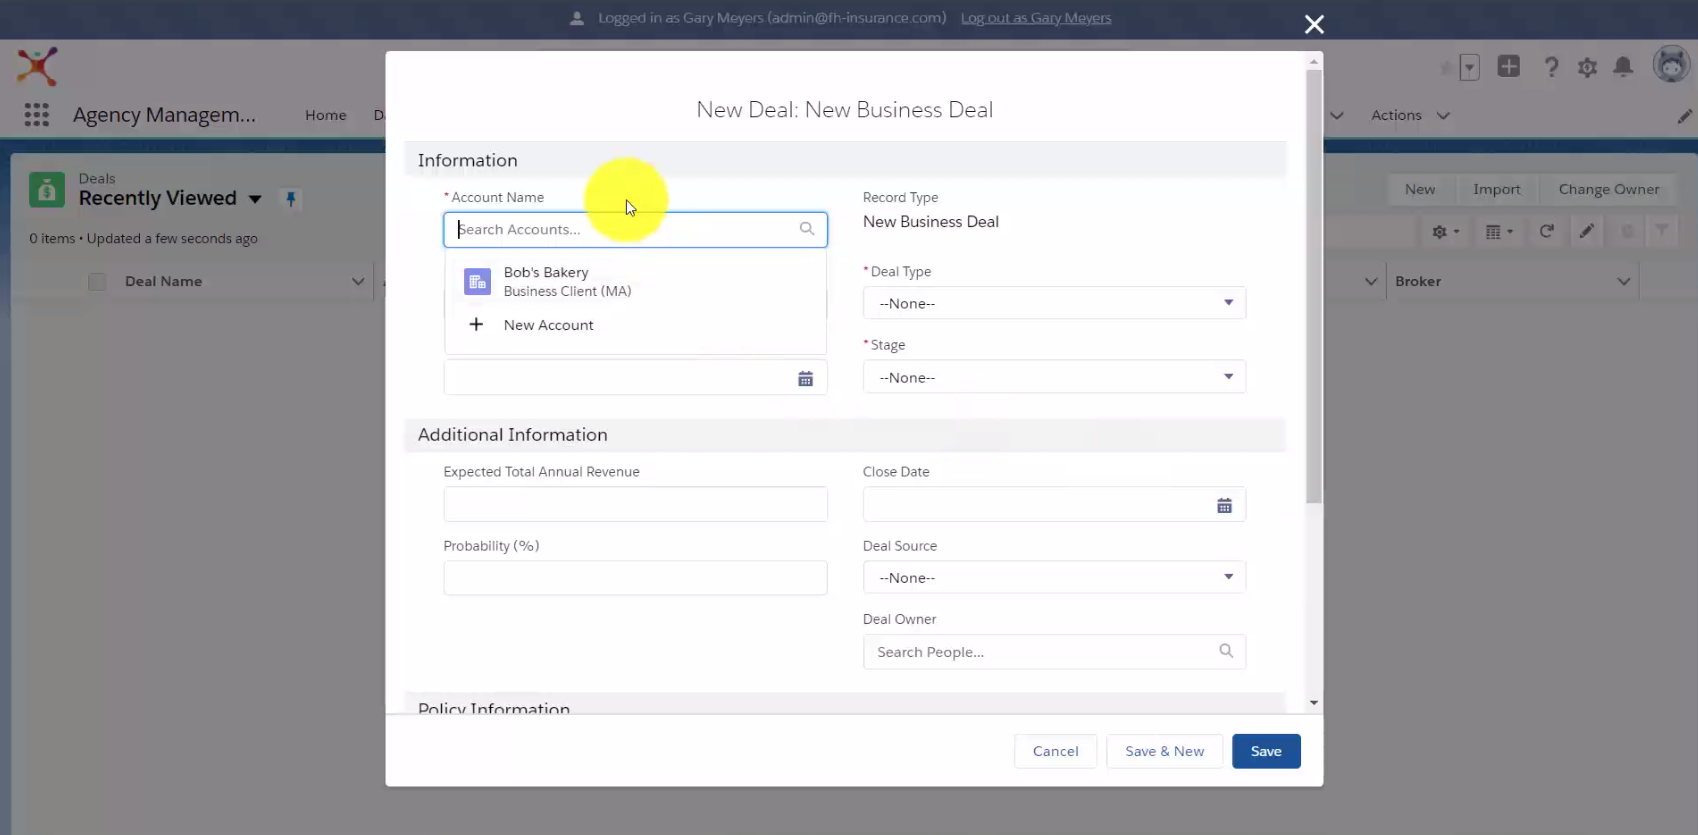
Complete your desired fields (Account Name, Deal Name, Deal Type, Effective Date and Stage are required), then click Save.
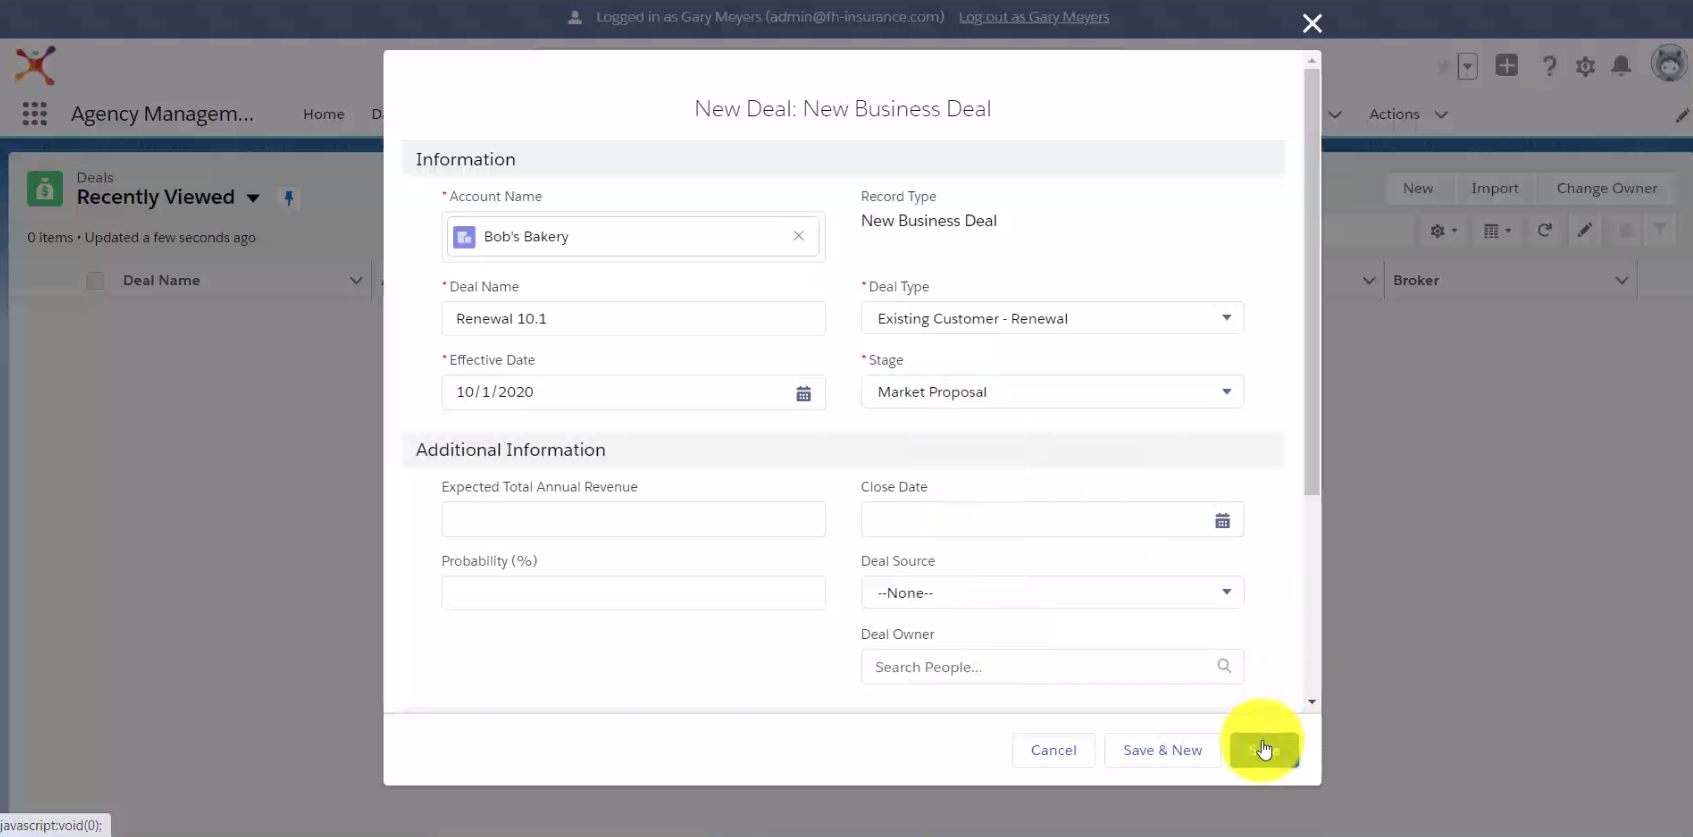
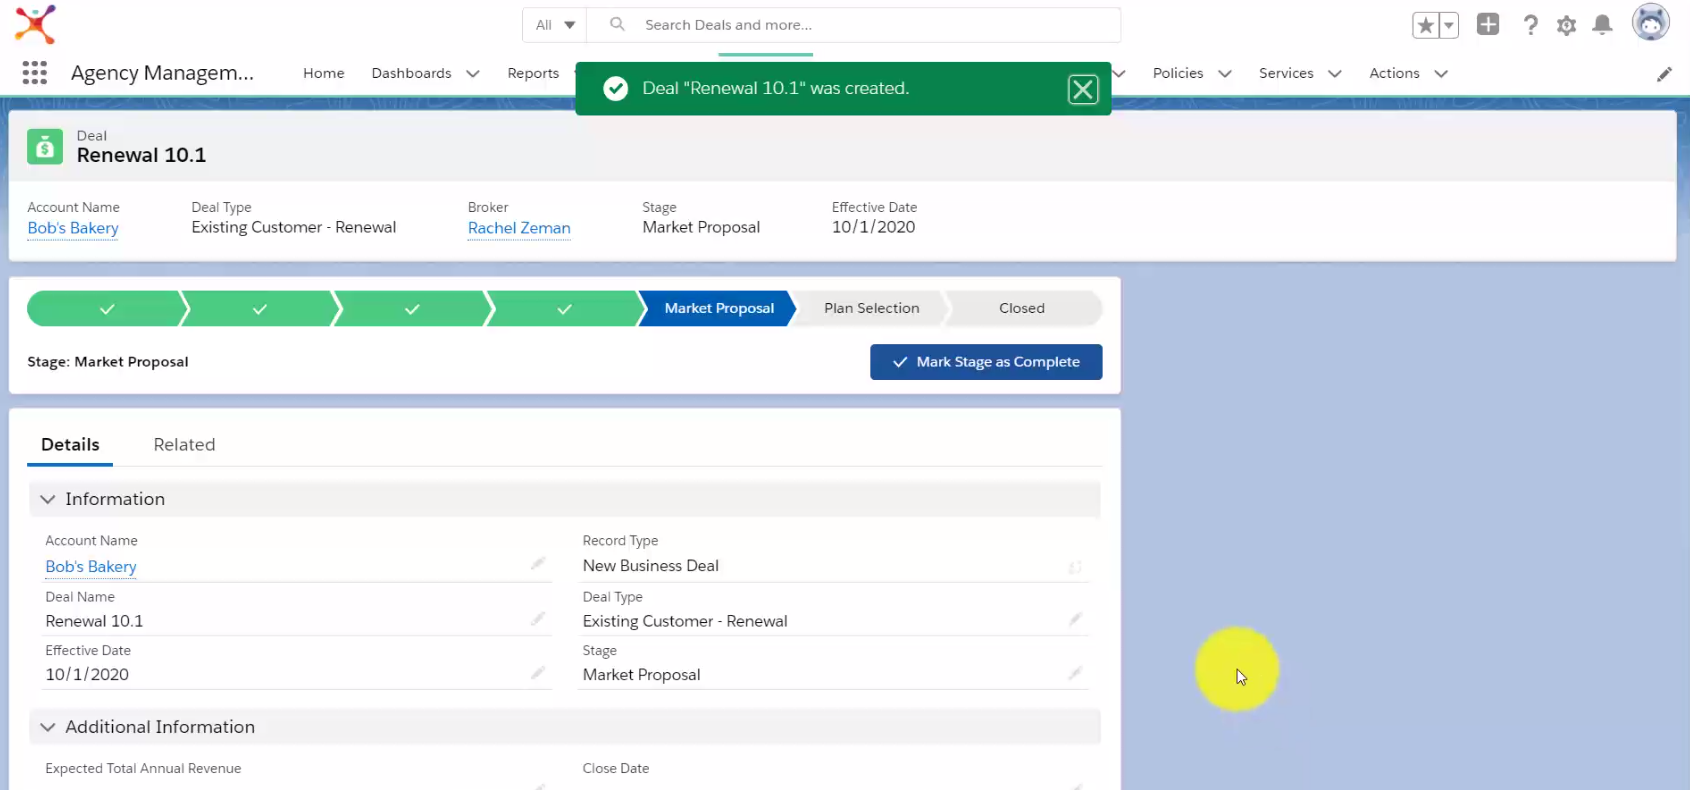
You have now successfully created a Deal.
Use the Quoting Engine
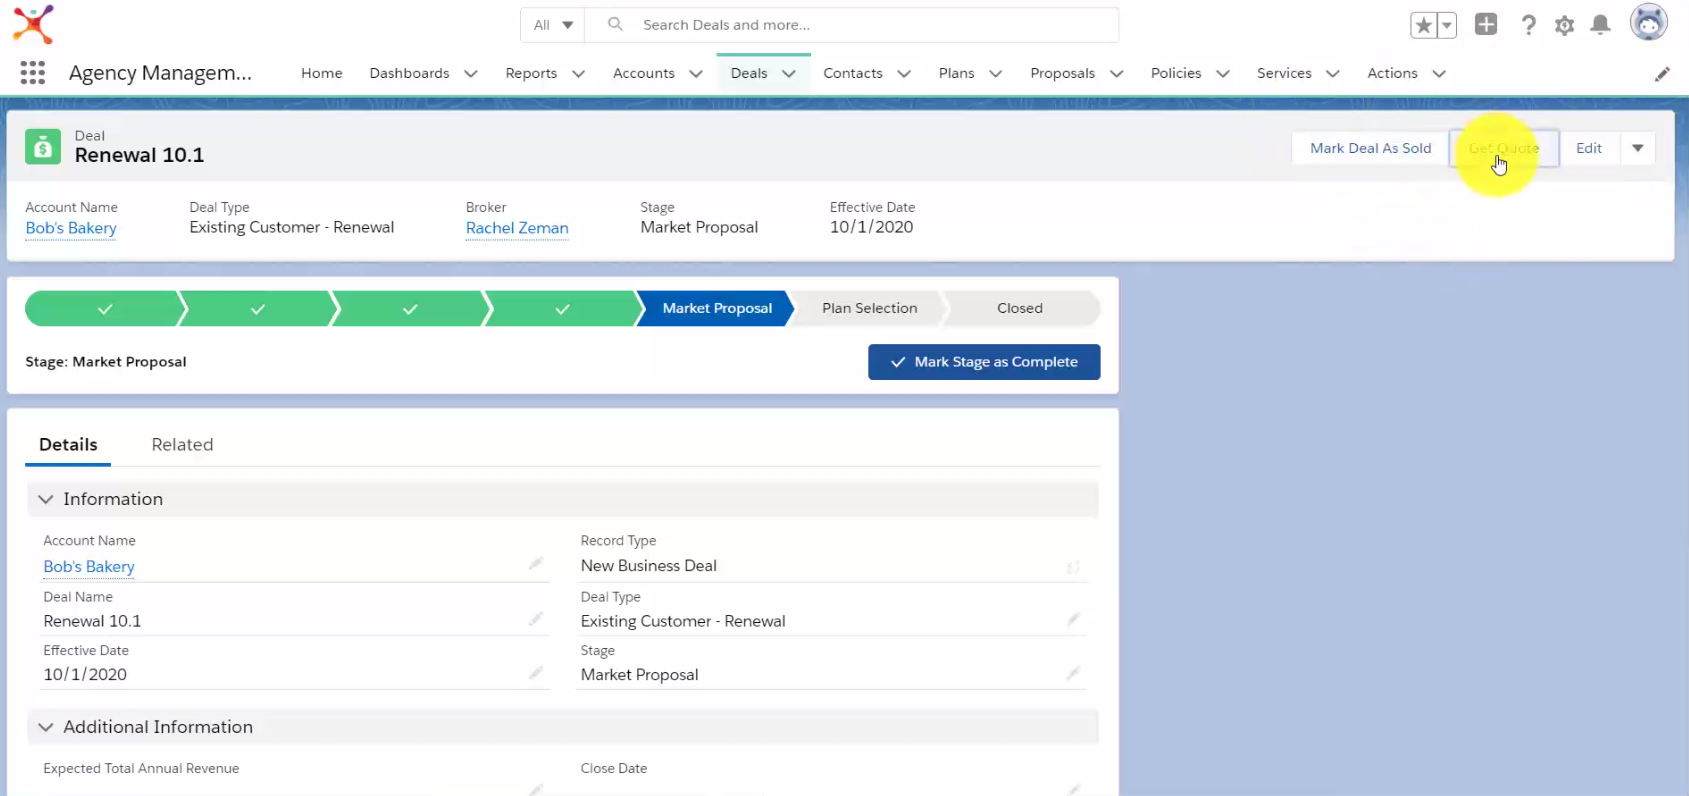
Within your Deal, you can click on Get Quote to access the Benelinx Quoting Engine.
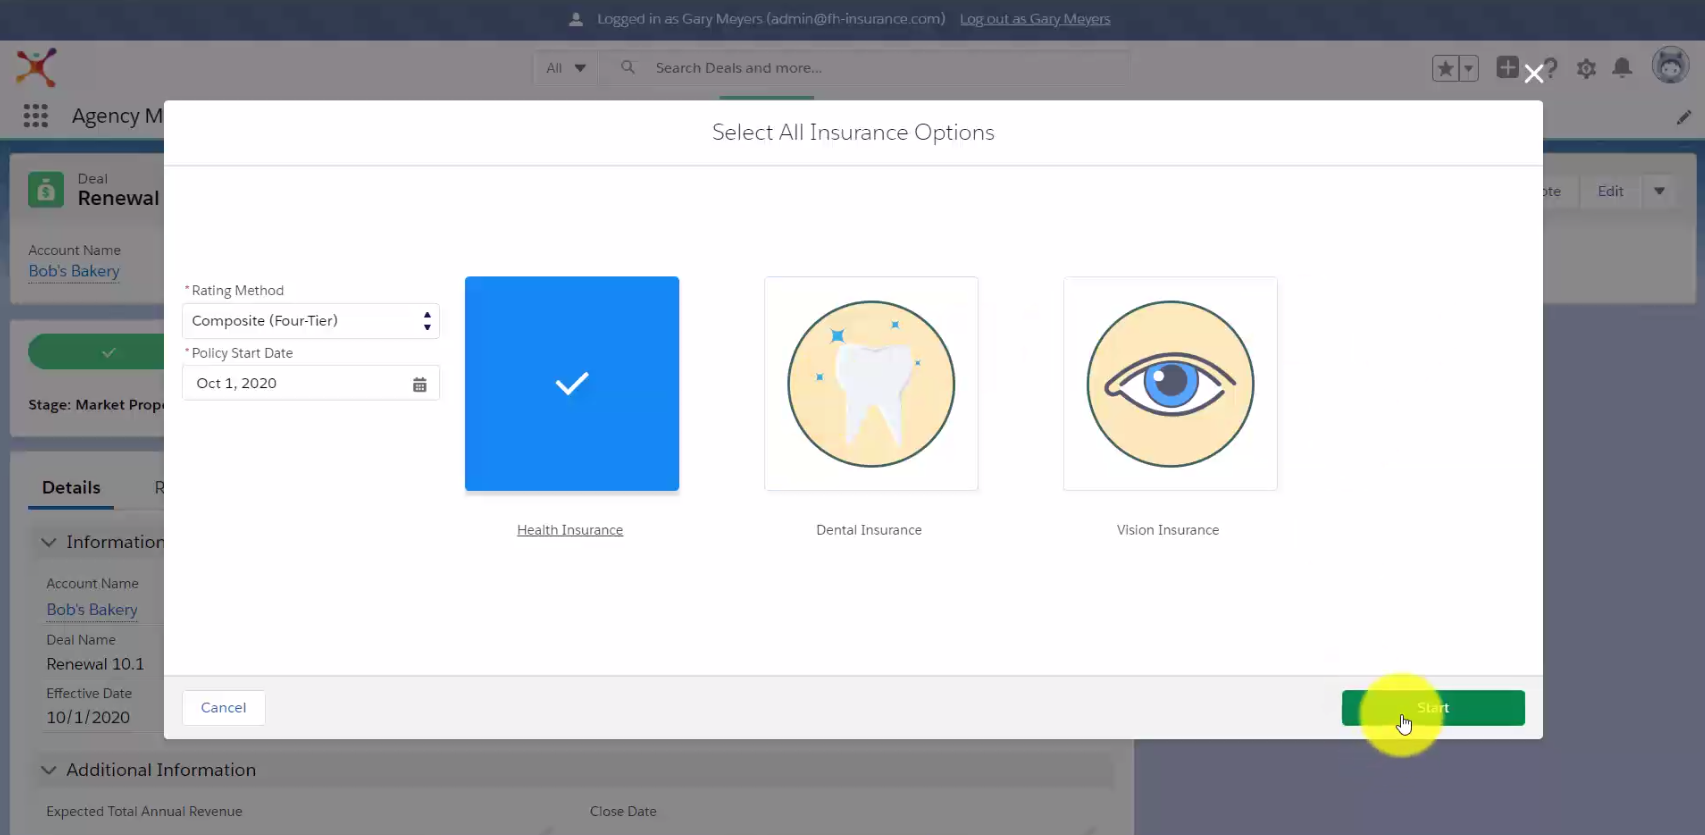
Select your desired Rating Method and Policy Start Date, and the products you’d like to quote, then click Start.
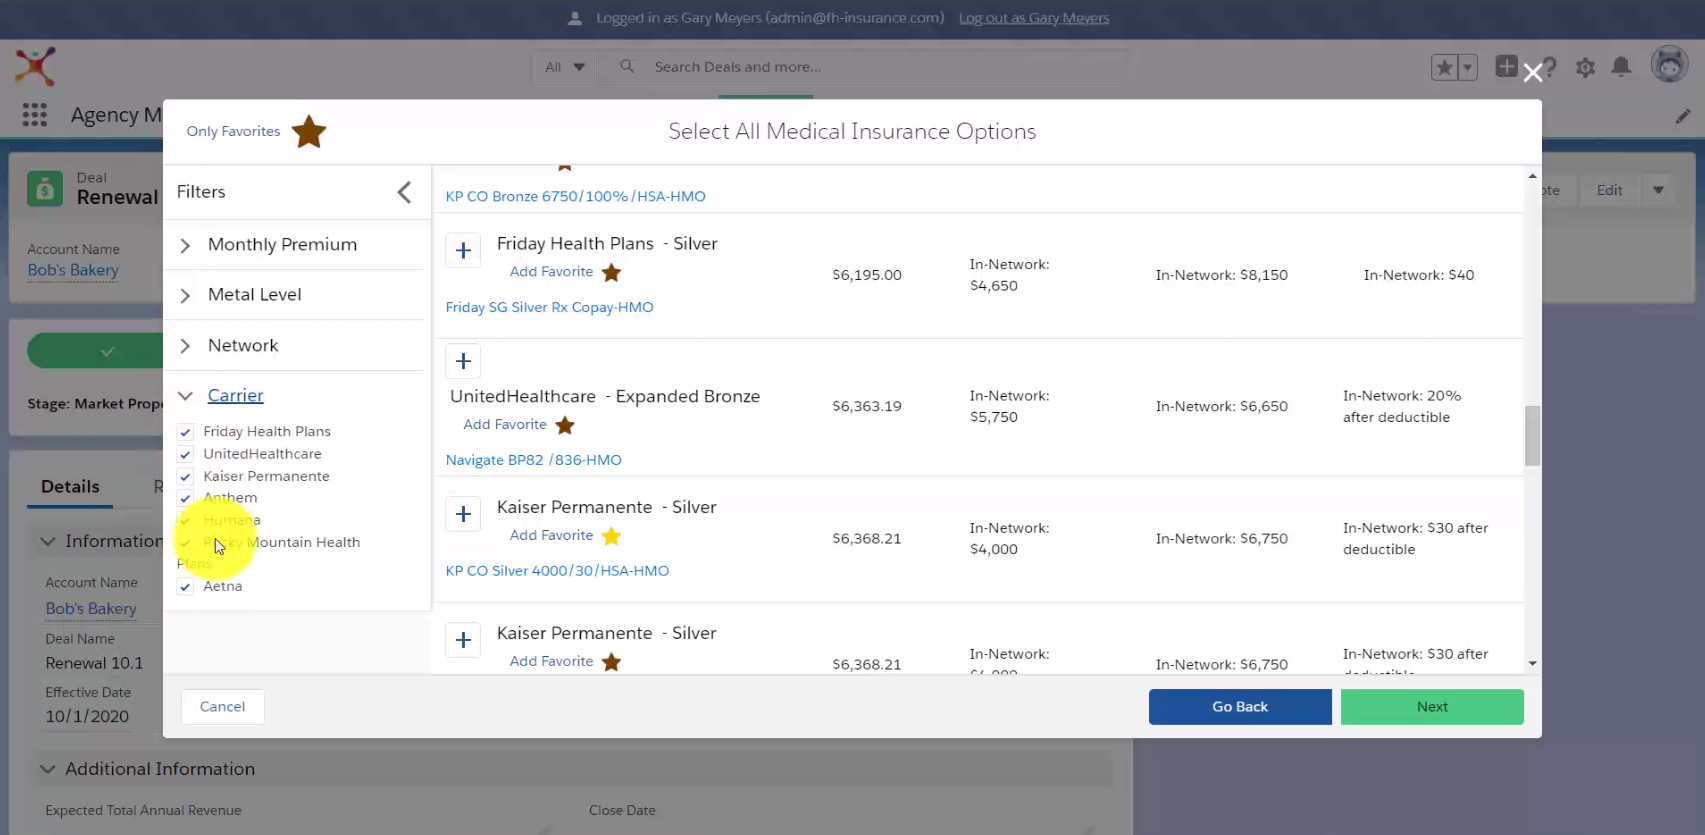
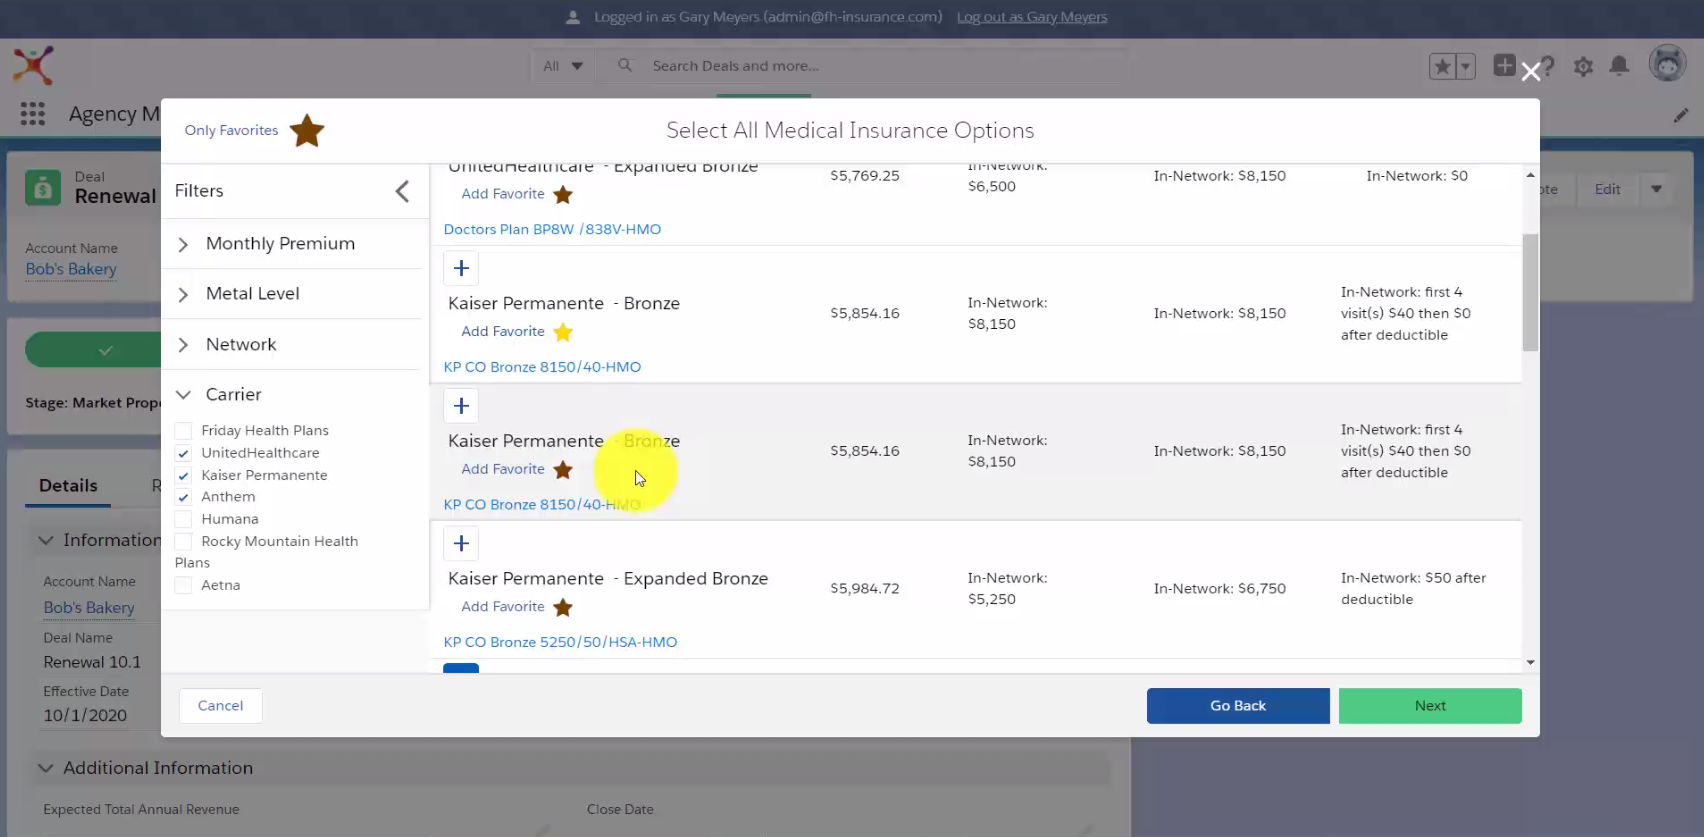
Vericred will then generate Quotes using the parameters you have specified. Within the Quote options, you can filter by Carrier, Network, Metal Level, and Monthly Premium.
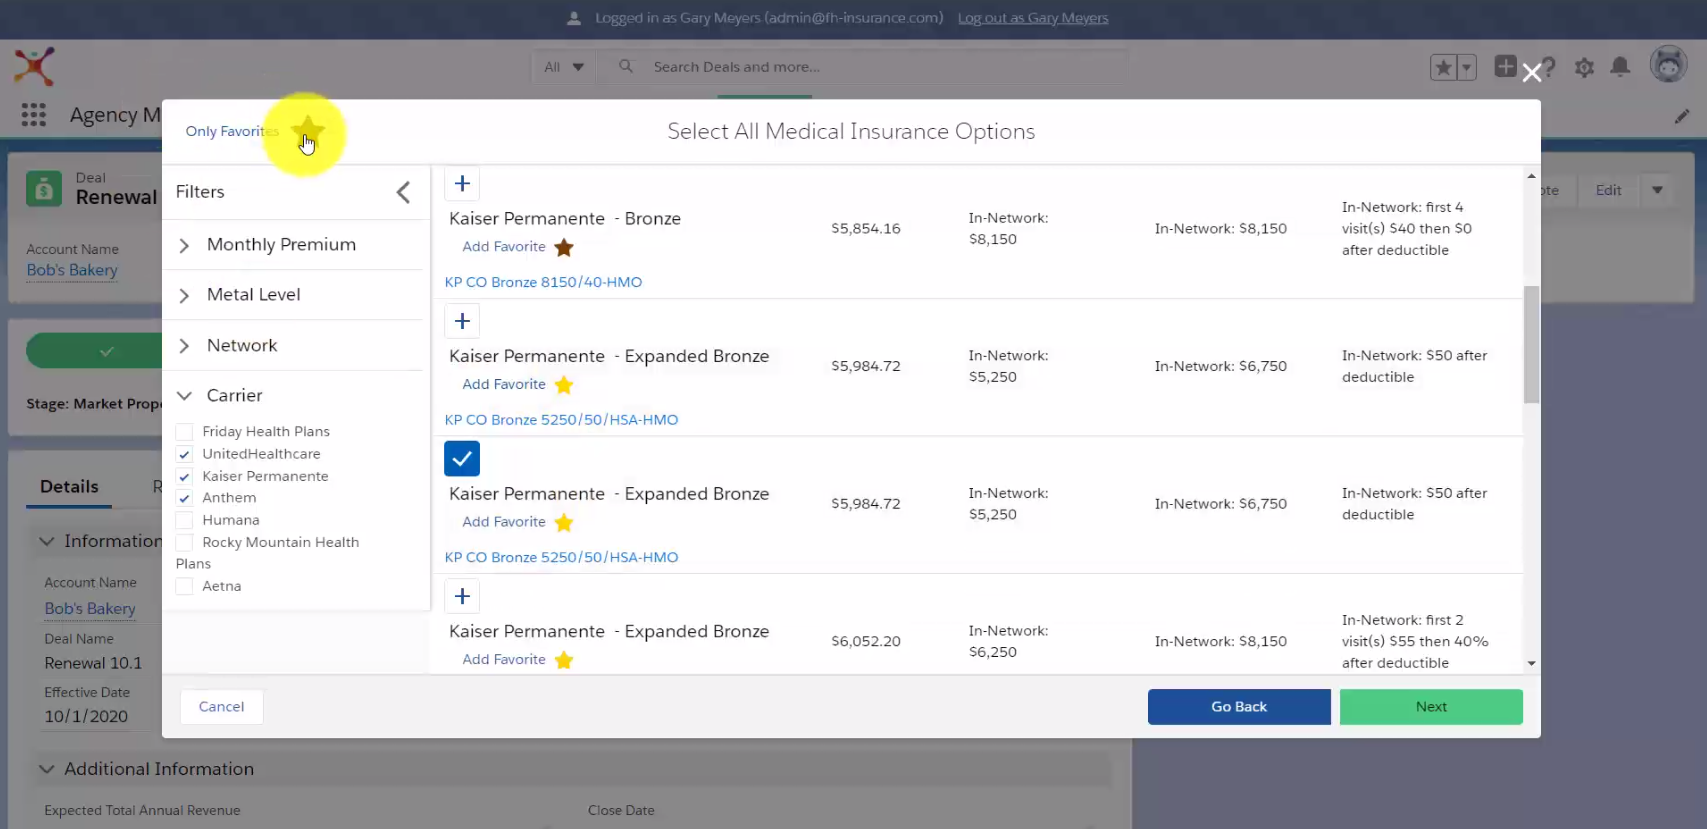
Click on the plus sign button to select your desired Plans.
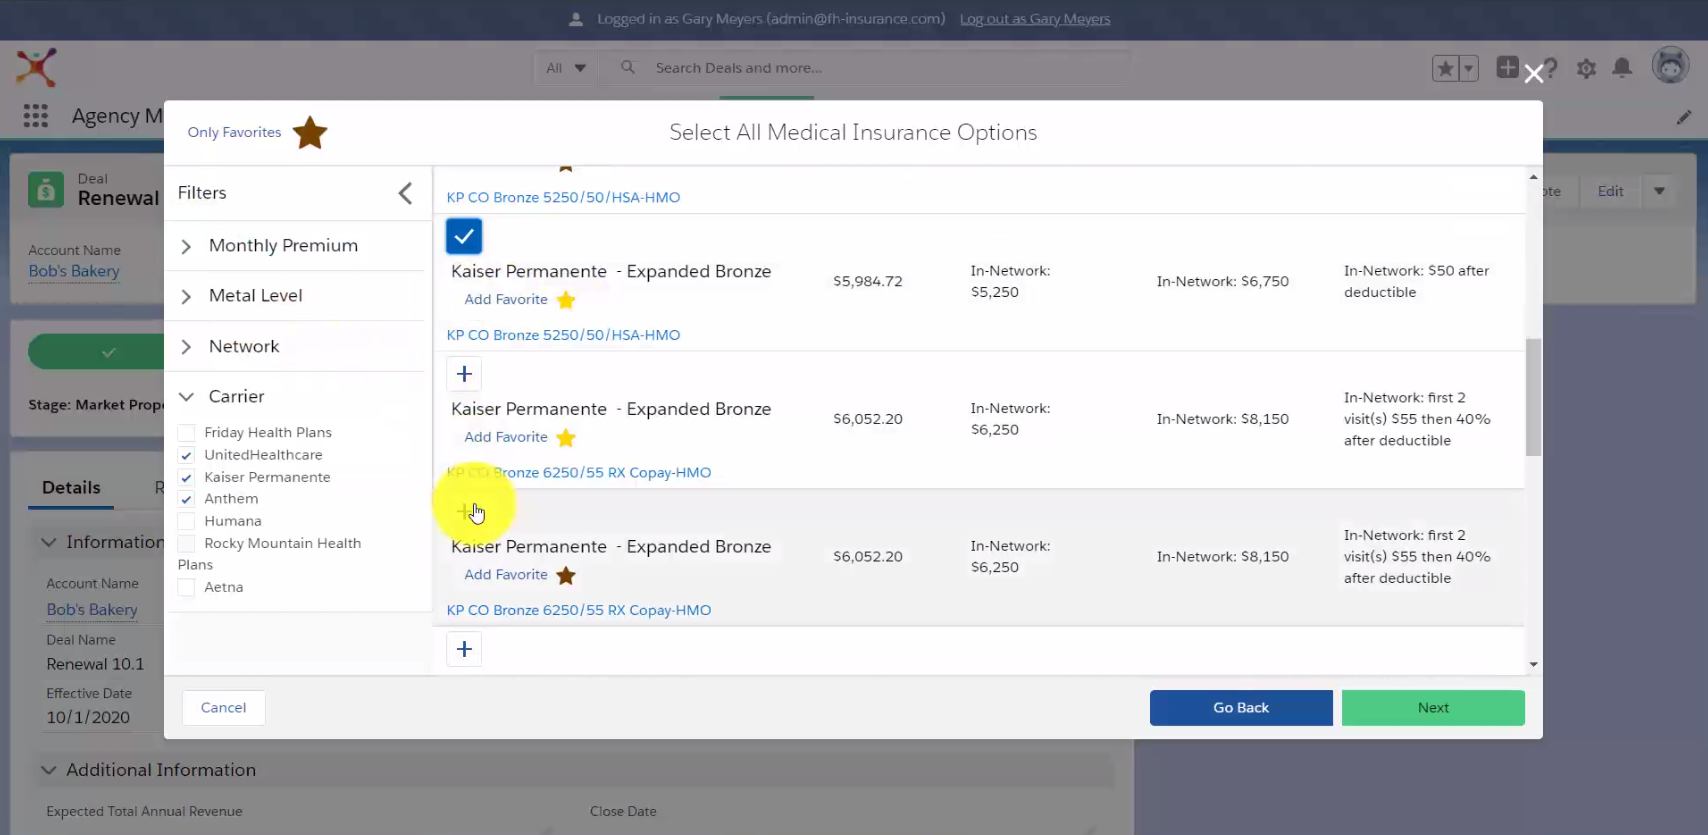
To save a Favorite, click on Add Favorite under the Plan Titles.
To view only Favorites, click on Only Favorites in the upper left corner of the Quoting Engine.
Once you’ve selected all desired Plans, click Next.
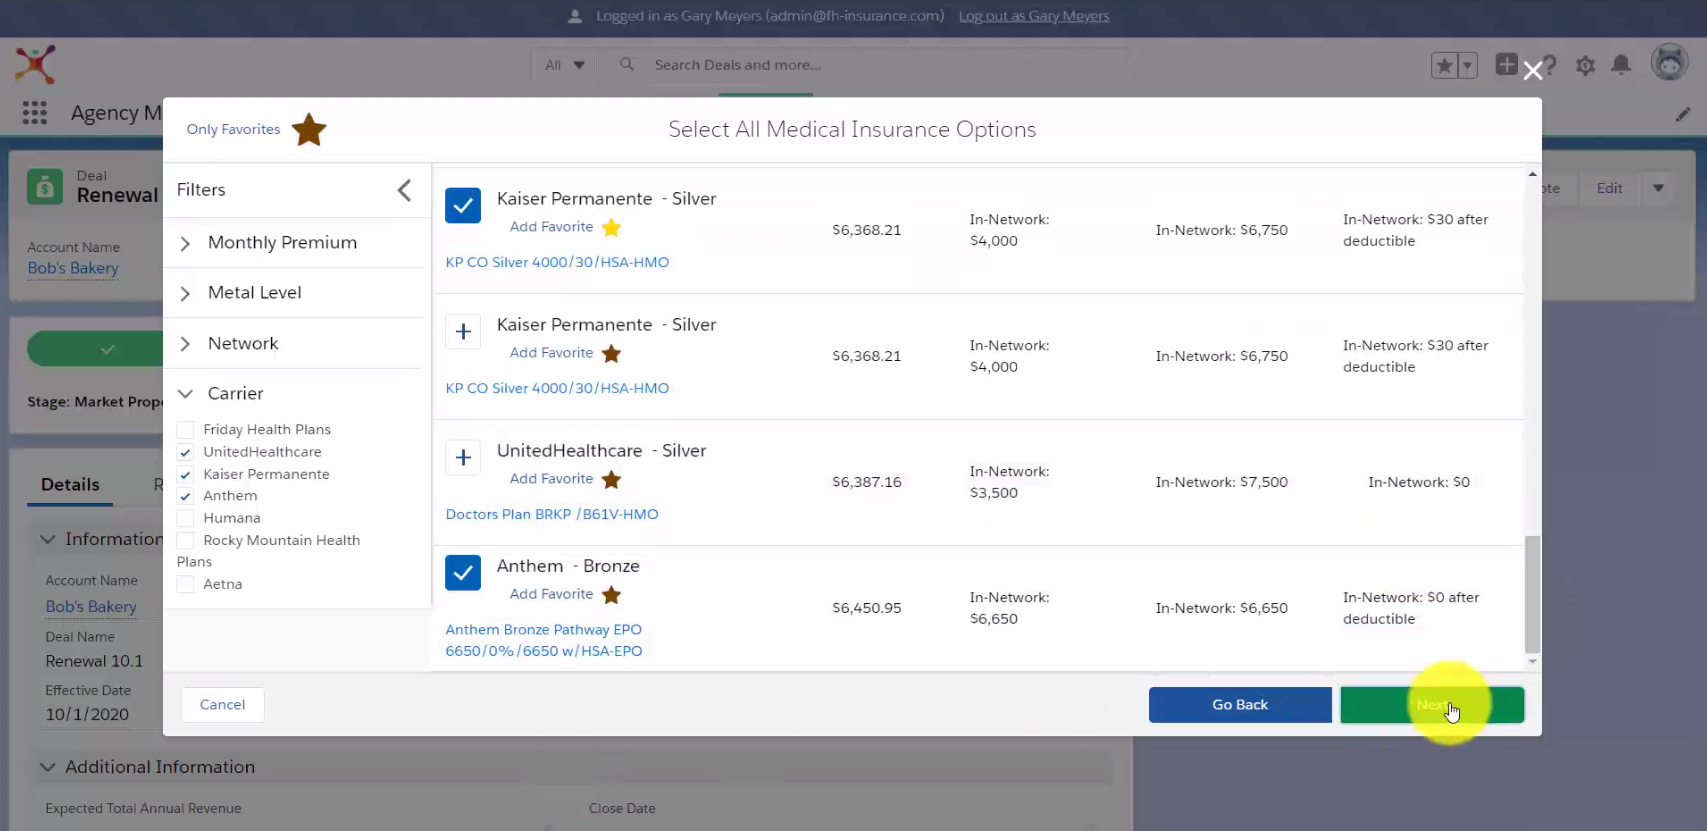
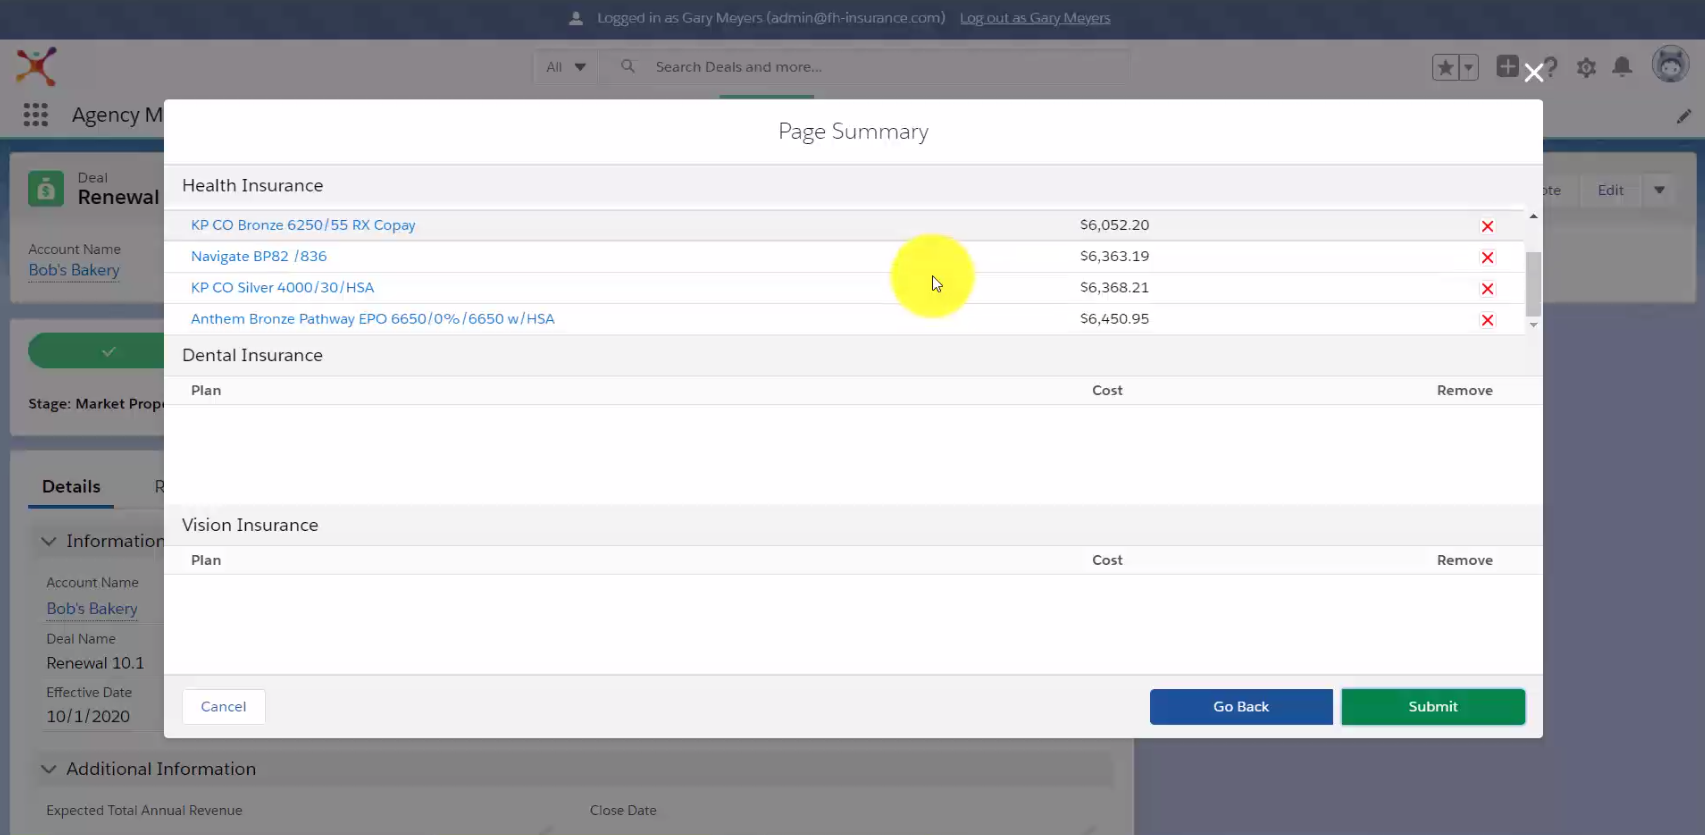
Review the selected Plans and click Go Back to make changes. Once the list is correct, click Submit.
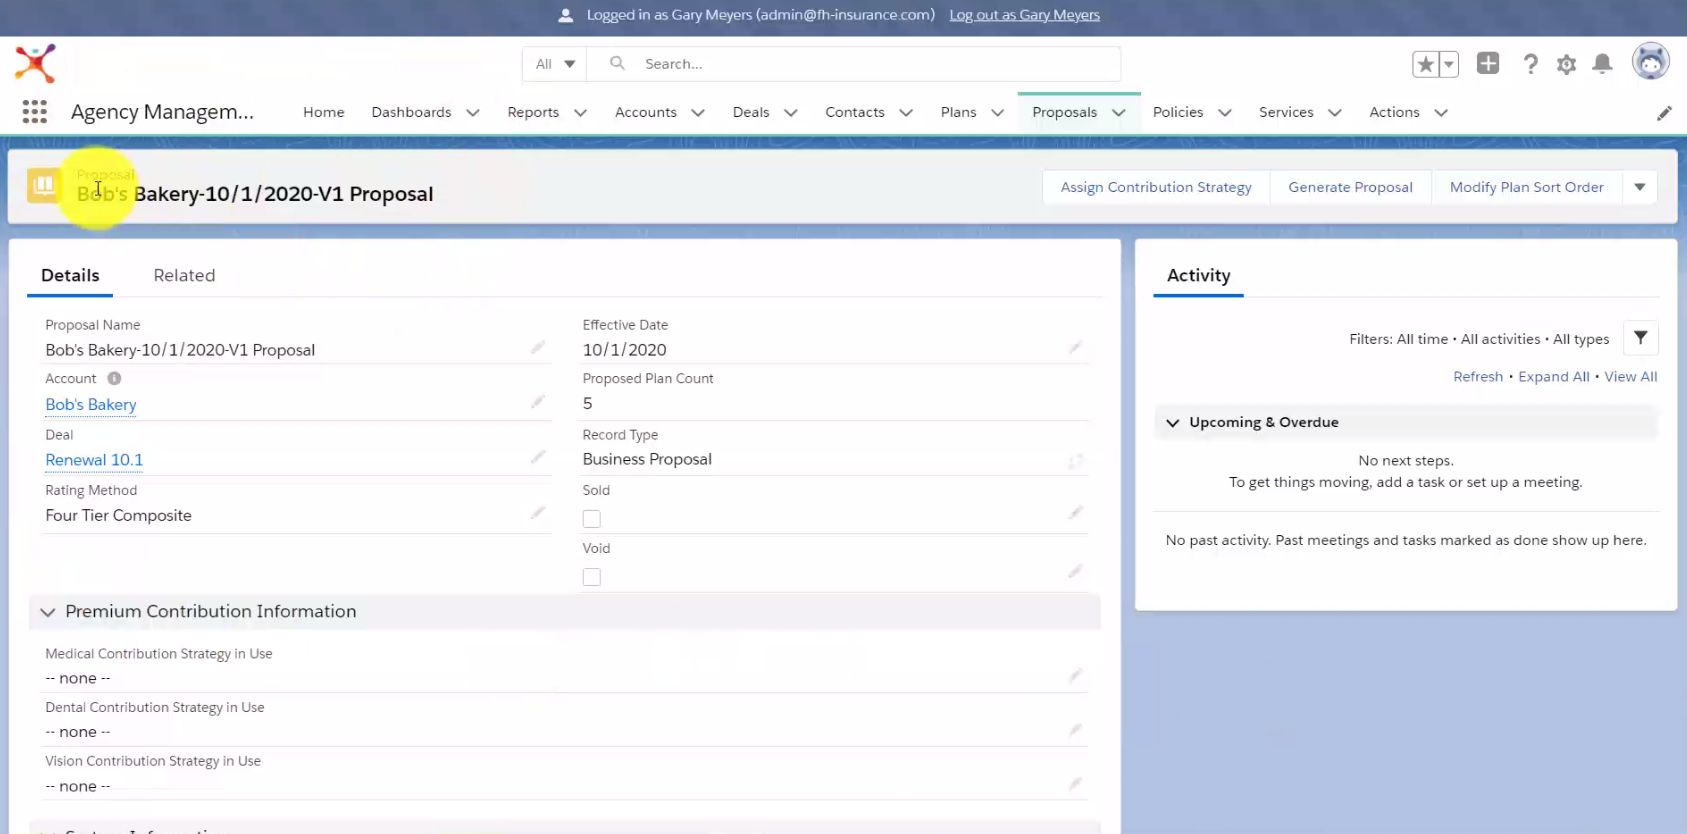
Create a Proposal
By clicking Submit, you have automatically created a Proposal, saved under the Proposals Object. The Proposal is named by the Account, Effective Start Date and version.