In the Update Phase, we’ll show you how to mark a Deal as Sold, which converts Proposed Plans into Sold Policies, and generate our final Benefits at a Glance.
Step-by-Step Instructions
Mark Deal as Sold
You can navigate to Deals in one of two ways. Within an Account, click Related and scroll down to the Deals section, then click on the desired Deal.
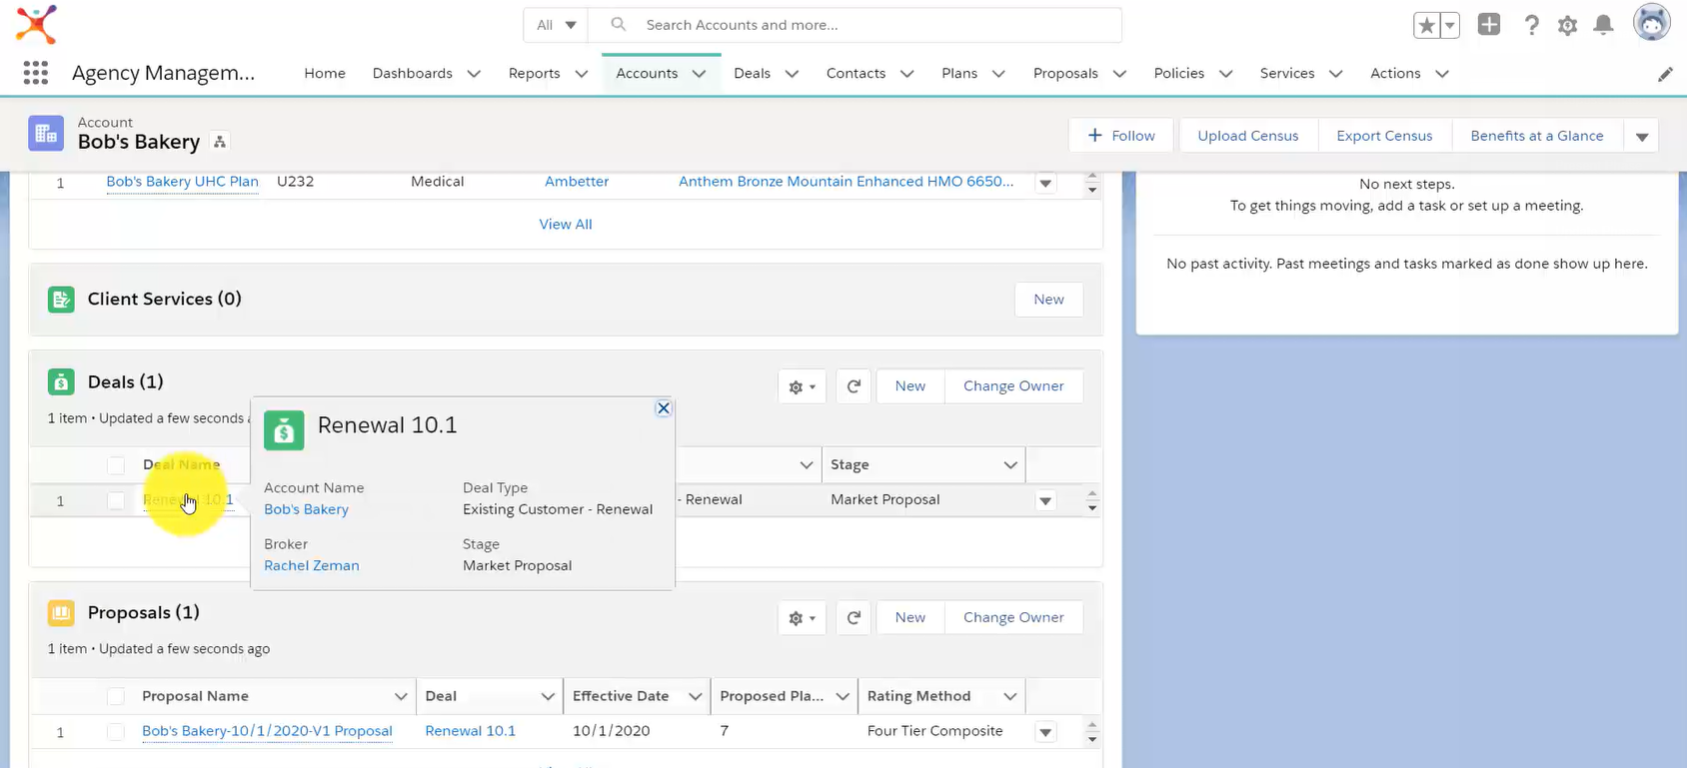
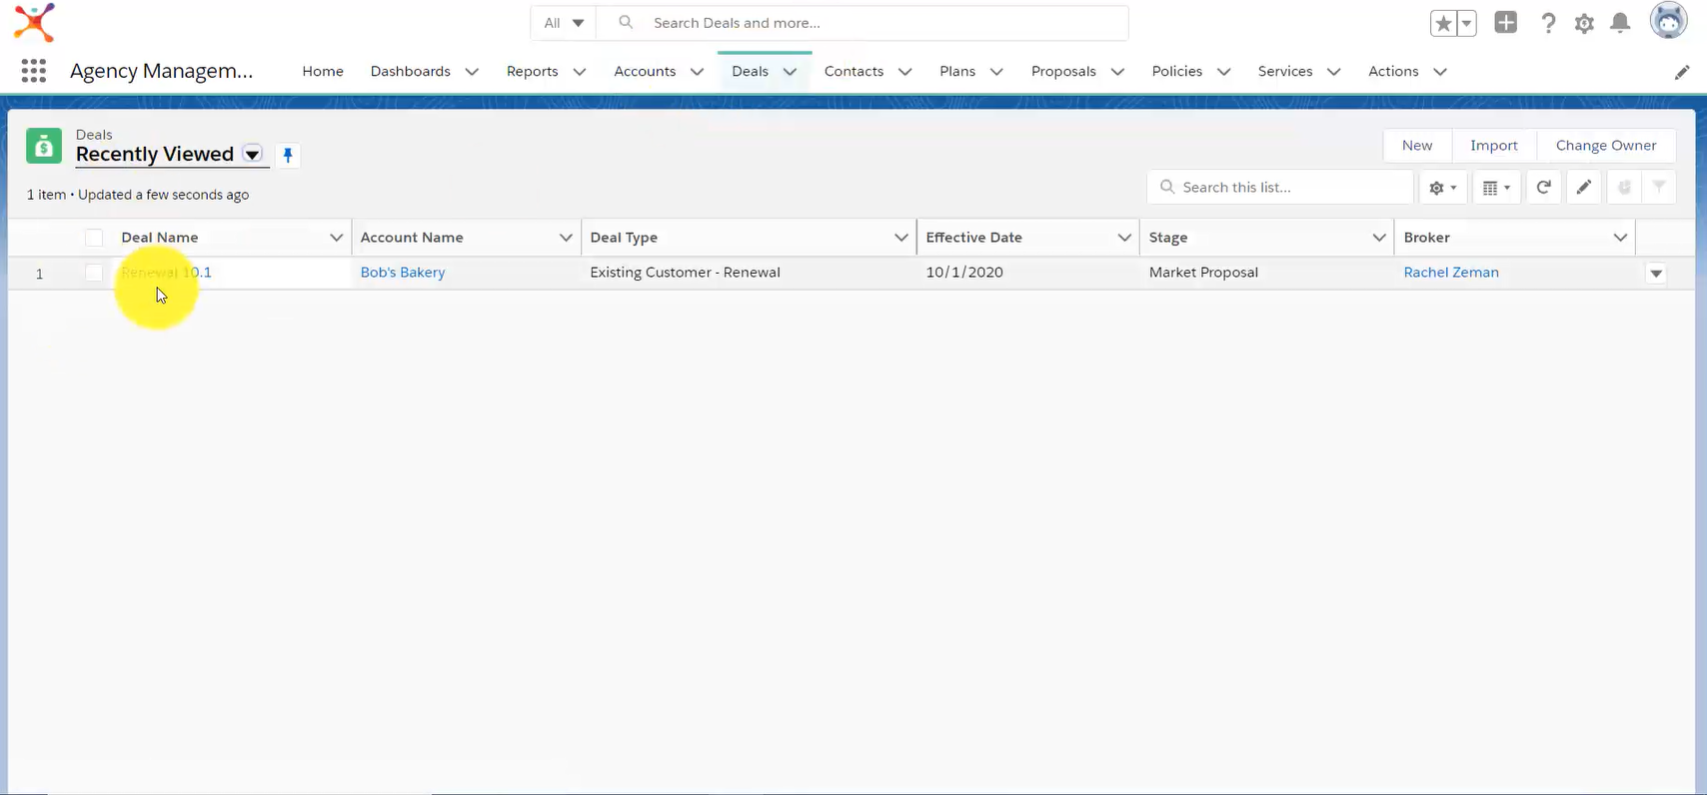
Alternately, click on Deals in the Navigation Bar, then select the desired deal from the List.
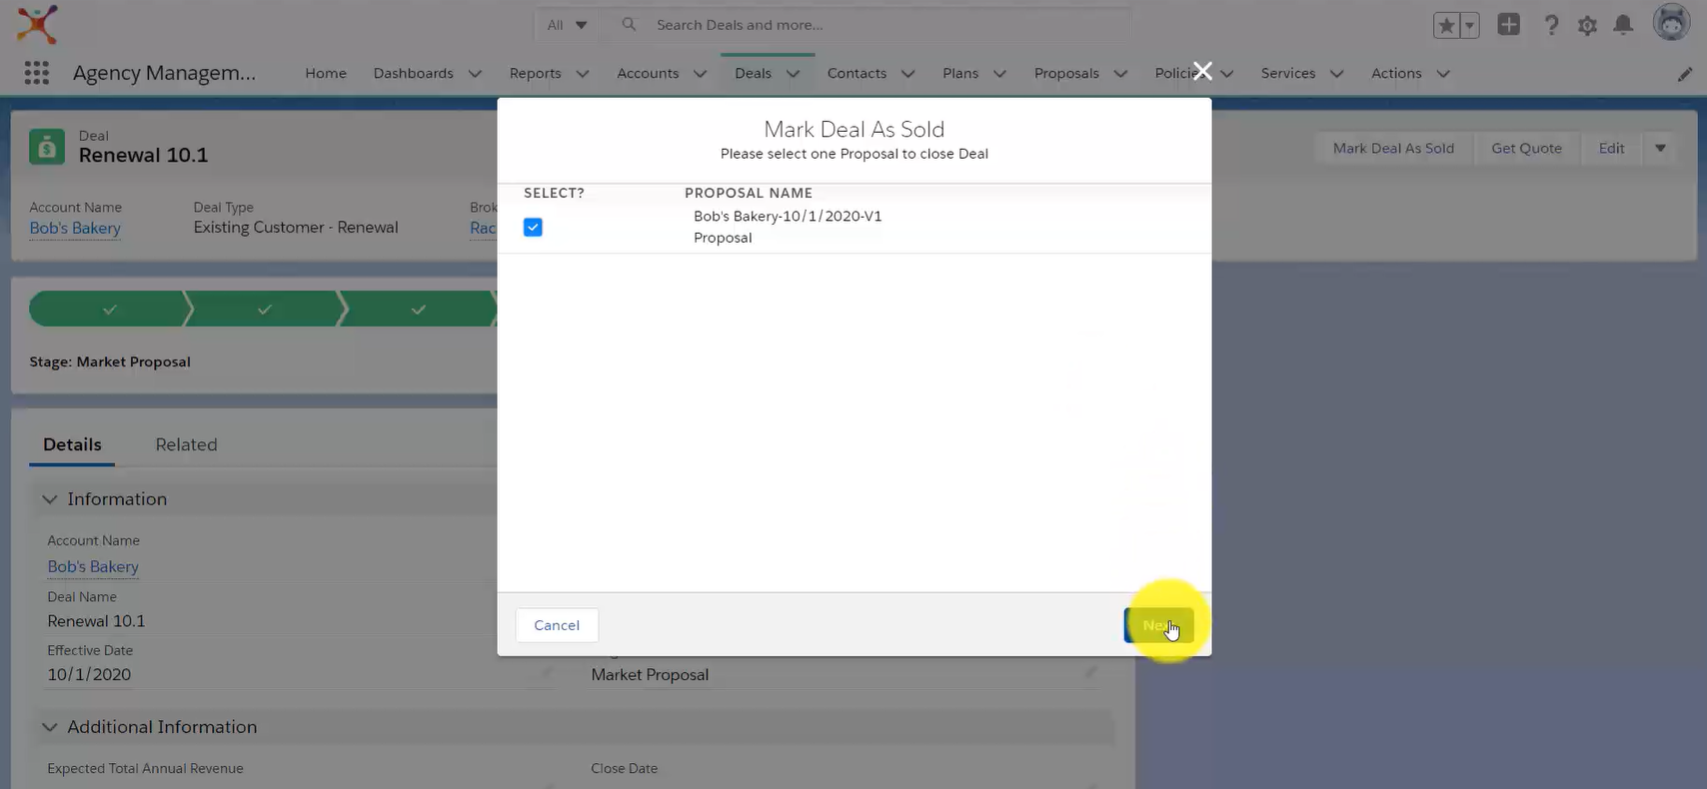
Once you’re within the Deal, click the Mark Deal As Sold button in the right hand corner.
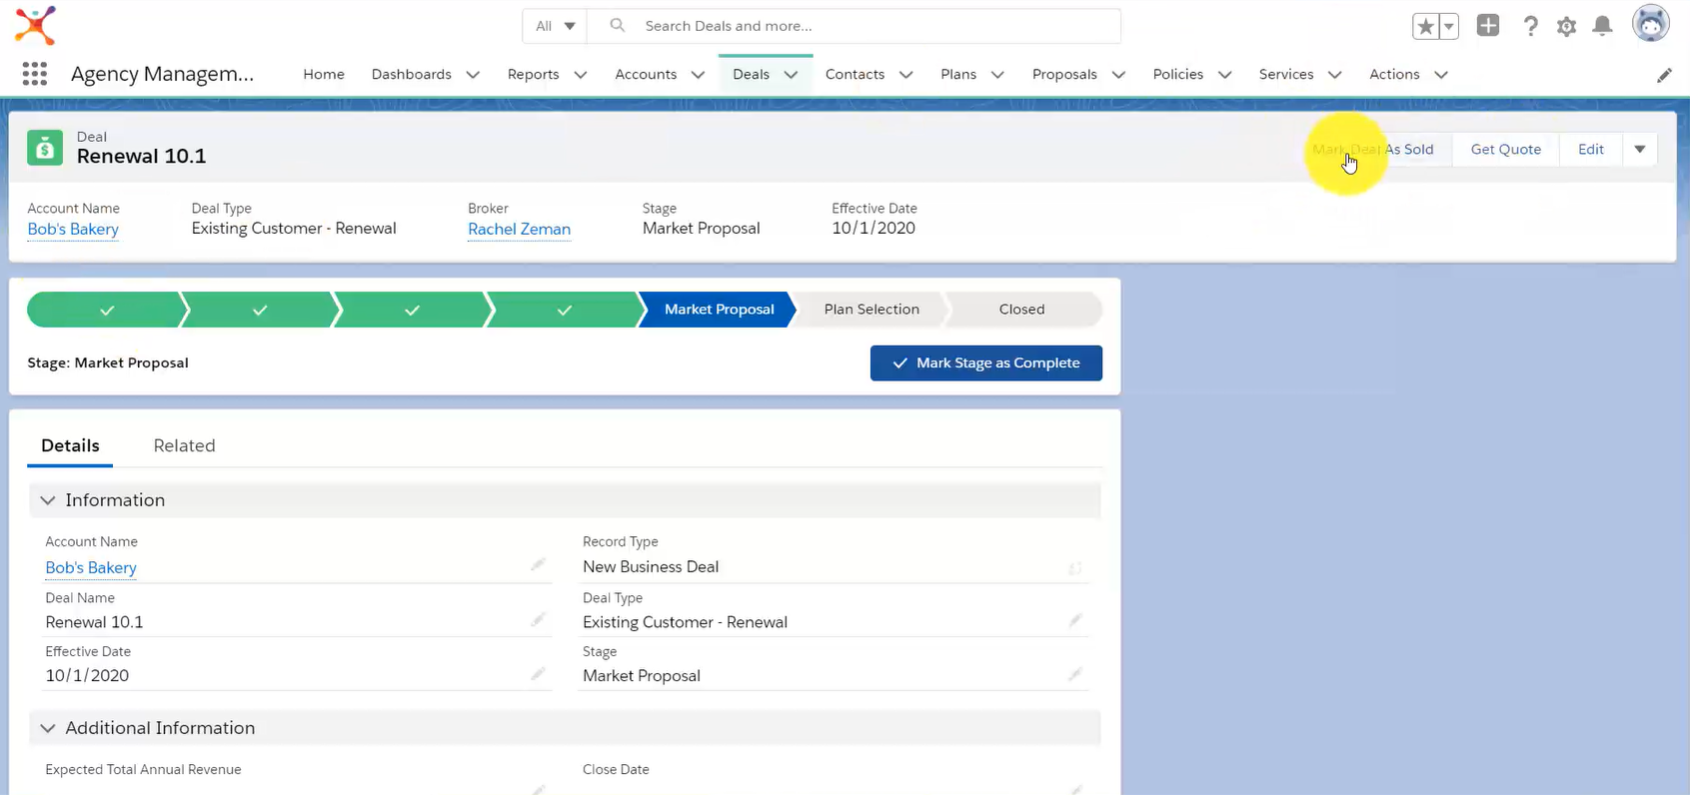
Select the Proposals you would like to mark as sold, then click Next.
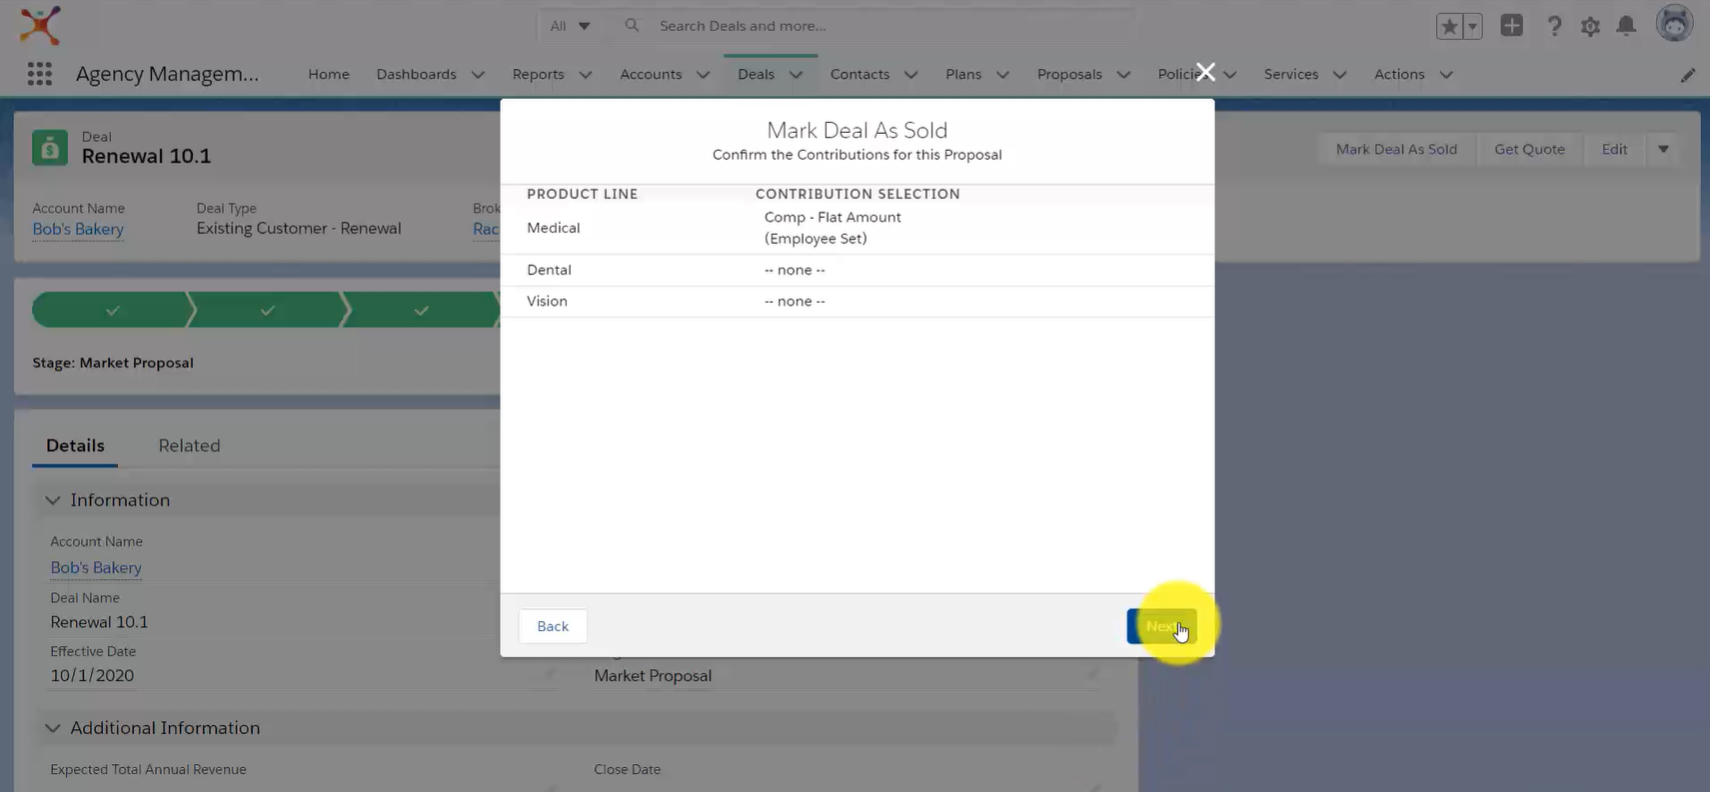
Review the Contribution Selection, then click Next.
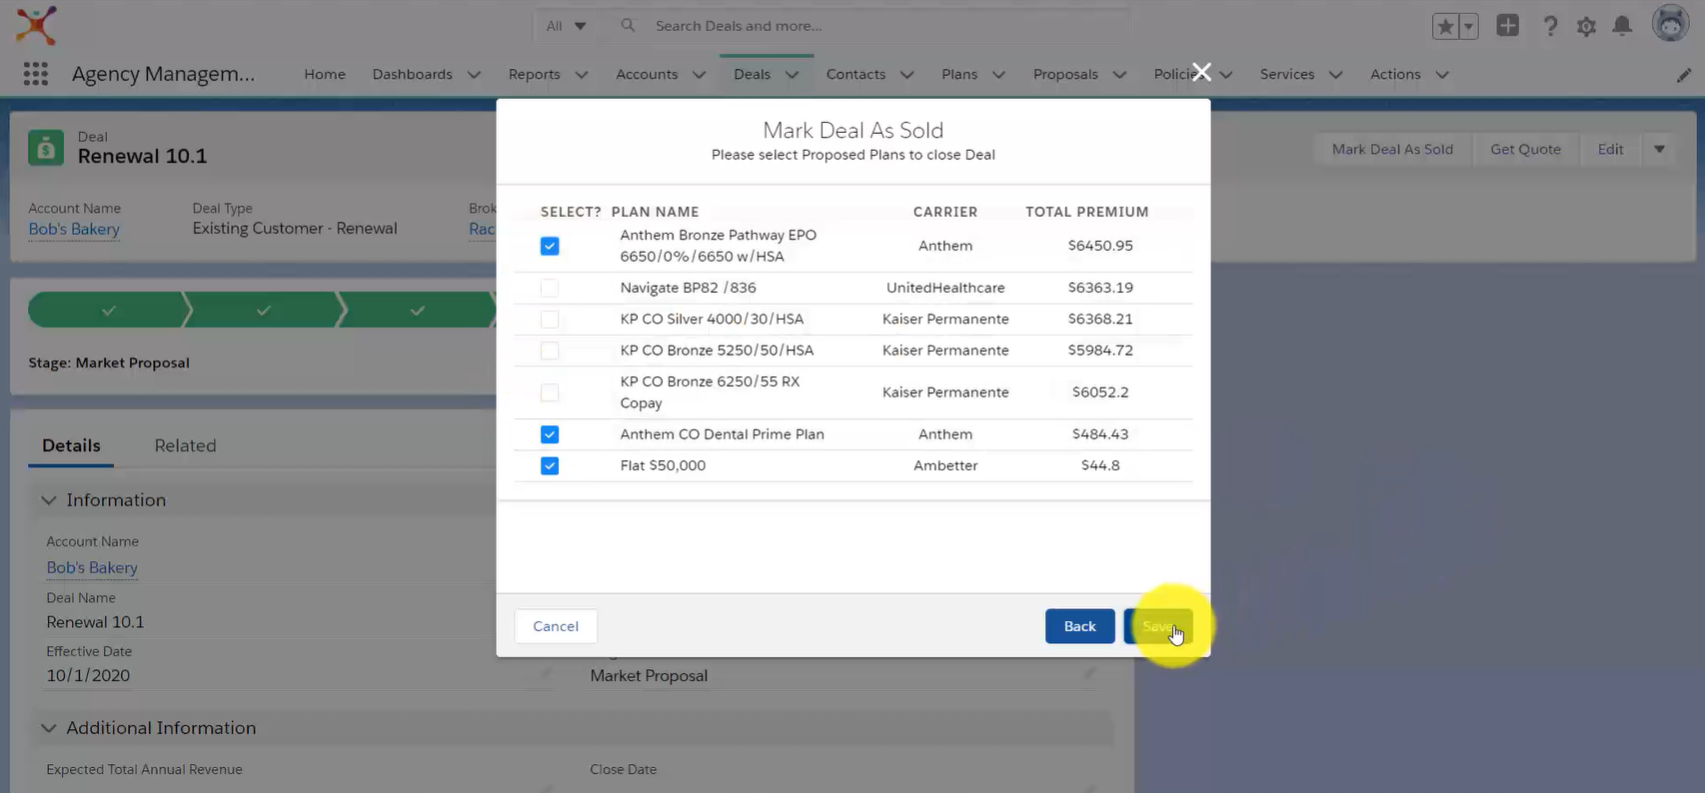
Select the Policies to mark as sold, then click Save.
Marking Deals as sold will copy the related Plans into your Policies List.
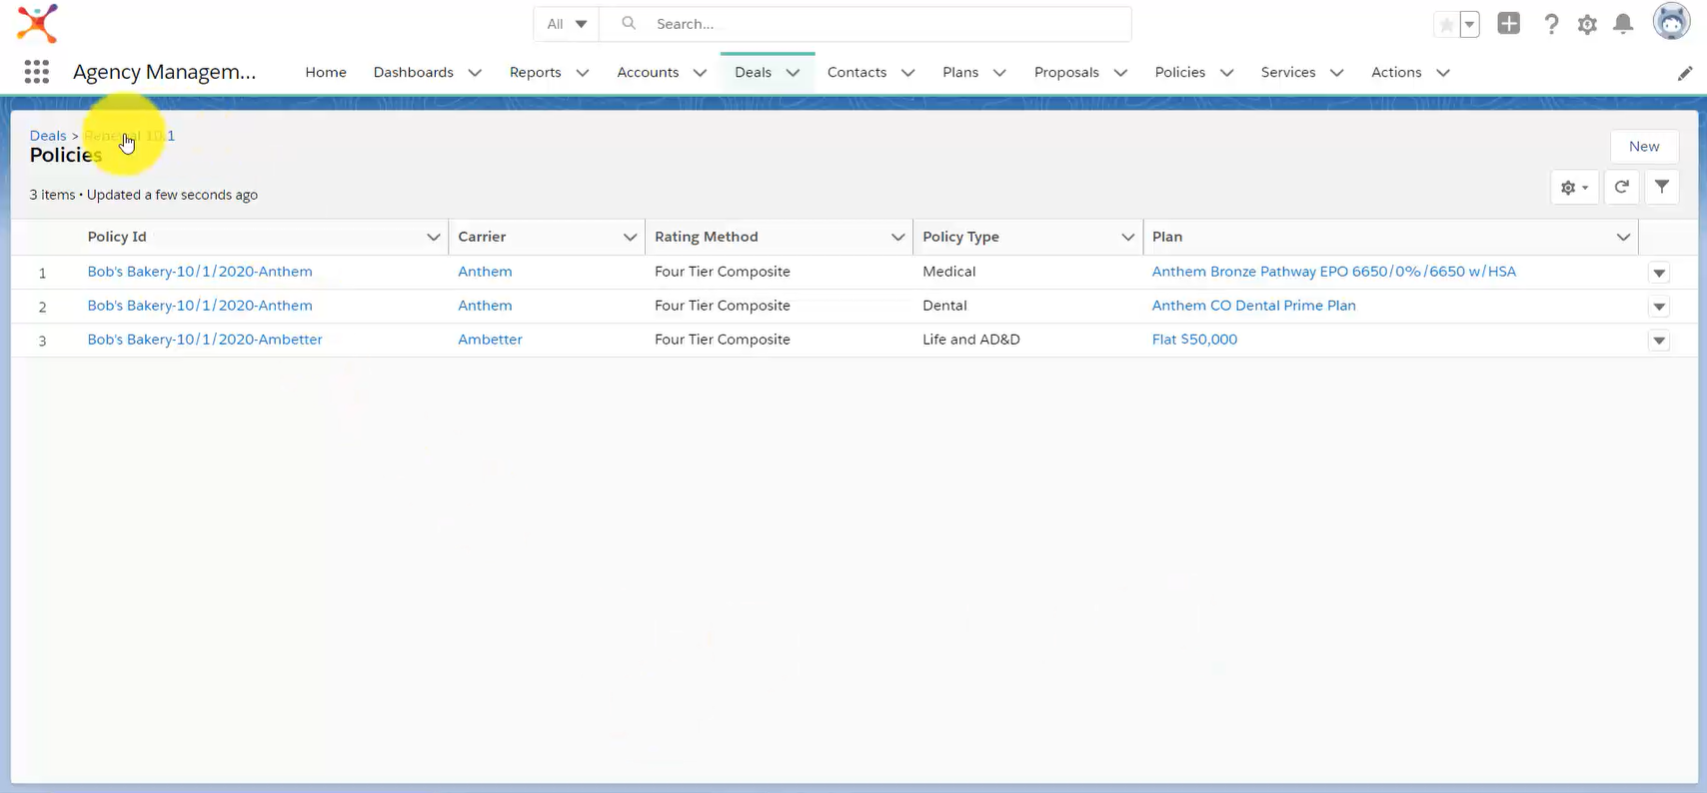
To access Policies, navigate to the associated Account, then click Related. You’ll see your Policies under the Policies section.
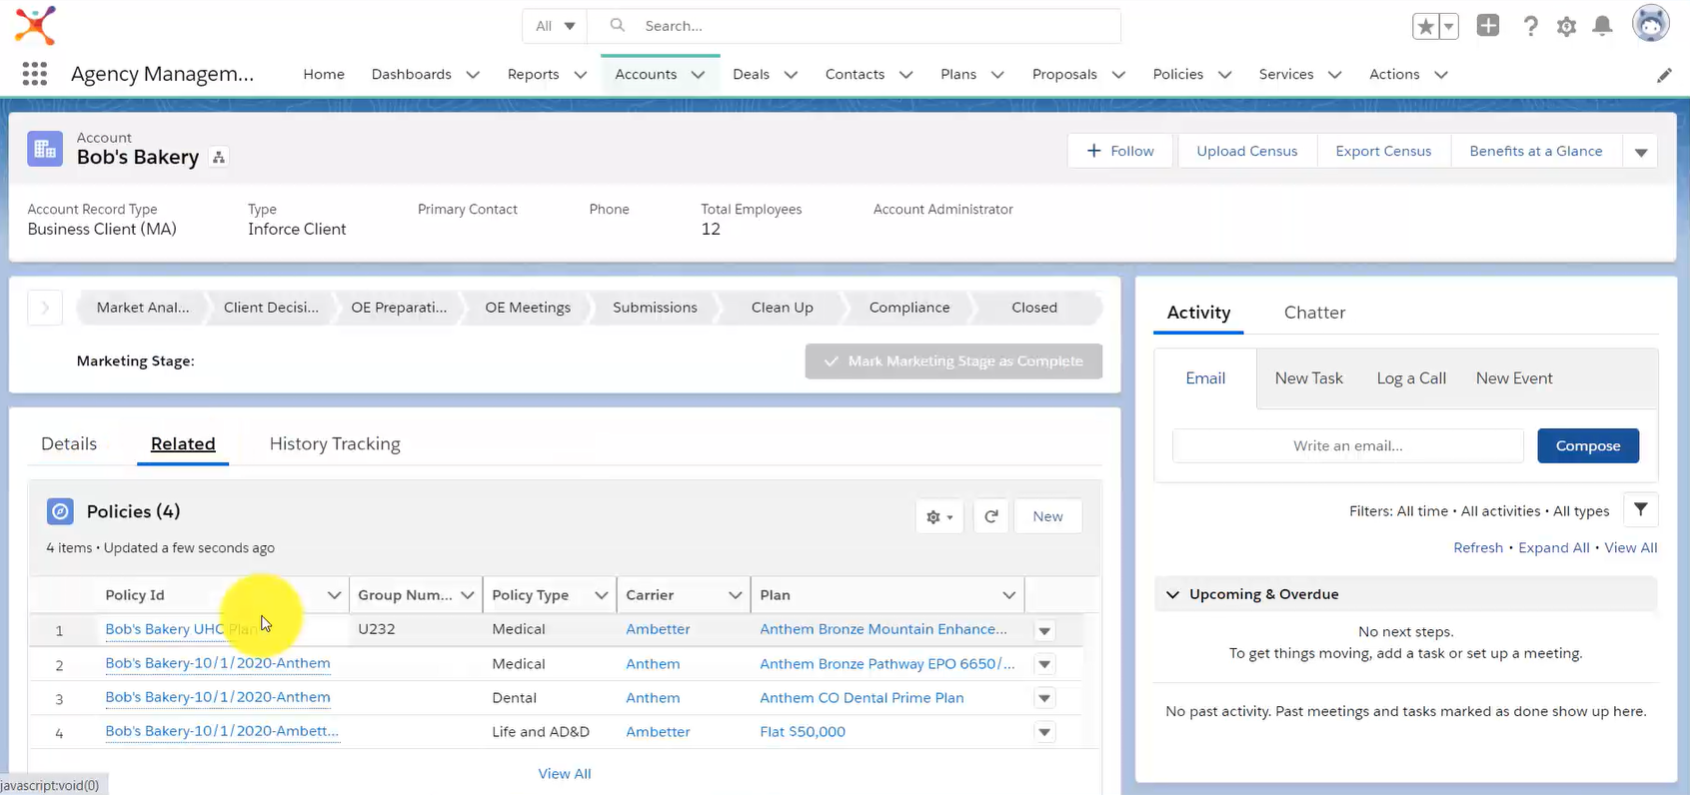
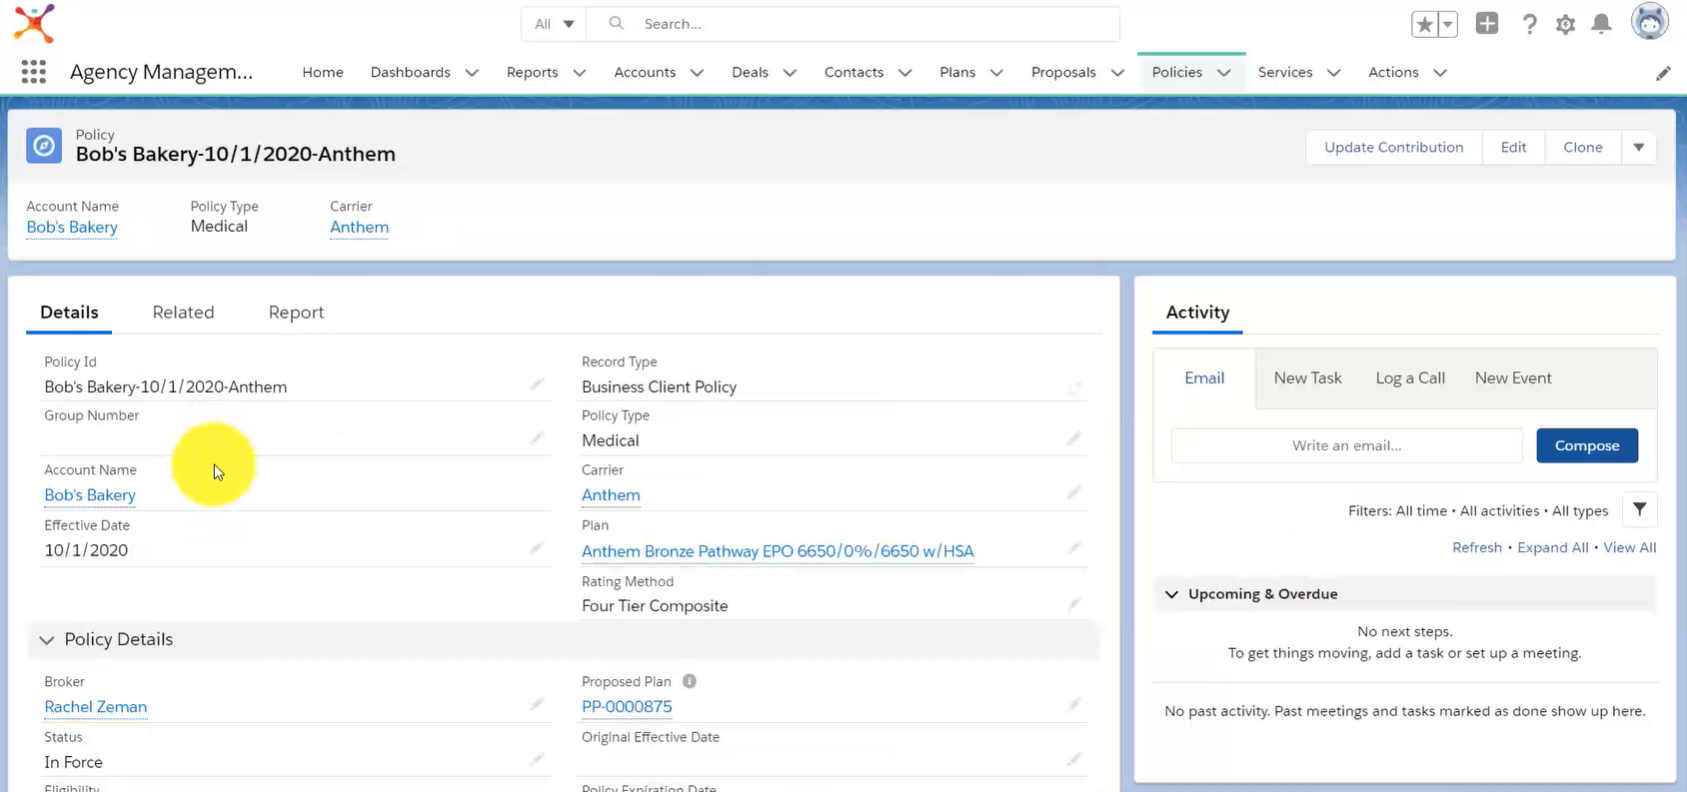
Click on a Policy to see all related information such as Effective Date, Carrier, Plan Design, Rates, Contribution Strategy, Payroll Cycle and more.
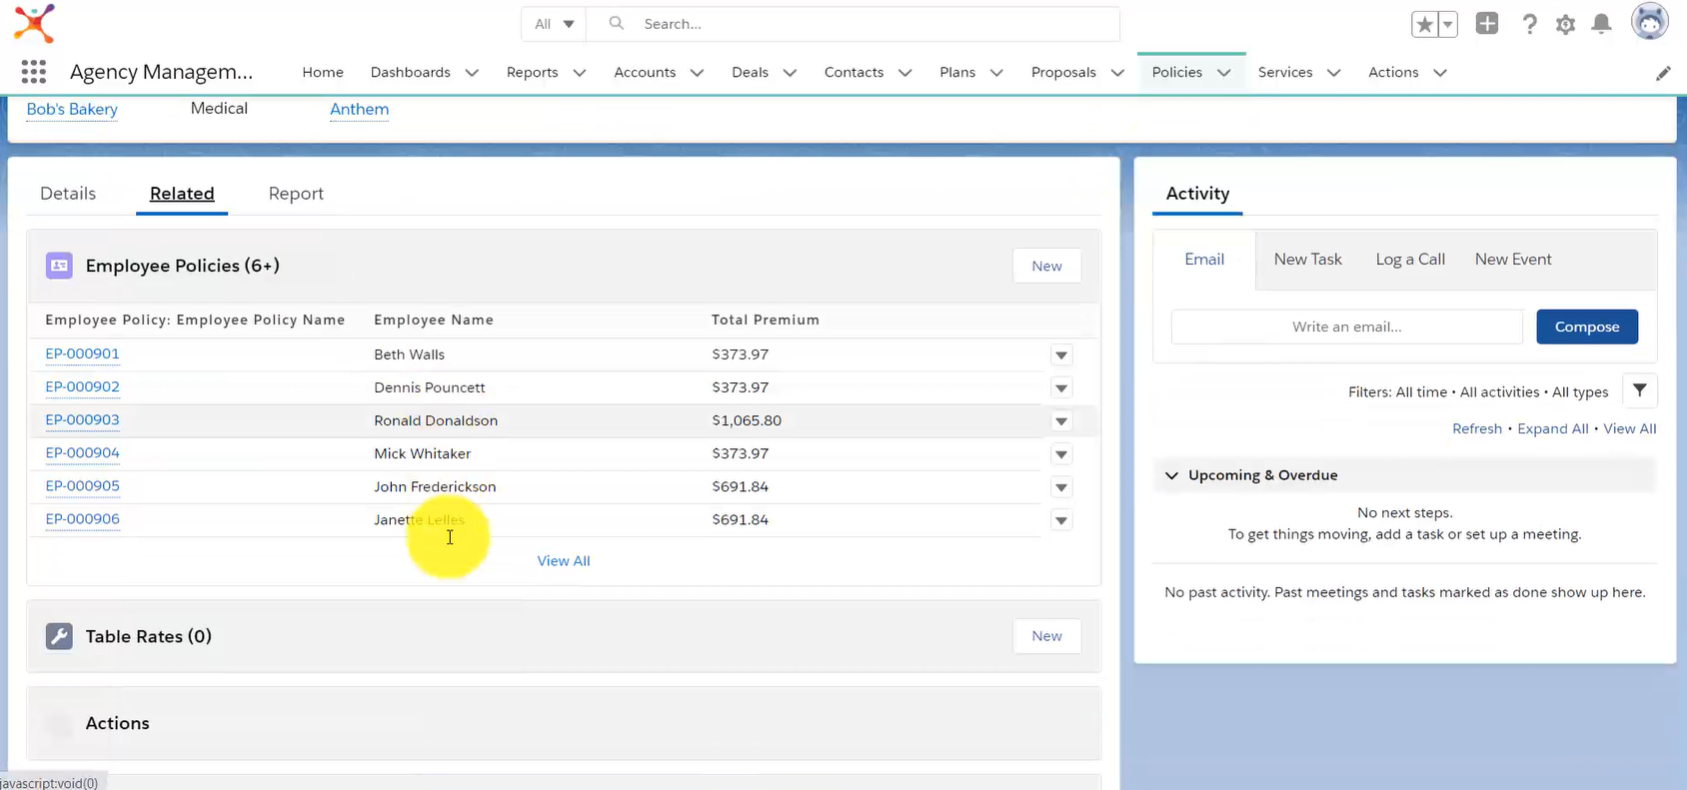
To access Employee Policies and Premiums, click Related and select an Employee Policy from the List. If your Proposal is Age Banded, you can find Rates under the Table Rates section.
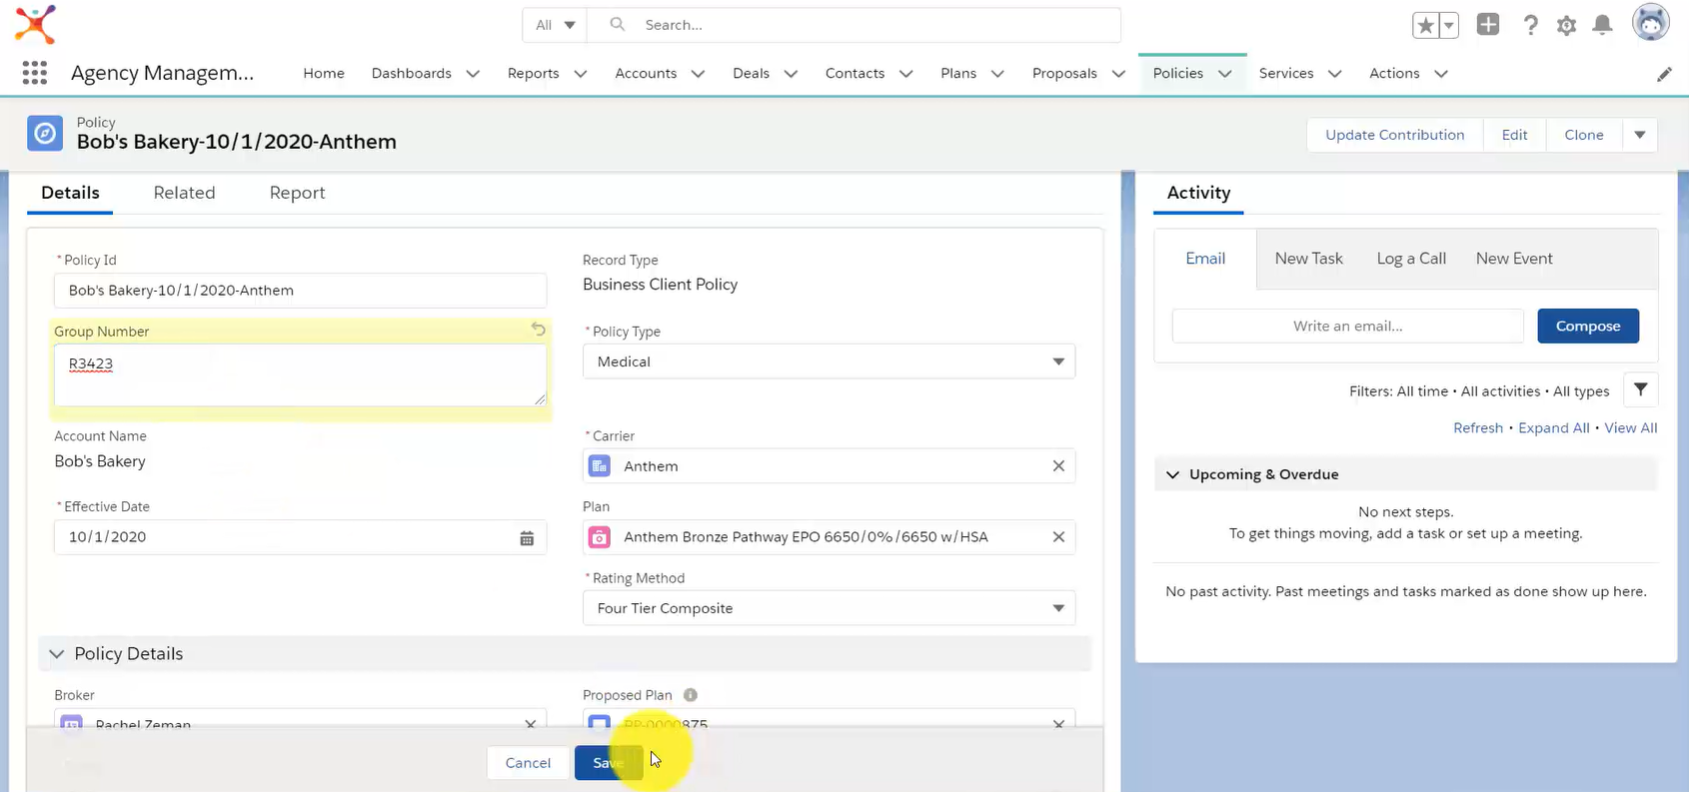
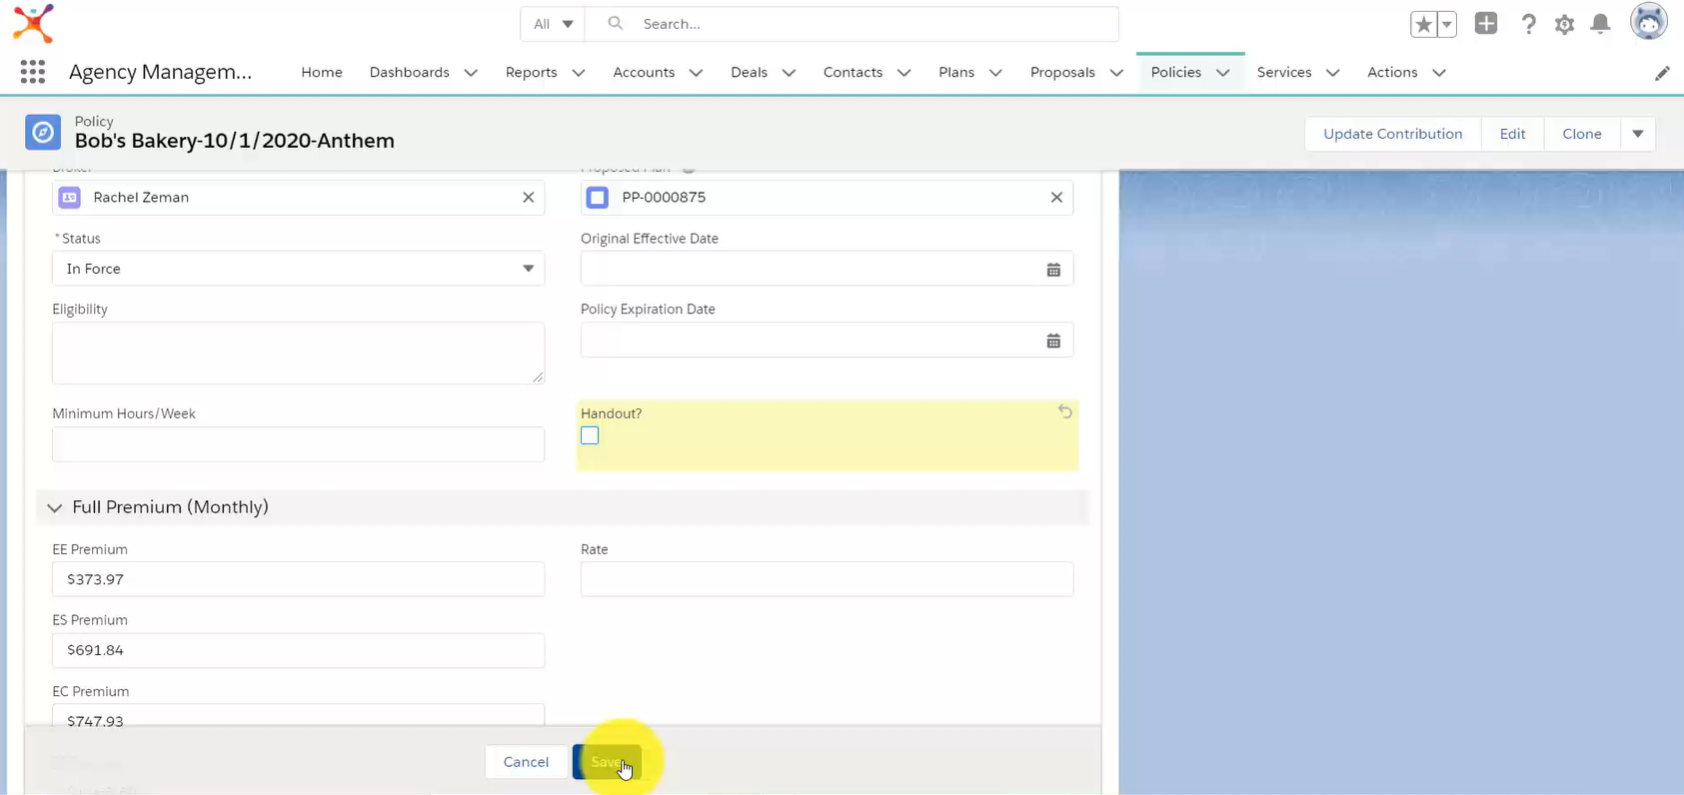
The only information not copied from the Proposal is to Group Number. You can add a Group Number under the Policy Details section, then click Save.
When you convert a Deal to Sold, the Handout button is automatically checked. If you do not want to include a Plan in your Benefits Booklet, click the Edit button in the upper right corner, uncheck the Handout box, and click Save.
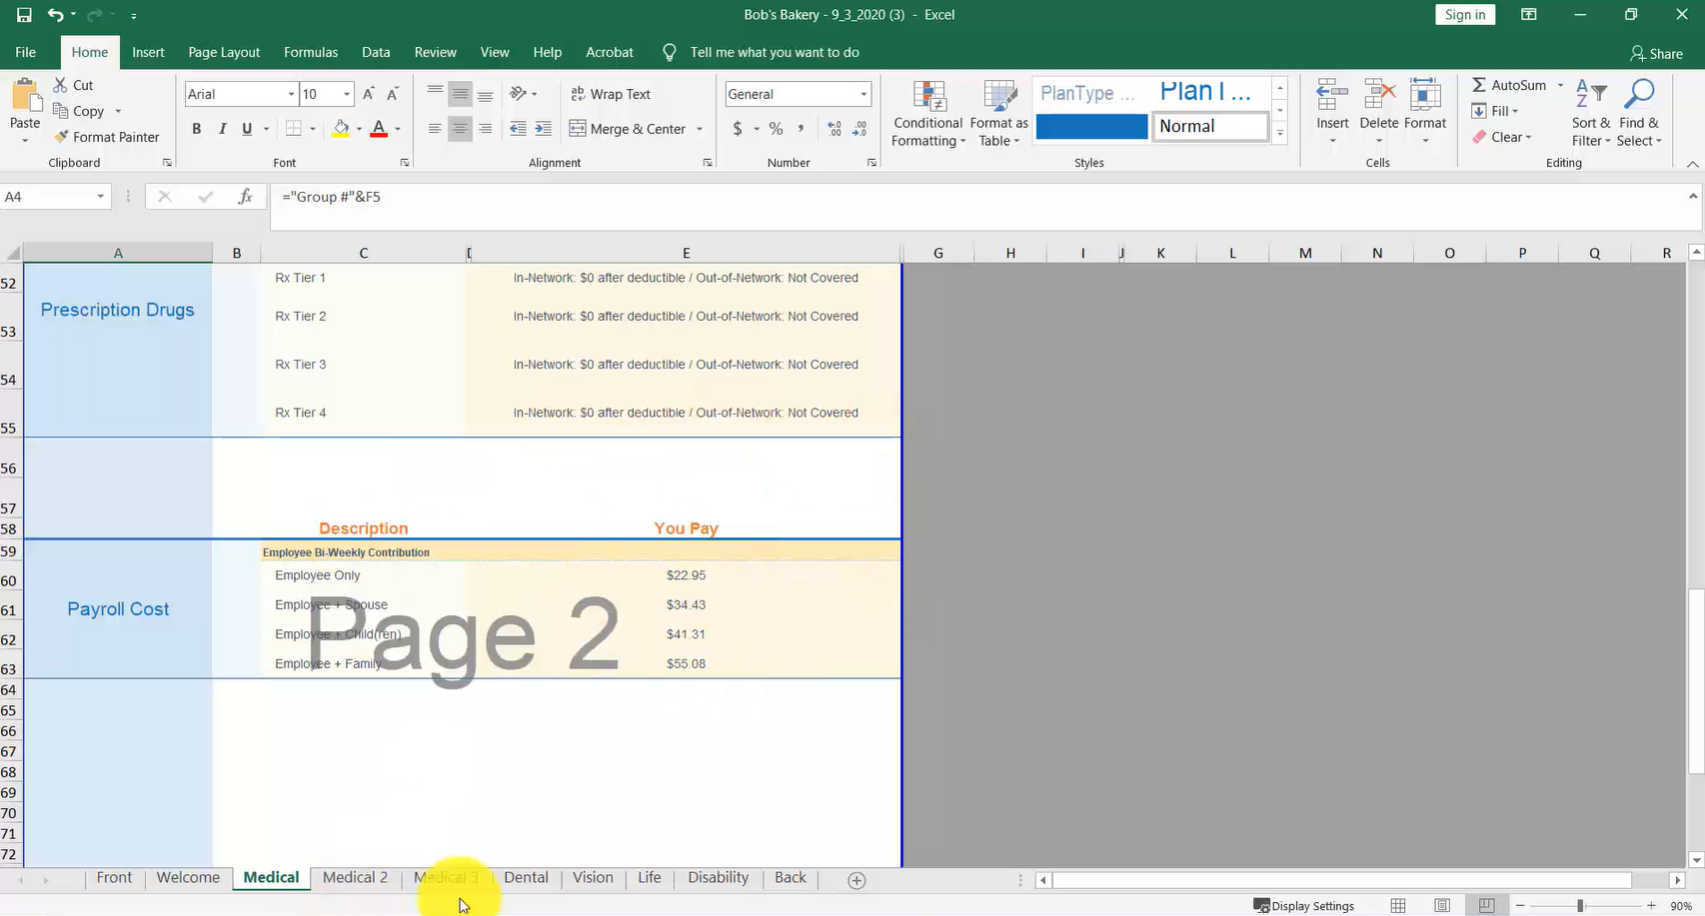
Generate Benefits At A Glance
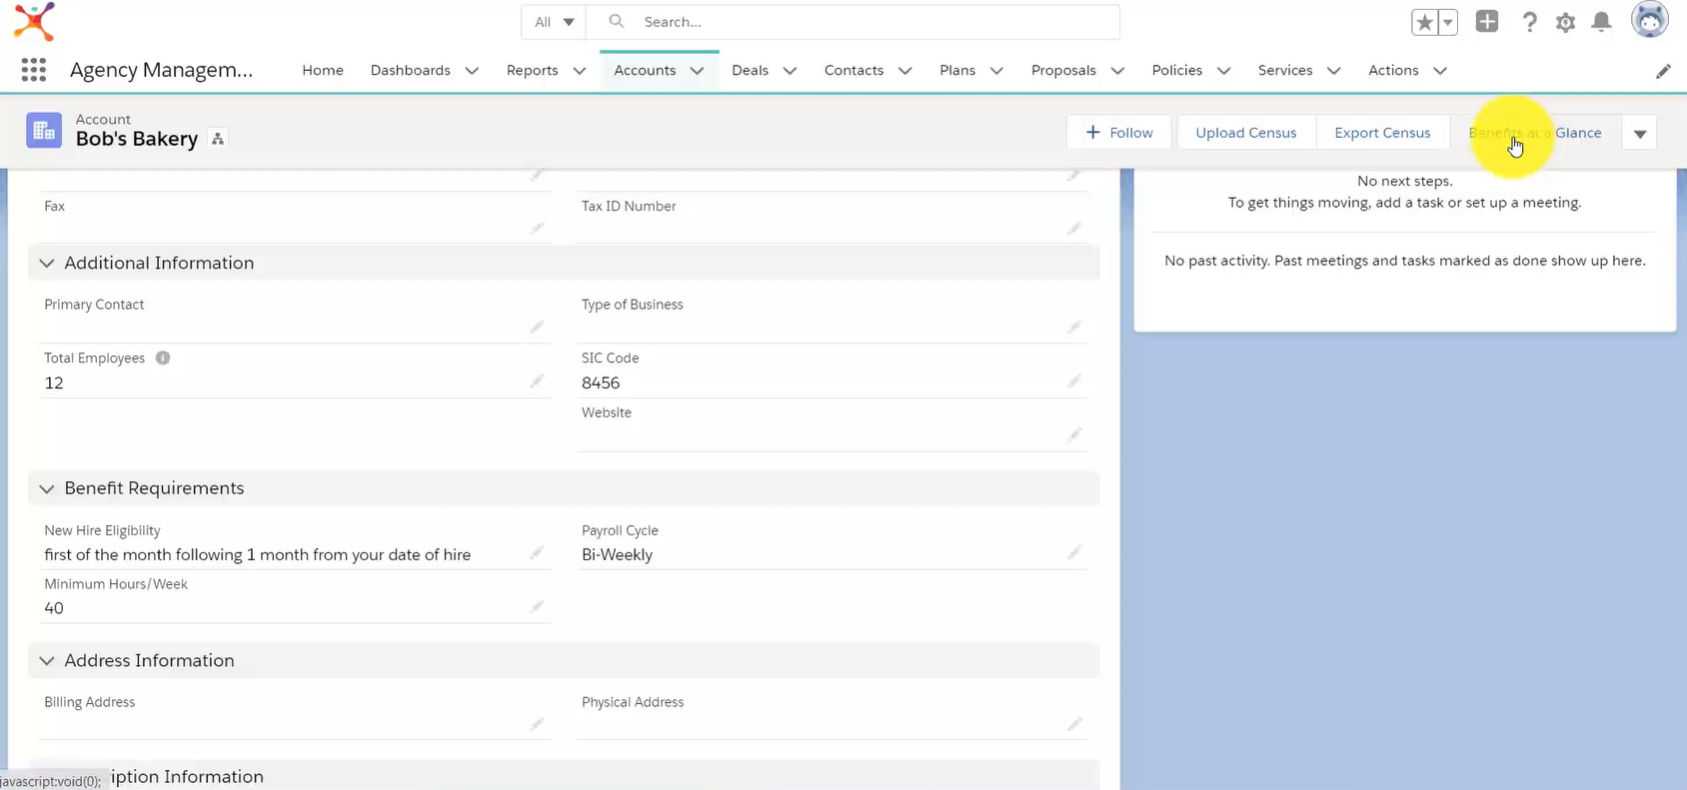
Navigate to an Account and click the Benefits At A Glance button in the upper right corner.
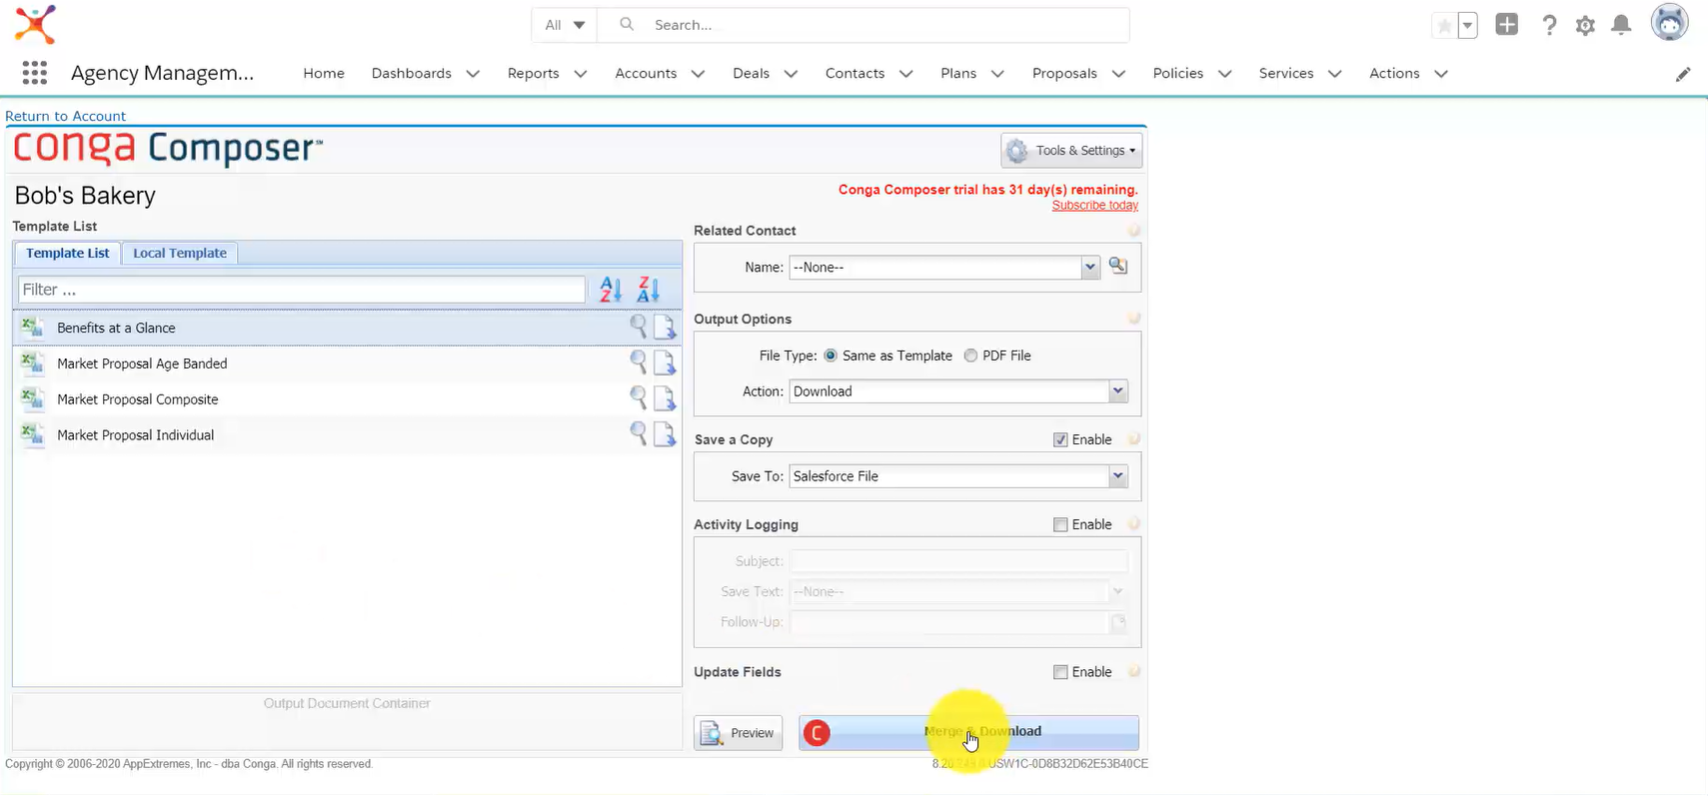
Benelinx will automatically direct you to Conga Composer. Once there, confirm the Benefits at a Glance template is selected (if another template is selected, click on Benefits At A Glance to change the selection), and click Merge & Download.
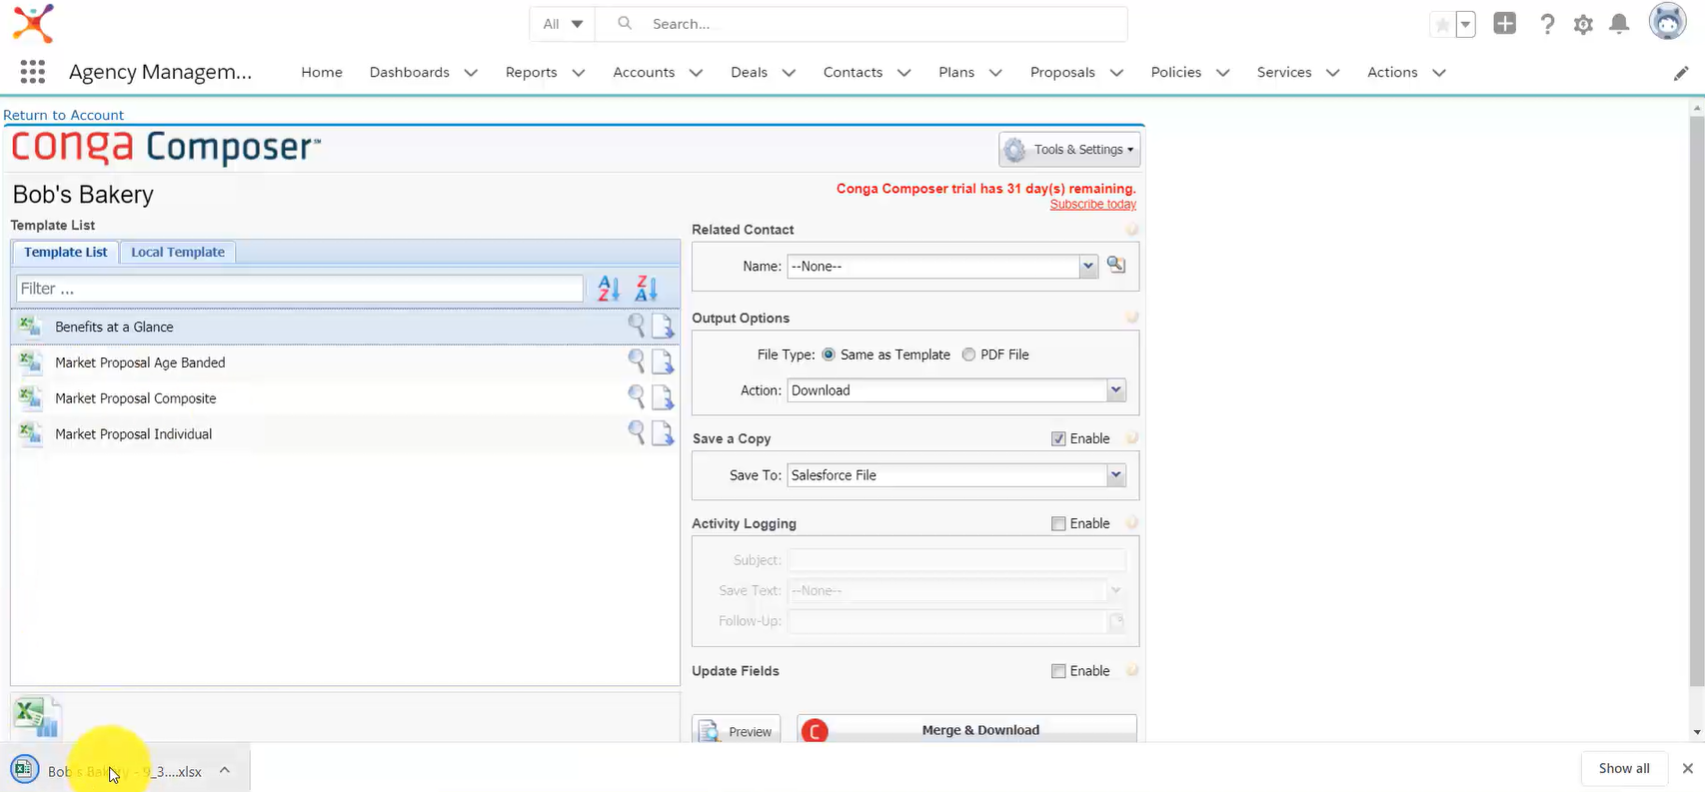
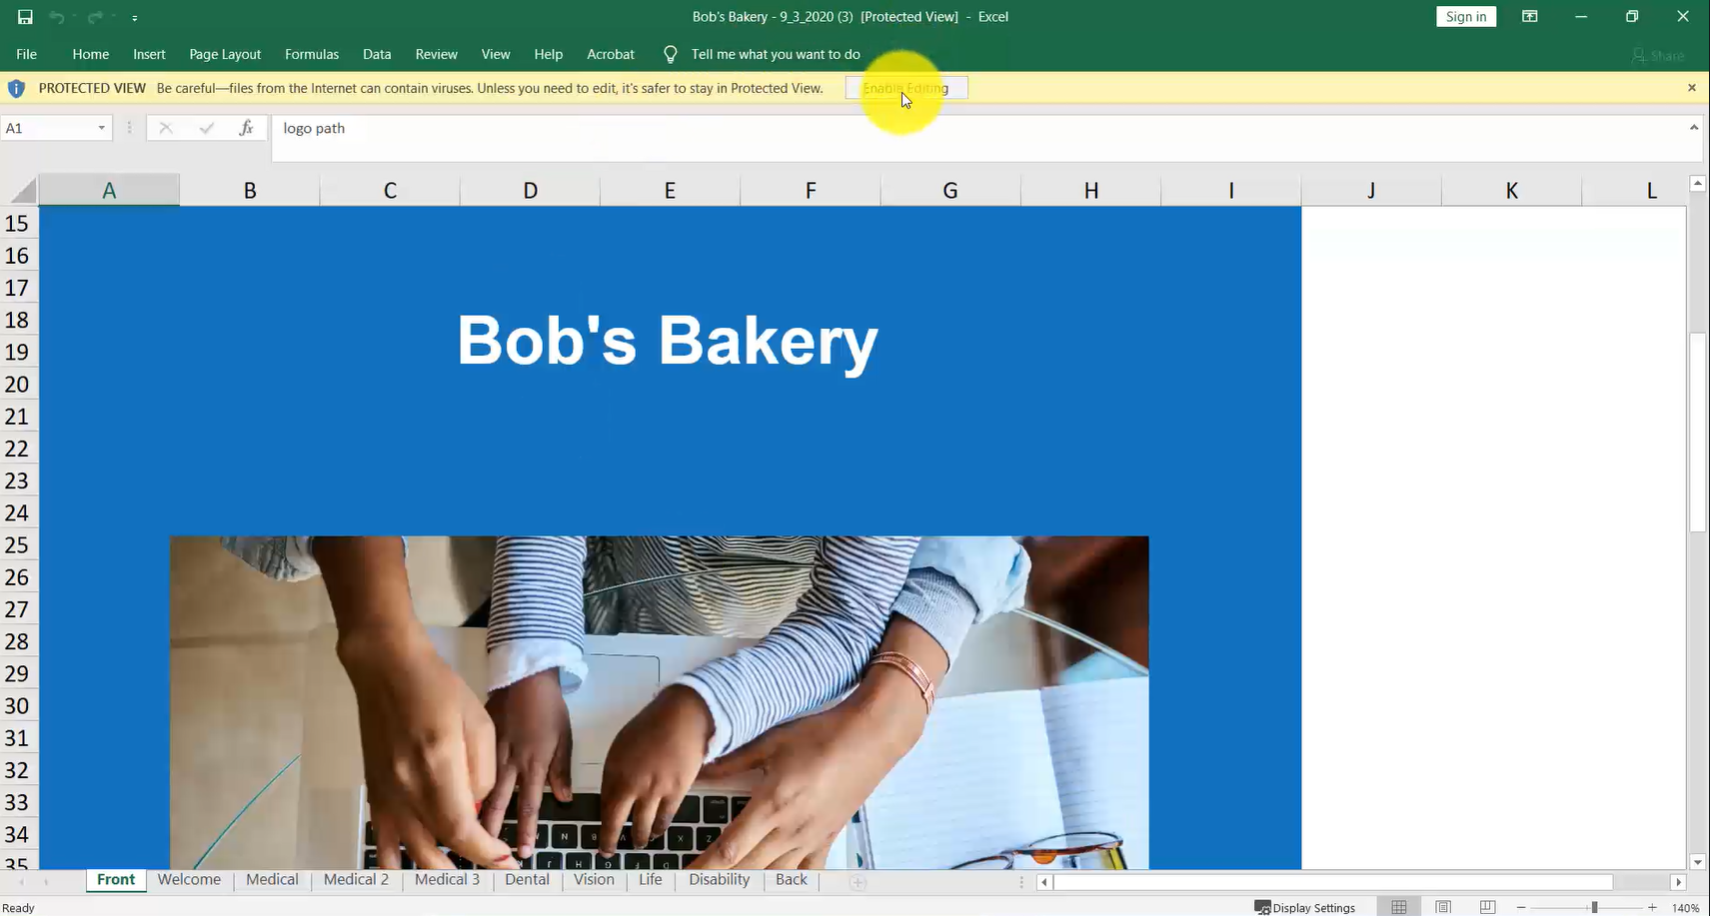
Double click on the downloaded file to open the Benefits at A Glance document in Excel.
Click Enable Editing the merge data into the Benefits At A Glance template.
Click on the tabs at the bottom of the spreadsheet to access various information such as the Welcome page, Plan Summary, Payroll Cycle, etc. You can delete any unneeded tabs by right-clicking on the tab, then selecting Delete. Click File>Save As to save the document as a PDF before sending to a client.